

This Butternut Squash Pie is rich, smooth, custard-like, and perfectly spiced. Made with roasted butternut squash, it’s a delicious twist on pumpkin pie and will become a favorite Thanksgiving dessert to make ahead!
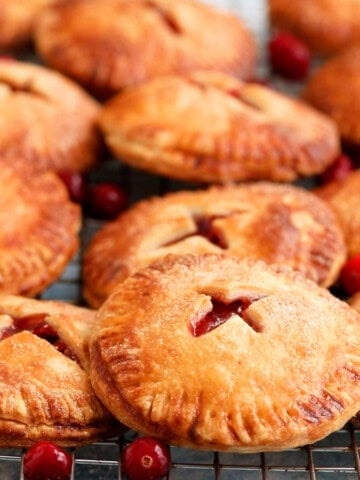
If you are looking for more delicious pies to make for Thanksgiving, try our pecan pie without corn syrup or the apple cranberry hand pies next!

Why You'll Love This Butternut Squash Pie

Thanksgiving dinner wouldn’t feel complete without a classic pumpkin pie, but this butternut squash pie might just change your mind! It looks and feels much like traditional pumpkin pie, but roasting the butternut squash brings out its natural sweetness and adds subtle caramelized notes for a richer, more complex flavor.
The filling is smooth, silky, and wonderfully creamy, with a custardy texture that slices beautifully once set. Brown sugar, vanilla and cinnamon come together to create that cozy, familiar fall flavor, while the buttery crust bakes up crisp and golden.
Instead of reaching for canned pumpkin, try making this pie with freshly roasted butternut squash puree this holiday season. It’s a delicious twist on a classic Thanksgiving dessert, and you might just make it a new Thanksgiving tradition!
-maria doss
★★★★★
"I just made this for a trial run before Thanksgiving. It was absolutely delish - was polished off in just two days!"
-JOSH
Jump to:
How Do I Roast Butternut Squash for Pie?
You can roast butternut squash in either the oven or the air fryer to make a smooth, flavorful puree for this pie. I prefer roasting because it brings out the squash’s natural sweetness and adds subtle caramelized notes, giving the pie a richer flavor than steamed squash.
To roast butternut squash in the oven:
- Prepare the squash – Preheat the oven to 375°F. Line a baking sheet with aluminum foil and lightly coat it with cooking spray for easier cleanup.
- Cut and remove the seeds – Slice the butternut squash in half lengthwise and scoop out the seeds and stringy bits. Don’t throw away the seeds! They make a delicious snack when roasted. Check out my guide on how to roast butternut squash seeds for an easy way to use them.
- Roast until tender – Place the squash halves cut-side down on the prepared baking sheet. Bake for about 1 hour, or until the flesh is very soft and easily pierced with a fork. The exact time will depend on the size of your squash.
- Cool and puree – Let the squash cool for at least 30 minutes, or until it’s comfortable to handle. Flip the halves over, scoop out the flesh, and transfer it to a food processor. Blend until completely smooth, then measure the amount needed for the pie.
To roast butternut squash in the air fryer:
The air fryer is a great option if you want to roast the squash without heating up the oven. Follow my guide on how to roast butternut squash halves in the air fryer for step-by-step instructions.
You can steam the squash if you’re short on time, but roasting is my preferred method for pie. Steaming adds moisture but doesn't develop those rich, caramelized flavors, which can leave you with a less flavorful puree. Roasting helps concentrate the squash’s natural sweetness and gives your pie a deeper, more satisfying flavor.
Tips for Success
- Cool and Chill the Pie: Allow the pie to cool completely at room temperature before slicing or serving. Just like a pumpkin pie, this Thanksgiving dessert is even better when made ahead and chilled. It sets beautifully and slices cleanly — perfect for preparing a day or two before a holiday meal, so it’s ready to serve when you are.
- Shield the pie crust: As with any custard pie, the crust can sometimes brown before the filling is fully set. If you notice the edges getting too dark, loosely cover them with aluminum foil after about 45 minutes and continue baking until the center is done.
- Whole Butternut Squash: For this recipe, choose a butternut squash that weighs about 3 ½ to 4 pounds. This will yield the right amount of smooth, flavorful puree for your filling.
- Storage: Once baked, let the pie cool completely, then cover it loosely and refrigerate. It will keep well in the fridge for 3 to 4 days.
- Freezing: To freeze, let the baked pie cool completely. Wrap it tightly in plastic wrap, then add a layer of aluminum foil to prevent freezer burn. The pie will keep in the freezer for up to 1 month. When ready to enjoy, thaw it overnight in the refrigerator before serving.
- Butternut Squash: A 3 to 4 pound squash will yield about 2½ to 3 cups of puree.
- Pie Crust: My go-to is an all-butter pie crust recipe — it bakes up beautifully flaky and tender. If you’re short on time, a good-quality pre-made crust or your favorite homemade version will work just as well.
Butternut Squash Pie FAQ'S
Custard pies like butternut squash pie can crack if they’re overbaked or baked at too high a temperature. The trick is to take the pie out of the oven when the edges are set but the center still has a slight jiggle when you gently shake the pan. The residual heat will continue to cook the filling, and the pie will firm up further as it cools and chills in the refrigerator.
But don’t worry if your pie cracks! It will still taste just as delicious. My favorite fix is to add a generous swirl of whipped cream just before serving. It covers any cracks beautifully and makes the pie look extra inviting—no one needs to know!
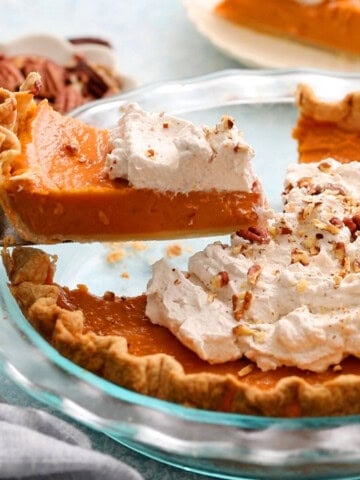
Freshly whipped cream is my favorite topping for butternut squash pie, especially with a little cinnamon mixed in. Its light, creamy texture pairs beautifully with the smooth, custardy filling and warm fall spices.
Let the pie cool completely, then spread or pipe the whipped cream over the top. Refrigerate until you’re ready to serve, for a lovely make-ahead dessert for Thanksgiving or any holiday gathering. For the cleanest slices, chill the pie before cutting.
Yes! Pre-cut butternut squash is a convenient shortcut if you want to save time peeling and chopping. You’ll need about 5 to 6 cups of raw, cubed squash to yield about 2½ cups of puree for this recipe. You can usually find pre-cut squash in the produce section of most grocery stores.
To prepare it, spread the cubes in a single layer on a lightly greased baking sheet and roast until tender. You don't need to add oil or seasonings since you’ll be blending the squash into a puree for the pie.
However, during recipe testing, I found that roasting a whole squash gives the creamiest, smoothest puree. Pre-cut cubes have more exposed surface area, so their edges can become browned or slightly crisp before the centers soften completely. That caramelization is delicious, but it can make the puree a little less silky. For the smoothest, most custardy pie filling, I prefer roasting the squash halves whole.
Yes, absolutely! Butternut squash makes a delicious alternative to pumpkin in pie. Once roasted and pureed, its dense, smooth flesh creates a rich, creamy filling with a naturally sweet, slightly nutty flavor. Roasting also helps concentrate the squash’s flavor and reduce excess moisture, giving the pie a lovely custardy texture.
Butternut squash pairs beautifully with classic fall spices like cinnamon, nutmeg, ginger, and cloves, creating that familiar warm, spiced flavor we all love in pumpkin pie. Once baked, the pie looks remarkably like a traditional pumpkin pie, with a smooth filling that sets beautifully for clean slices.
If you love pumpkin pie, this butternut squash version is a fun twist to try for Thanksgiving or any fall gathering!
Yes! Butternut squash pie tastes remarkably similar to traditional pumpkin pie, especially when both are made with warm spices like cinnamon, nutmeg, ginger, and cloves. Since both come from the squash family, they have a naturally sweet, earthy flavor that works beautifully in a creamy, custard-style pie.
The main difference is that butternut squash tends to have a slightly sweeter, nuttier flavor and a smooth, fine texture that makes an especially silky filling. Interestingly, canned pumpkin puree is often made from varieties of winter squash, including Dickinson squash, rather than the familiar jack-o’-lantern pumpkin.
So, if you enjoy pumpkin pie, you’ll love this butternut squash version, too. It has that same cozy fall flavor, with its own subtle sweetness and richness!
A thin layer of liquid on top of a chilled butternut squash pie can happen for two reasons: the custard has released moisture, a process called syneresis, or condensation has formed on the surface.
Overbaking the custard: Butternut squash pie filling is an egg-based custard. When it bakes for too long, the egg proteins tighten and squeeze out moisture, which can collect on top of the pie.
Refrigerating the pie while it’s still warm: Covering a warm pie or placing it in the refrigerator before it has cooled can cause condensation to form and drip onto the surface.
To prevent this, remove the pie from the oven when the edges are set but the center still has a slight, gentle jiggle. Let it cool completely before refrigerating, and avoid covering it while it’s still warm.
Already have liquid on top? Don’t worry! Gently blot the surface with a clean paper towel to absorb the excess moisture before serving. Your pie can still be delicious!
More Pie Recipes


Butternut Squash Pie
Equipment
Ingredients
- 1 butternut squash 31/2 to 4 pounds (2 ½ cups of puree)
- 1 9-inch homemade pie crust (or store-bought, deep dish, unbaked)
- 2 large eggs
- 1 cup light brown sugar (not packed)
- ¾ cup whole milk
- ¼ cup melted butter
- 3 tablespoons cornstarch
- 2 teaspoons vanilla extract
- 1 teaspoon ground cinnamon
- ¼ teaspoon salt
Instructions
- Butternut squash selection. You’ll need 2½ cups of squash purée for this recipe!I find a 3½-pound squash is enough if you remove the skin from the roasted squash with a paring knife, so you don’t waste any of the flesh. If you prefer to scoop out the flesh with a spoon, some may be left behind, so I recommend using a squash that weighs about 4 pounds.
- Bake butternut squash. Preheat the oven to 375°F. Line a baking sheet with foil and lightly coat it with cooking spray. Cut the butternut squash in half and scoop out the seeds and stringy parts. Place the squash halves cut-side down on the prepared baking sheet and bake for 60 to 80 minutes, until soft and tender.The skin will darken in some spots, and a knife inserted into the flesh should slide in easily. The squash should also feel soft when pressed gently. Remove from the oven and let cool for at least 30 minutes. (The squash can be roasted ahead and refrigerated for up to 2 days.)
- Chill the pie crust. Prepare the homemade pie crust according to the recipe instructions or use store-bought crust. Roll it into about 13-inch diameter and transfer to a 9-inch pie dish. Tuck it in with your fingers, making sure it’s smooth. For a beautiful edge, as shown in the photo, fold the overhanging dough back over the edge and use your hands to mold the edge into a nice thick rim around the pie. Use your fingers to flute the edges. Place the pie dish in the fridge until you make the filling.
- Mash the butternut squash. Flip the roasted squash over. Use a paring knife to peel off the skin, then transfer the flesh to a food processor. You can also scoop out the flesh with a large spoon, but I find that peeling the skin helps minimize waste.👉 Make sure to remove all the skin, as even a few small pieces can leave an unpleasant texture in your otherwise smooth, creamy pie.Blend until completely smooth, then measure out 2½ cups of purée.
- Preheat oven to 350°F.
- Make the filling. Add the squash puree, 2 eggs, 1 cup brown sugar, ¾ cup milk, ¼ cup butter, 3 tablespoon cornstarch, 2 teaspoon vanilla, 1 teaspoon cinnamon, and ¼ teaspoon salt into a large bowl and whisk well until very smooth. Pour into the pie crust.
- Bake. Bake for about 1 hour, or until the center is set and has a gentle jiggle. Cool completely on a wire rack, then cover and refrigerate. (It’s a great make-ahead pie for Thanksgiving!) 👉 Take a peek after about 45 minutes. If the crust is browning too quickly, loosely cover the pie with a piece of foil.
- Serving. Serve with whipped cream!
Notes
Nutrition
Nutritional information, based on third-party calculations, should be seen as estimates, not guarantees, as various factors like product types, brands, processing methods, and more can alter the nutritional content in recipes.
How to make butternut squash pie
You can find full printable recipe below, but here is a quick overview of the procedure along with step-by-step photos.


Make Ahead Tips
Roast in Advance: Whole butternut squash can be roasted, cooled, wrapped in foil, and stored in the refrigerator for up to 2 days.
Prepare the Puree: Once roasted, the squash can be pureed and refrigerated for 1–2 days, making it easy to assemble the pie when ready.
Bake Ahead: The pie can be baked, cooled completely, and stored in the refrigerator for 2–3 days. It’s delicious served chilled or at room temperature, making it ideal for holiday meals or entertaining.

More Butternut Squash Recipes for Thanksgiving
- Oven-roasted butternut squash is sweet, tender, and perfectly caramelized. It’s incredibly easy to make and the perfect squash for Thanksgiving, fall dinners, or any weeknight meal!
- Sweet butternut squash casserole features a creamy squash filling, topped with a buttery pecan topping, that’s sure to steal the show at your Thanksgiving dinner.
- This mashed butternut squash recipe is a delicious side dish for Thanksgiving and holiday dinners. It is rich, creamy, and absolutely delicious!
This roasted butternut squash pie may just become the best pumpkin pie you make this holiday season. Don’t let the thought of roasting a whole squash intimidate you — it’s easier than you think, and the flavor is absolutely worth it.
MADE THIS RECIPE AND LOVED IT? 💚 Please leave a ⭐️STAR rating and COMMENT below- I love to hear your feedback! Tag me with your creations on Instagram and find me on Facebook.
Hi, I’m Maria! I share easy, flavor-packed dinners, high-protein meals, and irresistible baking ideas. If you’ve ever asked, “Don’t know what to cook tonight?” you’re in the right place. And yes—there’s plenty here for breakfast, snacks, and dessert too. More about maria ->




Josh
I just made this for a trial run before Thanksgiving. It was absolutely delish - was polished off in just two days!
Maria Doss
That’s wonderful to hear! Thanks for sharing — that makes my day - Maria ♡