

This All Butter Pie Crust recipe is buttery, flaky, and perfectly tender. It is easily made with just 3 ingredients in the food processor. No shortening!
If you are looking delicious ways to use the homemade pie crust, check out our apple hand pies or the butternut squash pie recipe!
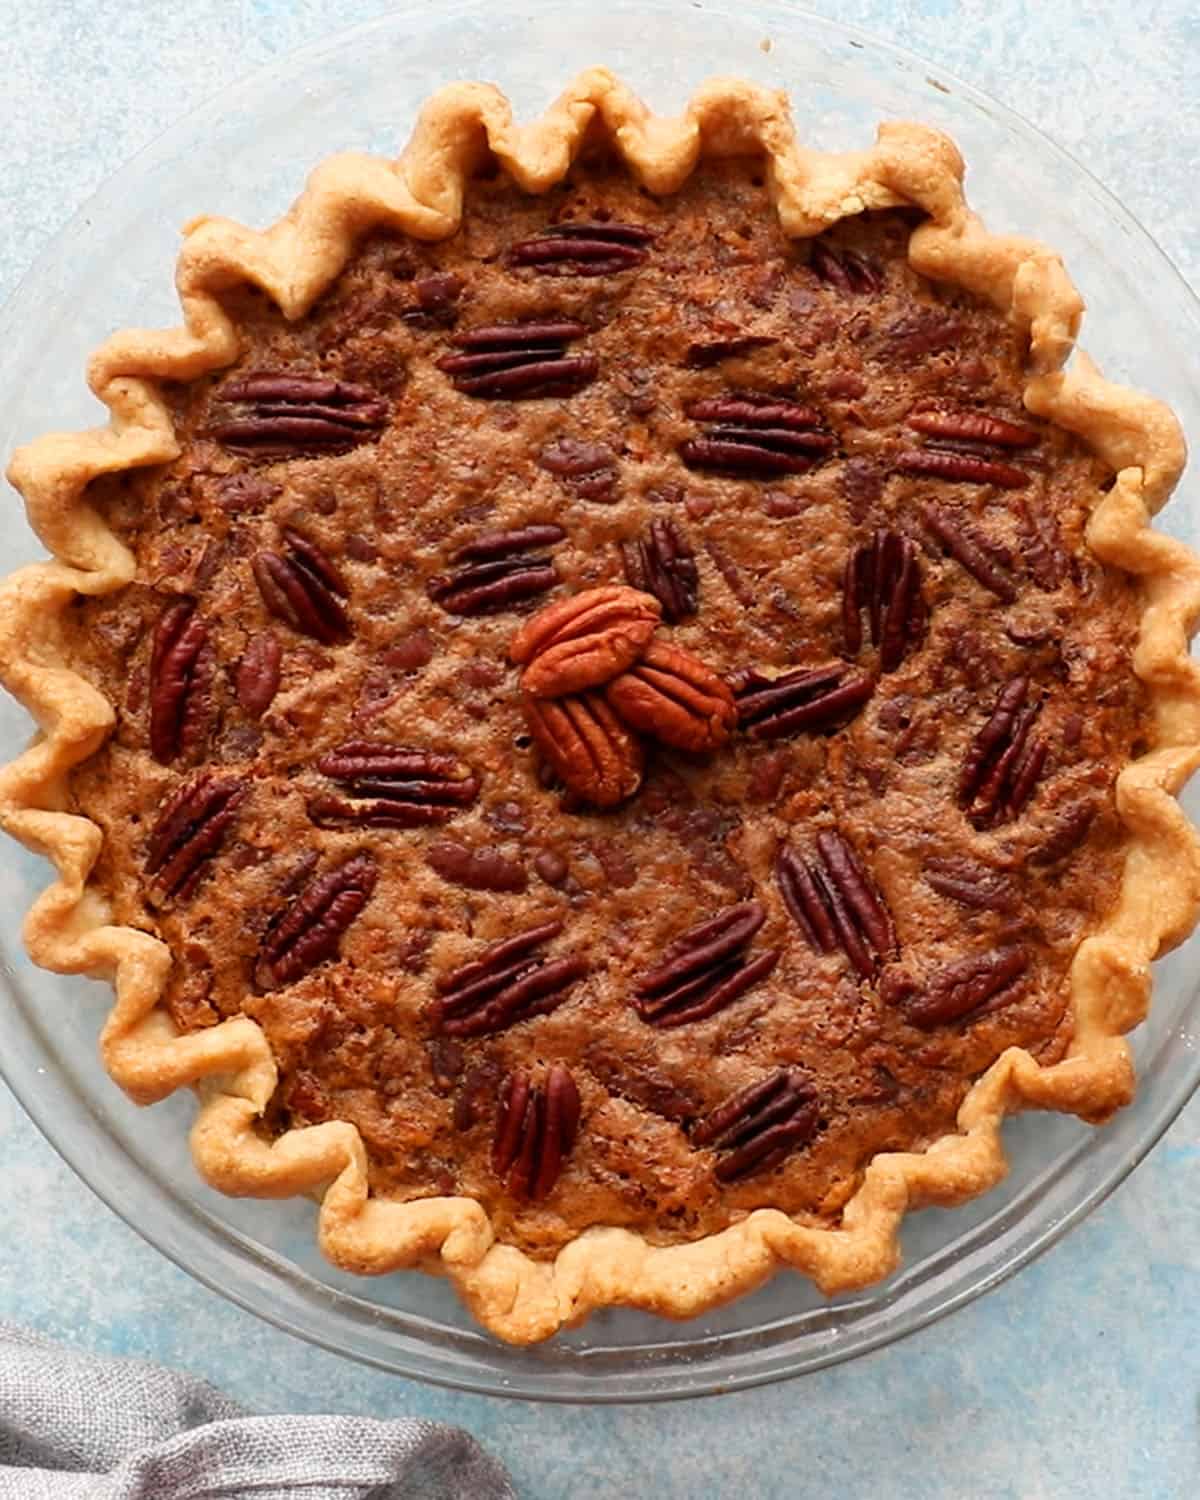
Why You'll Love This Butter Pie Crust Recipe?

The secret to a truly flaky pie crust? All butter! Using butter instead of shortening creates wonderfully flaky layers, thanks to the water naturally found in butter. As the crust bakes, the butter melts and releases steam, which helps separate and lift the layers of dough, creating that light, flaky texture we all love.
Butter also gives the crust a beautiful golden-brown color and adds so much more flavor than shortening. And if homemade pie crust has ever felt intimidating, don’t worry—I’ll walk you through the process with plenty of tips and tricks to help you make a flaky, buttery crust with confidence.
– Maria Doss
★★★★★
"I am determined to make my own pie crust. I had trouble rolling it out but I think the dough was too cold. I made a berry galette with the crust. OMG it was delicious! Thank you for the easy recipe."
-PAT
Jump to:
- Why You'll Love This Butter Pie Crust Recipe?
- The Secret To Making A Good Pie Crust
- Ingredients For Butter Pie Crust
- Tips for Success
- FAQ'S
- Ways To Use Homemade Pie Crust
- All Butter Pie Crust
- How to blind bake Pie Crust
- How to make butter pie crust?
- How to roll a pie crust for a 9-inch pie?
- Looking for ways to use homemade pie crust?
The Secret To Making A Good Pie Crust
The secret to a good pie crust is using cold ingredients — especially cold butter and ice-cold water. Keeping the butter pie dough as cold as possible helps prevent the fats from melting before the pastry hits the hot oven. The colder the ingredients, the easier the dough is to handle and the less likely it is to stick.
Ingredients For Butter Pie Crust
Scroll down to the recipe card below for full information on ingredients and amounts.
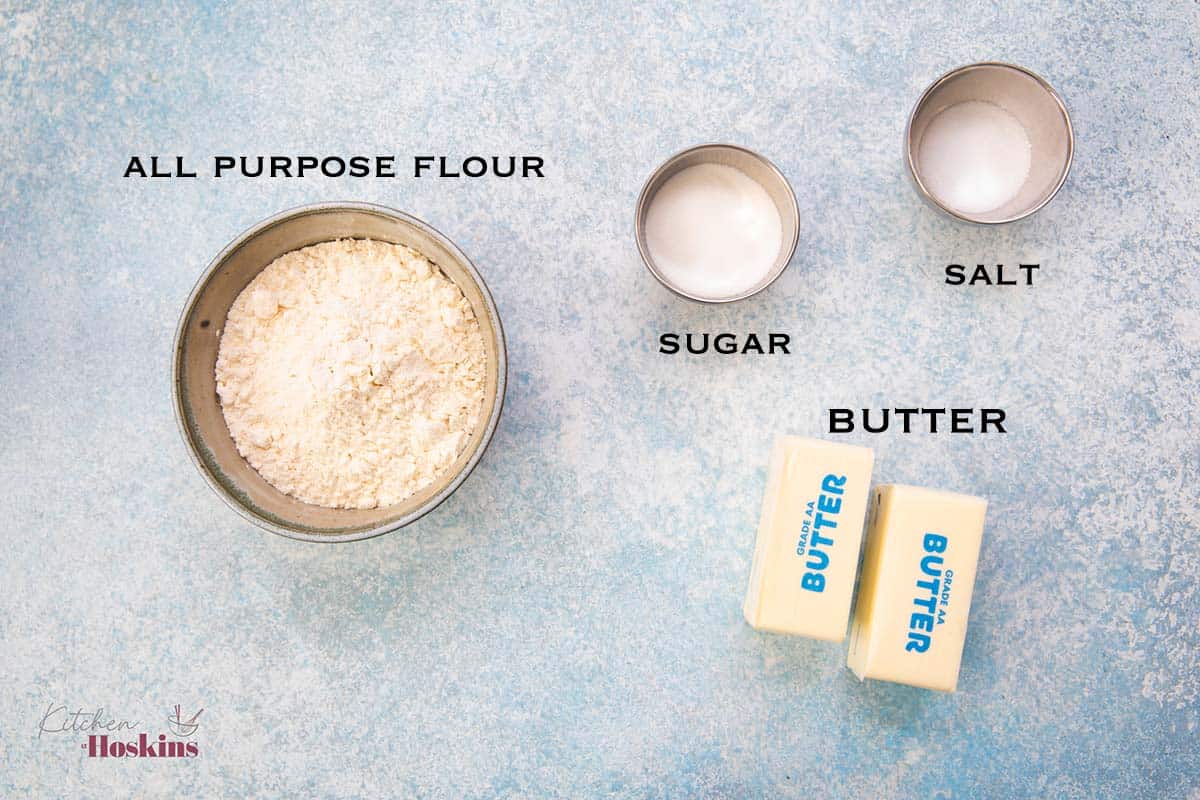
- All-Purpose Flour - Choose a high-protein, good-quality all-purpose flour (like King Arthur Unbleached) to give your homemade pie dough better structure, flakiness, and a higher rise.
- Butter - Always use very cold butter, as it helps prevent excess gluten formation, stays firm for easier rolling, and creates steam during baking for a flaky texture.
- Sugar - Adding a small amount of sugar to an all-butter pie crust enhances the flavor, encourages even browning, and is especially ideal for sweet pie fillings.
- Salt - Although technically not counted as an ingredient, salt is essential for flavor.
Tips for Success
- Use a glass pie dish - Glass dishes distribute heat evenly, ensuring that the bottom cooks thoroughly, and they provide the advantage of allowing you to easily see when the sides and bottom of the crust have turned a golden brown.
- Keep it cold - Use butter staright from the fridge and ice cold water. A warm crust is challenging to handle, as it tends to stick and requires more flour for rolling, resulting in a tougher crust.
- Roll into ⅛-inch thickness or 13-inch circle - This provides ample dough to create an attractive border for the all butter pie crust.
- Rotate and roll - When rolling the dough out, rotate the pie crust often to prevent it from not sticking to your work surface. Sprinkle on a little more flour if it’s sticking.
- Water: The amount of water needed may vary depending on the flour measurement and the temperature in your kitchen on that day, as flour can sometimes differ slightly in weight or density. For this recipe, you will need 4 tablespoons of ice-cold water. After multiple rounds of testing, I found that 4 tablespoons strikes the perfect balance—providing enough moisture to bring the dough together without making it sticky.
FAQ'S
To maintain the dough's cold temperature, use ice-cold water and butter straight from the fridge. For the ice water, fill a glass with water and add ice cubes, using approximately ¼ cup or 4 tablepsoons for the all butter pie crust recipe. It's also crucial to chill the pie dough for a minimum of 2 hours before rolling it out.
Absolutely! You don’t need a food processor to make this all-butter pie crust. In fact, making it by hand gives you more control over the butter, so you can easily leave those larger pieces intact for a flakier crust.
1. Whisk together the flour, sugar, and salt in a large bowl.
2. Add the cold, cubed butter and gently work it into the flour using your fingertips or a pastry cutter. Stop when the mixture resembles coarse crumbs with some pea-sized pieces of butter still visible. Don’t worry about making it perfectly uniform—those little pockets of butter are what help create flaky layers.
Gradually add the cold water, stirring gently with a wooden spoon until the dough starts to come together. Add only as much water as needed; the dough should hold together when gently squeezed but shouldn’t feel wet or sticky.
Transfer the dough to a lightly floured work surface and gently bring it together with your hands. Shape it into a disc, wrap tightly, and refrigerate for at least 1 hour before rolling.
To prevent a pie crust from shrinking during baking, follow these tips:
1. Make sure the dough is thoroughly chilled before rolling it out and fitting it into the pie dish, as this relaxes the gluten in the dough and minimizes unwanted shrinkage.
2. If blind baking, use a fork to prick the bottom of the crust. This helps release steam and prevents the crust from puffing up.
3. When transferring the dough to the pie dish, gently lift and ease into the dish, allowing it to settle naturally.
4. After you've shaped the crust in the pie dish, place it back in the refrigerator until you make the filling. This extra chill helps maintain the shape.
Homemade butter pie crust will last for about 2 days in the fridge and up to 3 months in the freezer.
To store in the fridge: After preparing the food processor pie dough, shape it into a disc, wrap it tightly in plastic wrap, and refrigerate for up to 2 days. This helps the gluten relax and keeps the butter firm for flakier results.
To store in the freezer: Planning ahead for the holidays? You can make multiple pie crusts in advance — butter pie dough freezes beautifully! Wrap each disc tightly in plastic wrap and place in a freezer-safe bag. Store in the freezer for up to 3 months.
To Thaw: Transfer the dough to the fridge and thaw it overnight before rolling it out.
The most common butter pie crust mistakes usually come down to two things: keeping the butter cold and handling the dough too much. A few simple techniques can make a big difference in getting those flaky, tender layers.
1. Not using cold butter – Cold butter is essential for a flaky crust. If the butter is too warm, it can blend into the flour instead of staying in little pockets. You lose those pockets of butter that create steam in the oven, which can leave you with a dense or crumbly crust instead of flaky layers.
The fix: Keep the butter as cold as possible. If your kitchen is warm or the butter starts softening while you work, pop the dough in the refrigerator for a few minutes.
2. Overworking the dough – Pie dough is not bread dough, so there’s no need to knead it! Handle it as little as possible and stop mixing as soon as the dough starts coming together. It’s perfectly fine for the dough to look a little shaggy—it should hold together when gently squeezed.
3. Adding too much water – More water doesn’t necessarily make better dough. Too much can encourage gluten development, making the crust tougher and more likely to shrink in the oven. Add just enough water for the dough to hold together when pressed. It should feel slightly damp but not wet or sticky.
4. Skipping the chill time – Don’t roll or bake the dough right after mixing. Wrap the dough tightly and refrigerate it for at least 1 hour, or up to 2 days. Chilling gives the butter time to firm back up and allows the dough to relax.
Making a truly flaky pie crust is all about a few simple techniques. The goal is to keep little pockets of cold butter throughout the dough so they can create those beautiful, crisp layers as the crust bakes.
1. Use all butter – One of the secrets to a flaky pie crust is using butter instead of shortening. Butter contains about 15% to 18% water. As the cold butter melts in the oven, that water turns to steam and helps lift and separate the layers of dough, creating light, crisp, flaky layers. Butter also gives the crust a rich flavor and beautiful golden color.
2. Don’t overwork the butter – Resist the urge to blend the butter completely into the flour. If the butter gets worked in until the mixture looks like fine sand, you’ll end up with a more tender, crumbly crust rather than a flaky one. For the best flakes, leave some larger, pea-sized pieces of butter throughout the dough. These pockets of butter create separation between the layers as the crust bakes.
3. Keep the butter and water cold – Cold ingredients are essential for flaky layers. If the butter starts to soften or melt while you’re making the dough, it can blend into the flour instead of staying in distinct pockets. Keep both the butter and water as cold as possible, and work quickly if your kitchen is warm.
4. Use just enough water – Add the minimum amount of water needed for the dough to hold together when gently squeezed. Too much water can encourage gluten development, which may make the crust tougher. The dough should look a little shaggy rather than perfectly smooth—it will come together as you gently press and shape it.
Ways To Use Homemade Pie Crust

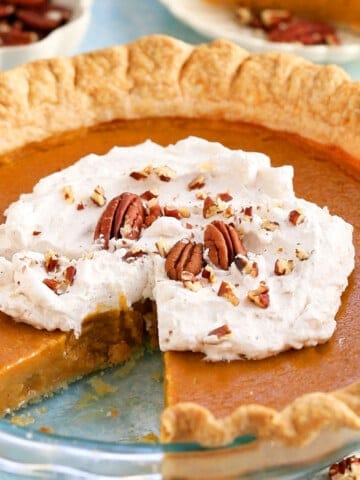
All Butter Pie Crust
Equipment
Ingredients
- 1 ¼ cups all purpose flour (150 gms)
- ½ tablespoon white granulated sugar
- ½ teaspoon salt
- ½ cup cold unsalted butter, cut into small cubes (1 stick or 113.5 gms)
- 4 tablespoons ice cold water (approximate)
Instructions
- Prepare the ice-cold water. Add some ice cubes into a cup and fill it with water. Let it sit for a few minutes while you work on the next steps, so the water gets thoroughly chilled before you add it to the dough.
- Process dry ingredients. In the work bowl of a food processor, combine 1 ¼ cups flour, ½ tablespoon sugar, and ½ teaspoon salt. Pulse a few times to combine.
- Mix in butter. Scatter the chopped cold butter, all over the surface of the flour. Pulse the mixture until coarse crumbs form with some pea-sized pieces of butter.
- Add water. Add 4 tablespoon ice water (measure only the cold water without the ice) and pulse just until the mixture forms moist clumps. Test the dough by pressing a small piece between your fingertips—if it holds together, the water is sufficient. If not, add ½ to 1 tablespoon of additional water at a time and process for a few seconds. 👉 Don't add too much water! Add just enough water for the dough to hold together when pressed. It should feel slightly damp but not wet or sticky.
- Shape and chill. Transfer the dough to a clean work surface and gather it into a ball, press If it feels dry and crumbly, gently press the dough together with both hands—the warmth of your hands will slightly soften it and help shape it into a disc. The dough should not be completely smooth, and do not knead it.Wrap the disc in plastic wrap and refrigerate for at least 1 hour before using in any recipe that calls for pie crust.
- Storage. The dough can be stored in the refrigerator for up to 2 days or frozen for up to 3 months.
Notes
Nutrition
Nutritional information, based on third-party calculations, should be seen as estimates, not guarantees, as various factors like product types, brands, processing methods, and more can alter the nutritional content in recipes.
How to blind bake Pie Crust
Some pies, like pumpkin pies, need a pre-baked crust — here’s how to do it:
- Shape the edges – Crimp with a fork or flute them using your fingers.
- Freeze for 30 minutes – This helps prevent the pastry from shrinking or sliding while baking.
- Add pie weights – Line the crust with parchment paper and fill it about ⅔ full with pie weights (or dried beans).
- Bake at 425°F for 15 to 18 minutes – Until the edges look golden.
- Remove weights – Carefully take out the parchment and weights, then prick the bottom with a fork.
- Bake again for 5 minutes – This finishes baking the bottom so it’s crisp and dry.
- Cool completely – Let the crust cool to room temperature before filling.
How to make butter pie crust?
You can find full printable recipe below, but here is a quick overview of the procedure along with step-by-step photos.
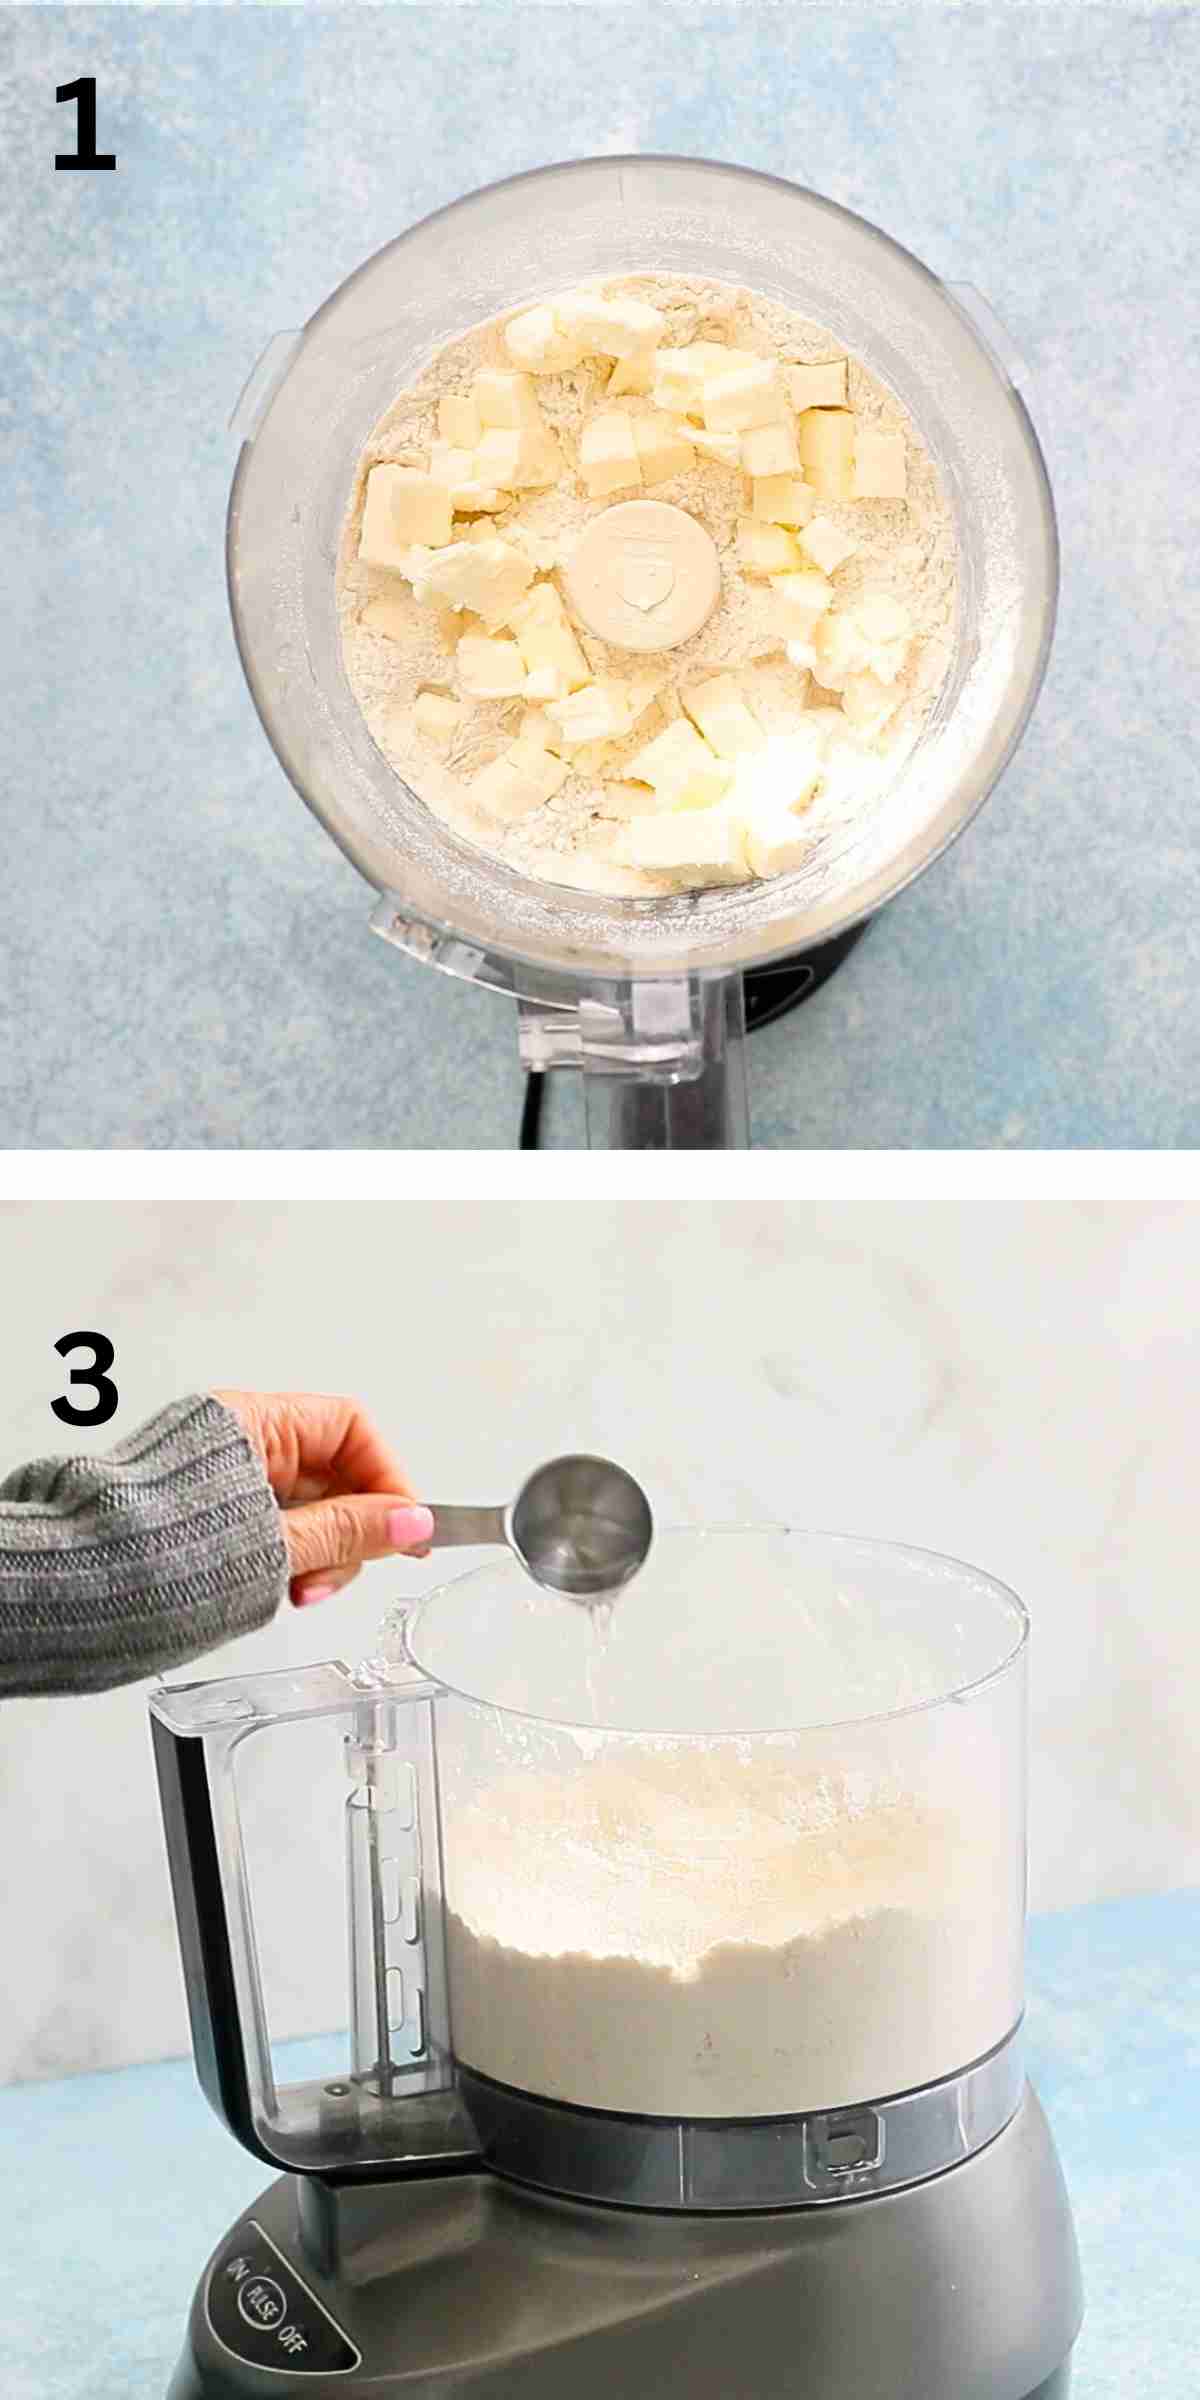
1.Add flour, sugar and salt into a food processor. Pulse twice to combine. Add the chopped butter, all over the surface.
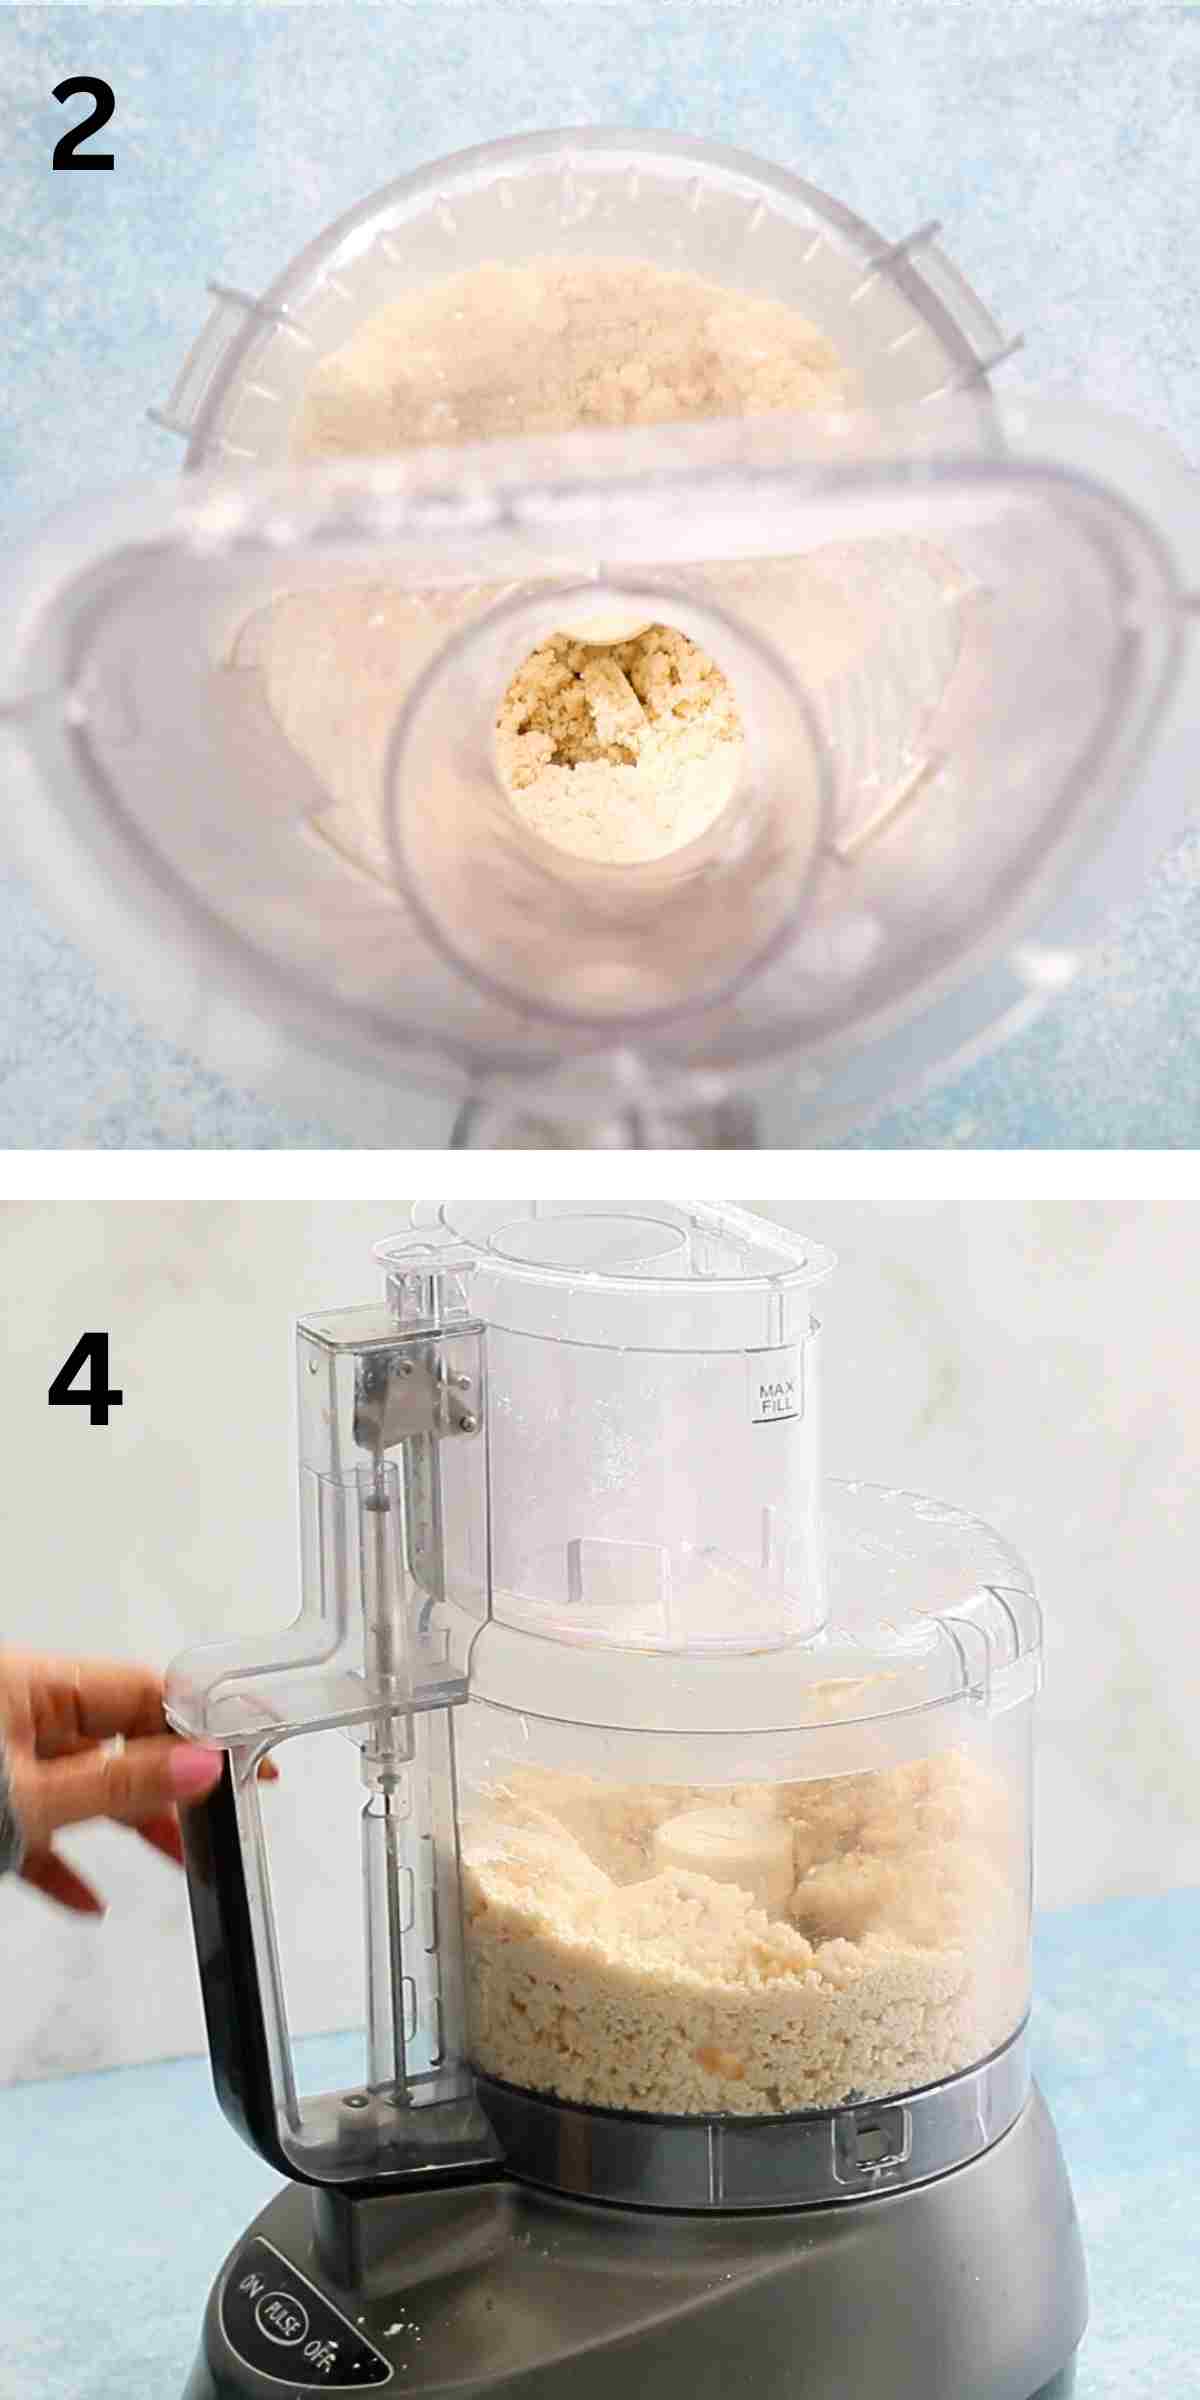
2. Pulse 6 to 9 times, until until it resembles coarse meal.
3. Add ice cold water.
4. Pulse for 9 to 13 seconds until the dough begins to form large clumps.
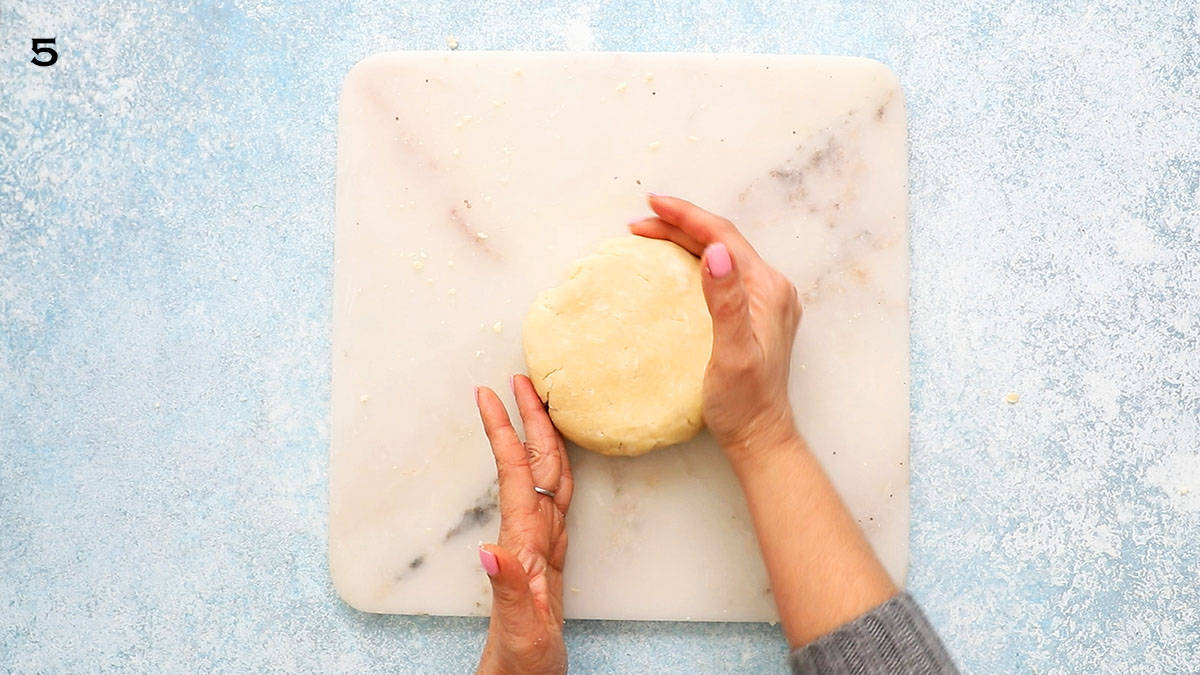
5. Transfer the pie crust dough to a work surface. Using hands, shape the dough into a flat disc. Avoid overworking the dough. Wrap in plastic wrap, then refrigerate for one hour or up to 2 days.
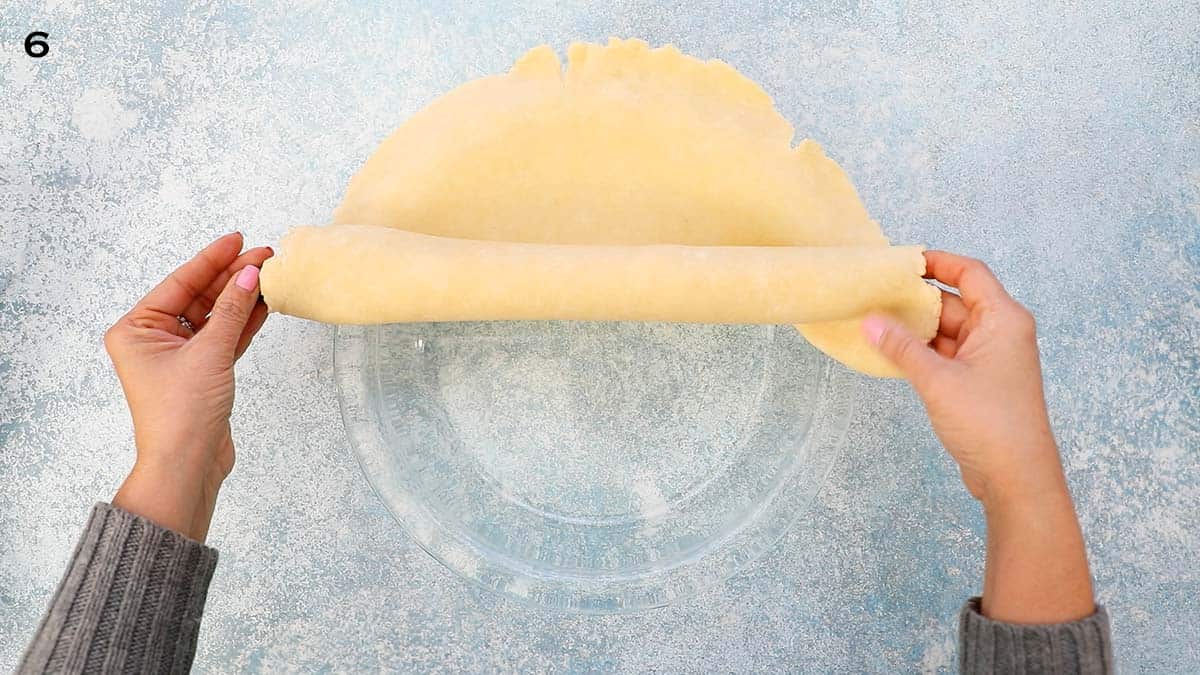
To ensure a decorative edge, roll out the all-butter pie crust to a size larger than your 9-inch pie dish, such as a thin 12-inch circle.
6. Since your dough is about ⅛-inch thick, I like to use a rolling pin to help transfer the crust to the pie dish. Carefully roll one end of the circle of dough loosely onto the rolling pin, pick it up, and carefully roll it back out over the top of the dish.
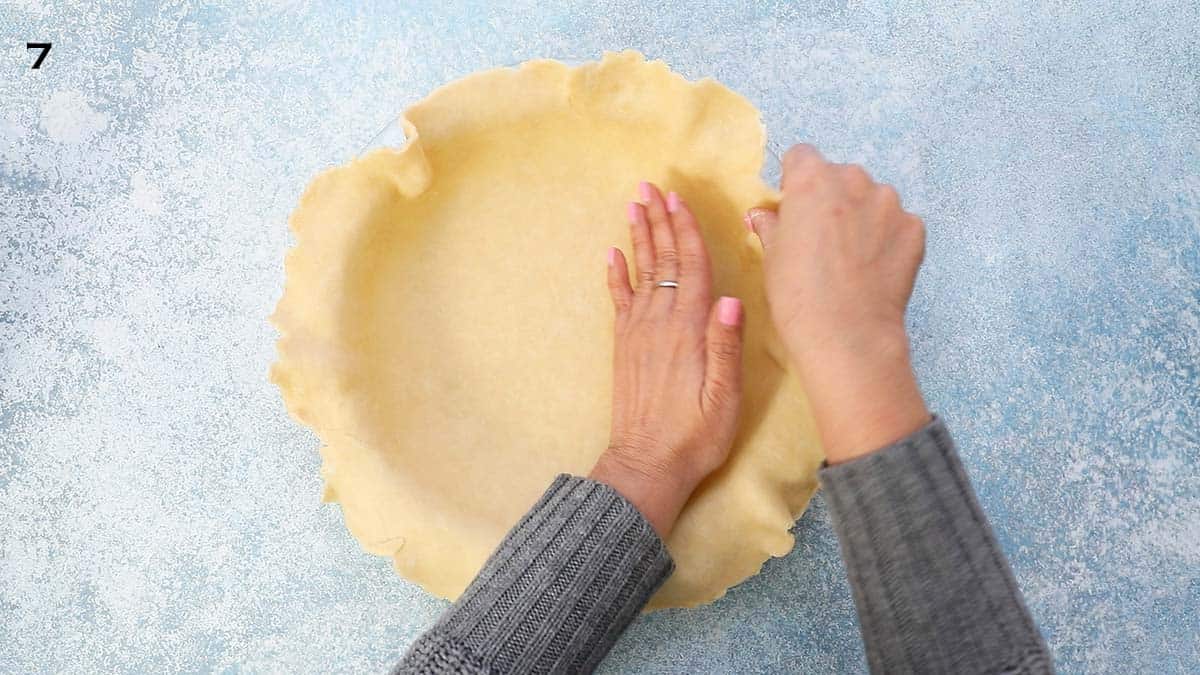
7. Drape into the pie dish, gently tucking it into the interior all the way around.
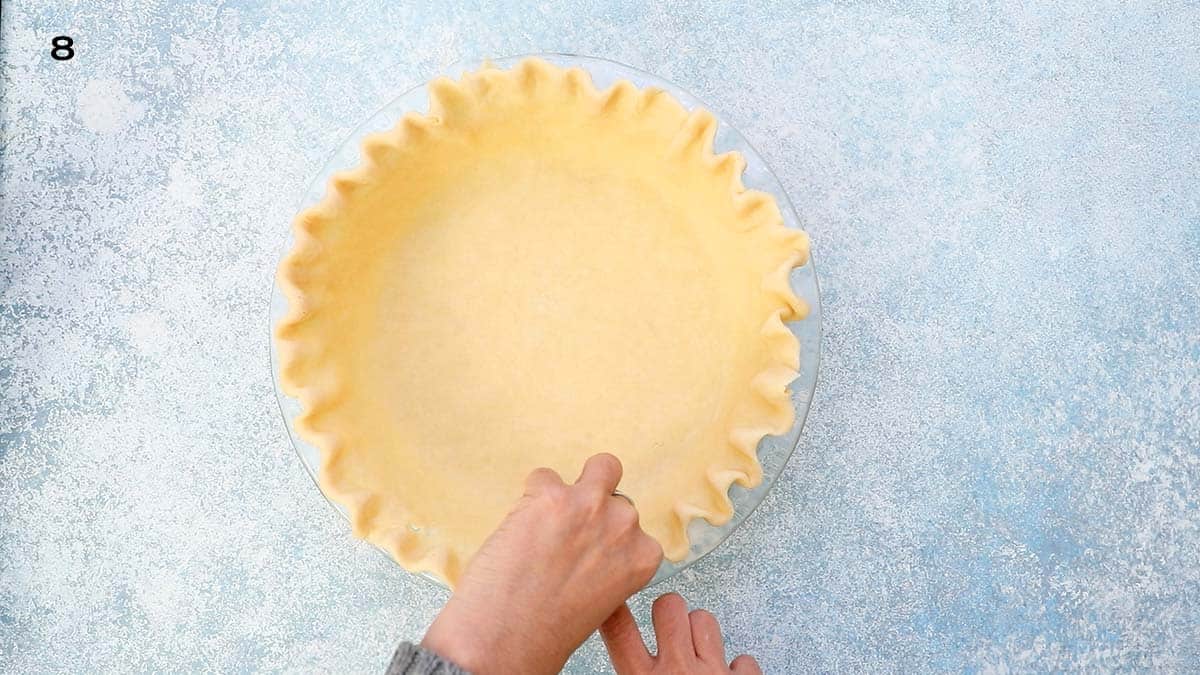
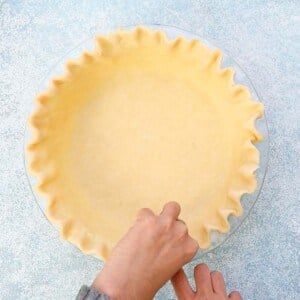
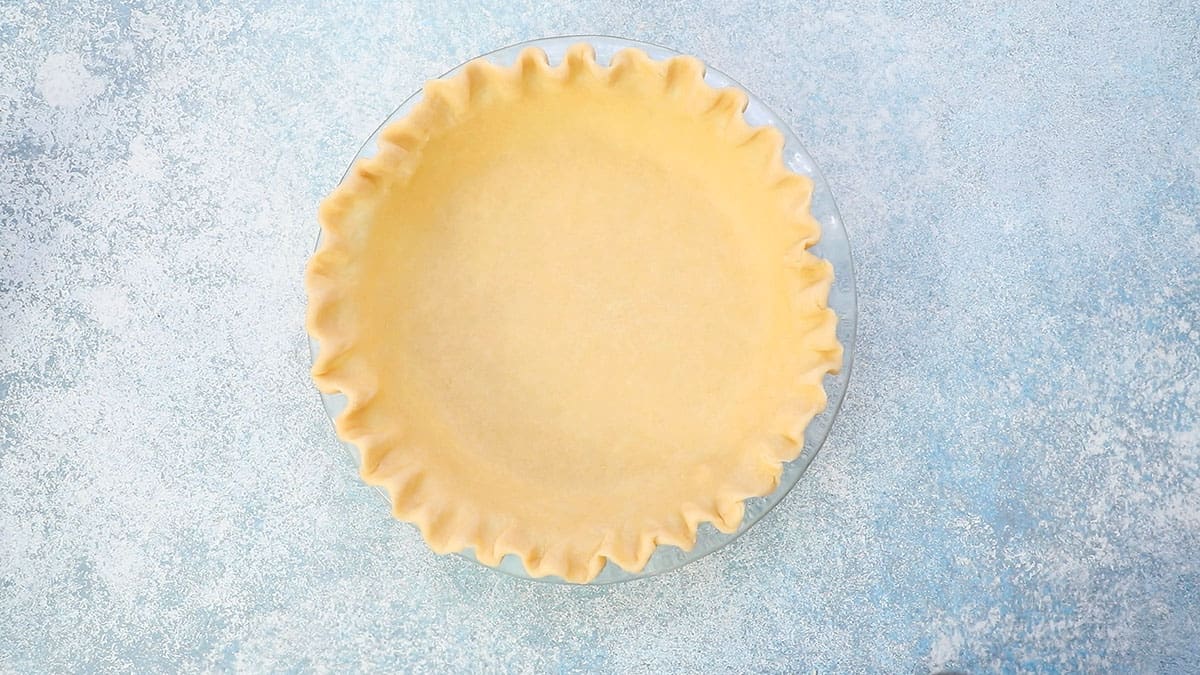
8. Trim any excess dough around the edges. To flute the edges, use a knuckle and 2 fingers to press around the edges of the pie crust, to give it a beautiful and classic scalloped look.
Looking for an easy, no-fuss pie crust? You might love these no-bake mini graham cracker crust.
How to roll a pie crust for a 9-inch pie?
- Dust the work surface lightly with flour, and also dust the rolling pin. Roll into ⅛-inch thickness or 13 inches. When rolling the dough out, rotate the pie crust often to prevent it not sticking to your work surface. Sprinkle on a little more flour if it’s sticking.
- Use a rolling pin to help transfer the crust to the pie dish. Carefully roll one end of the dough circle loosely onto the rolling pin, pick it up, and carefully roll it back out over the top of the dish. Drape into the pie dish, gently tucking it into the interior all the way around.
- Trim any excess dough around the edges. To flute the edges, use a knuckle and 2 fingers to press along the edges of the pie crust, to give it a beautiful and classic scalloped look. You can also use a fork to crimp the edges for an easier approach.
Looking for ways to use homemade pie crust?
- Pecan pie without corn syrup is one of the easiest Thanksgiving pies to make! A buttery, flaky crust is filled with a luscious caramel filling generously studded with toasted pecans.
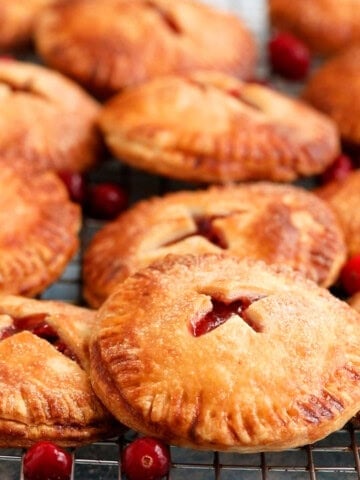
- Apple hand pies have an irresistibly warm, spiced apple filling wrapped in a homemade buttery, flaky food processor pie crust. It is handheld, adorable, and eliminates the need for slicing and serving.
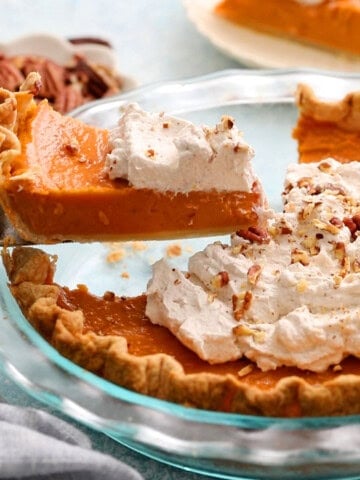
- Sweet potato pie features a buttery, flaky 3-ingredient pie crust filled with an ultra-creamy, smooth sweet potato filling and topped with clouds of brown sugar whipped cream.
- Got scraps of pie crusts? Make these adorable pie crust cookies. They’re cute, easy, fun, and surprisingly simple to make!
- Halloween pop tarts are incredibly easy to make with just two ingredients! Keep them simple or dress them up with a cute candy flower on top. They're the perfect Halloween treat for kids!
- Butternut squash pie is rich, smooth, custard-like, and perfectly spiced. Made with roasted butternut squash, it’s a delicious twist on pumpkin pie and will become a favorite Thanksgiving dessert!
MADE THIS RECIPE AND LOVED IT? 💚 Please leave a ⭐️STAR rating and COMMENT below- I love to hear your feedback! Tag me with your creations on Instagram and find me on Facebook.
Hi, I’m Maria! I share easy, flavor-packed dinners, high-protein meals, and irresistible baking ideas. If you’ve ever asked, “Don’t know what to cook tonight?” you’re in the right place. And yes—there’s plenty here for breakfast, snacks, and dessert too. More about maria ->


Brittania
Great recipe but where are the baking directions? Temp?
Maria Doss
Hi Brittania, This pie crust is used as the base for various pies. There is no specific baking temperature listed for the crust, because the temperature and baking time will depend on the particular pie recipe you're making. Here are the baking times and temperature for few different recipes - Apple hand pie, pecan pie, persimmon galette and so on. Hope it helps - Maria
Pat B
I am determined to make my own pie crust. I had trouble rolling it out but I think the dough was too cold. I made a berry galette with the crust. OMG it was delicious! Thank you for the easy recipe. I just need to let my dough warm up a little more.
Maria Doss
Love to hear that - Maria ❤️