

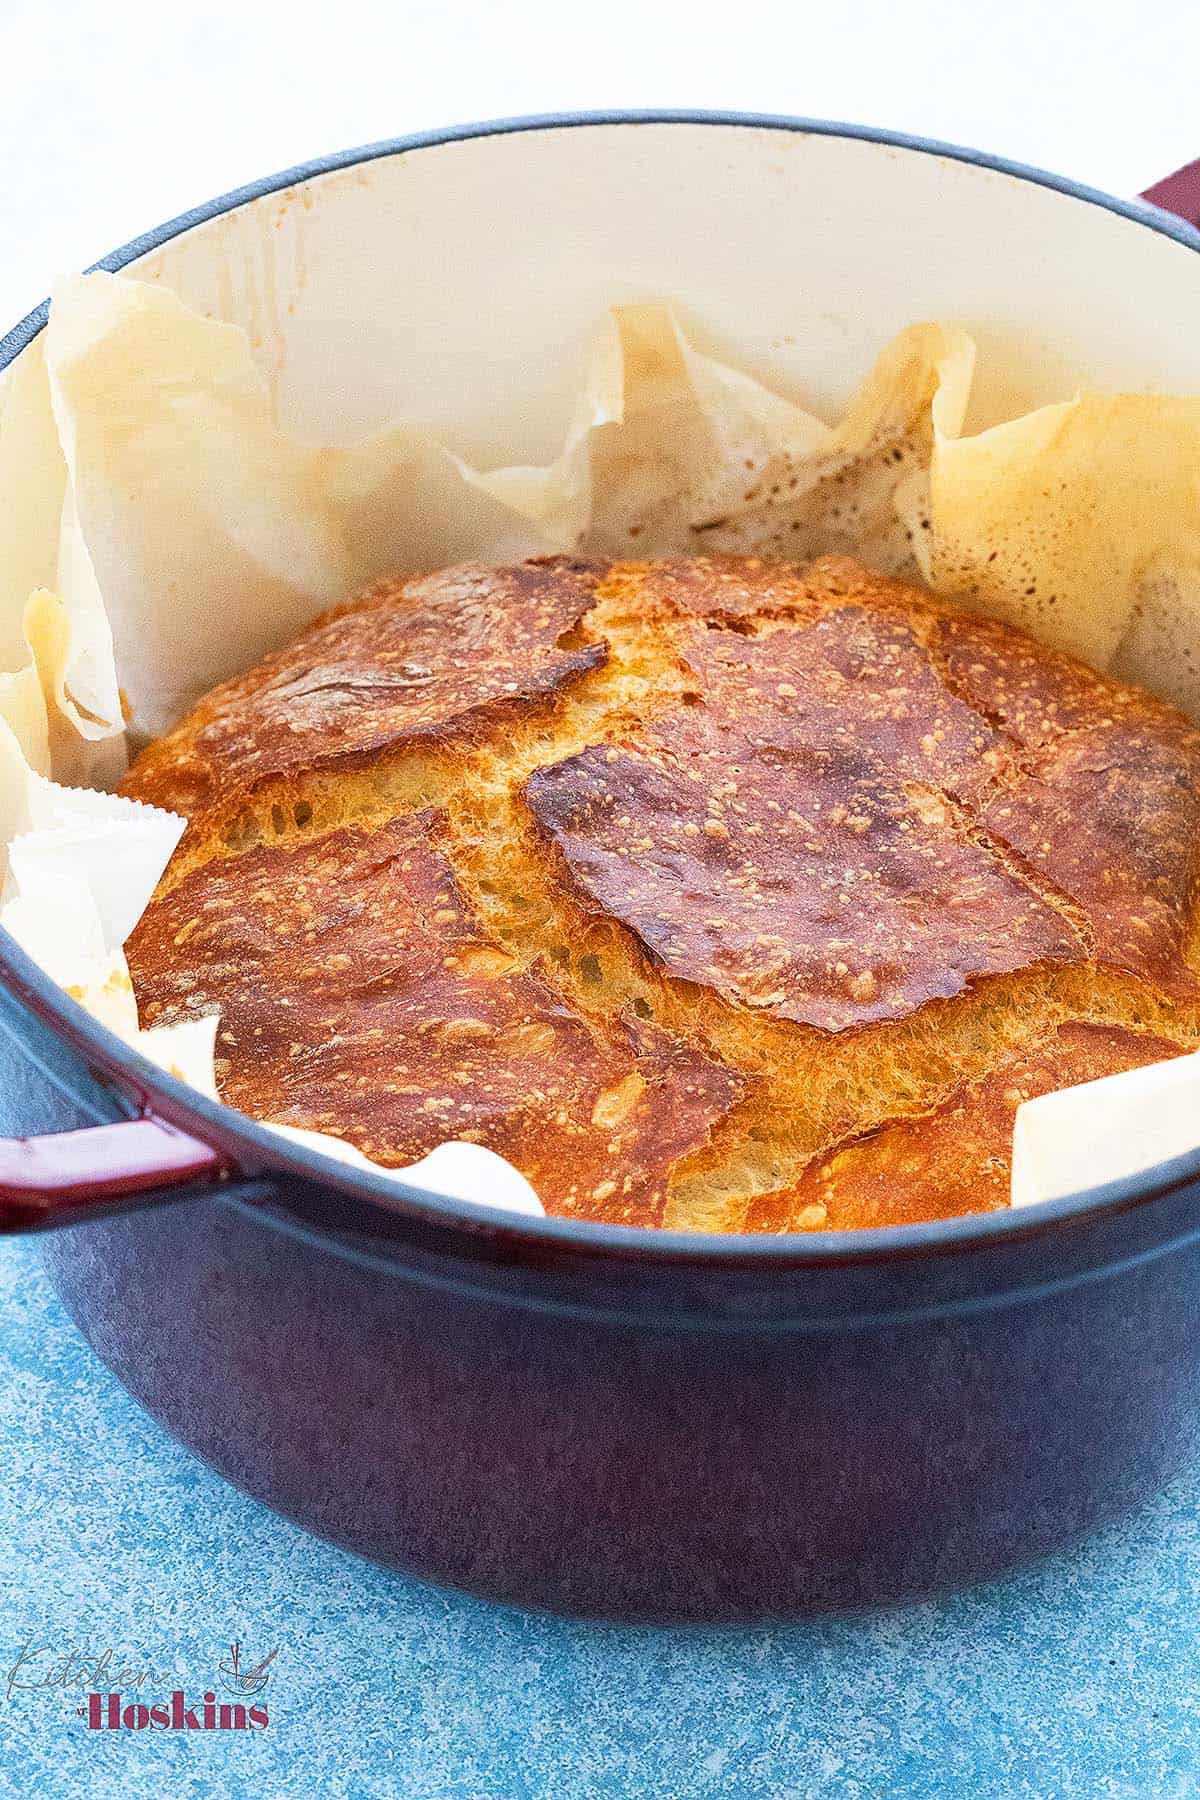
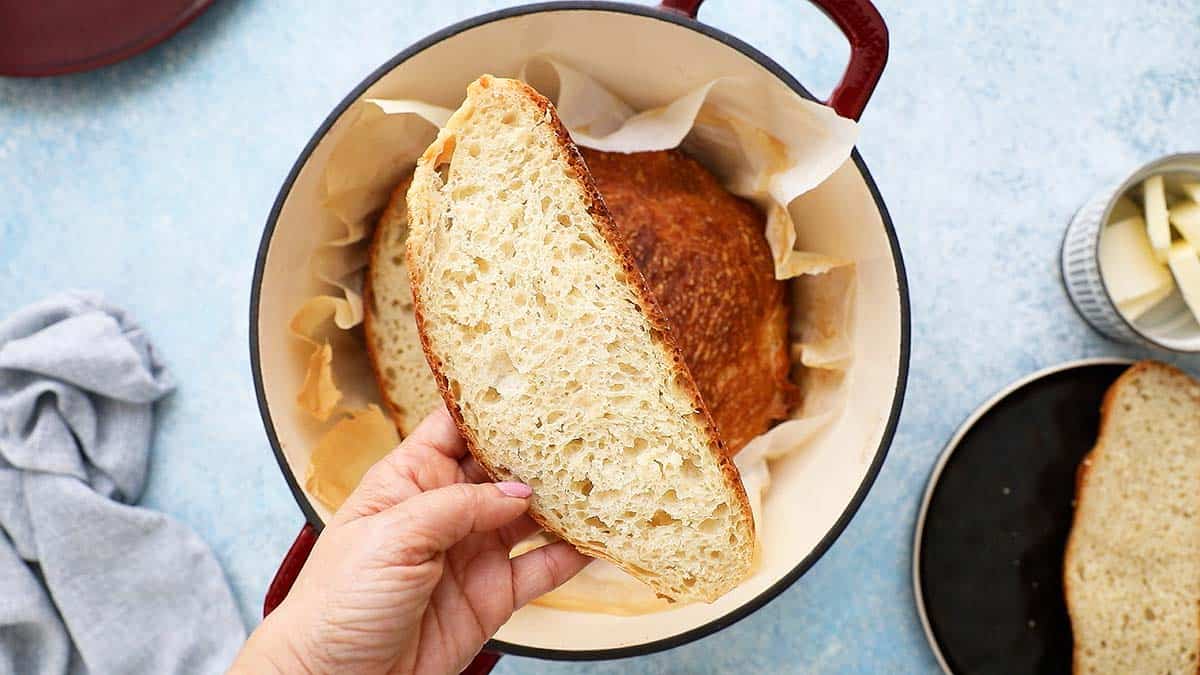
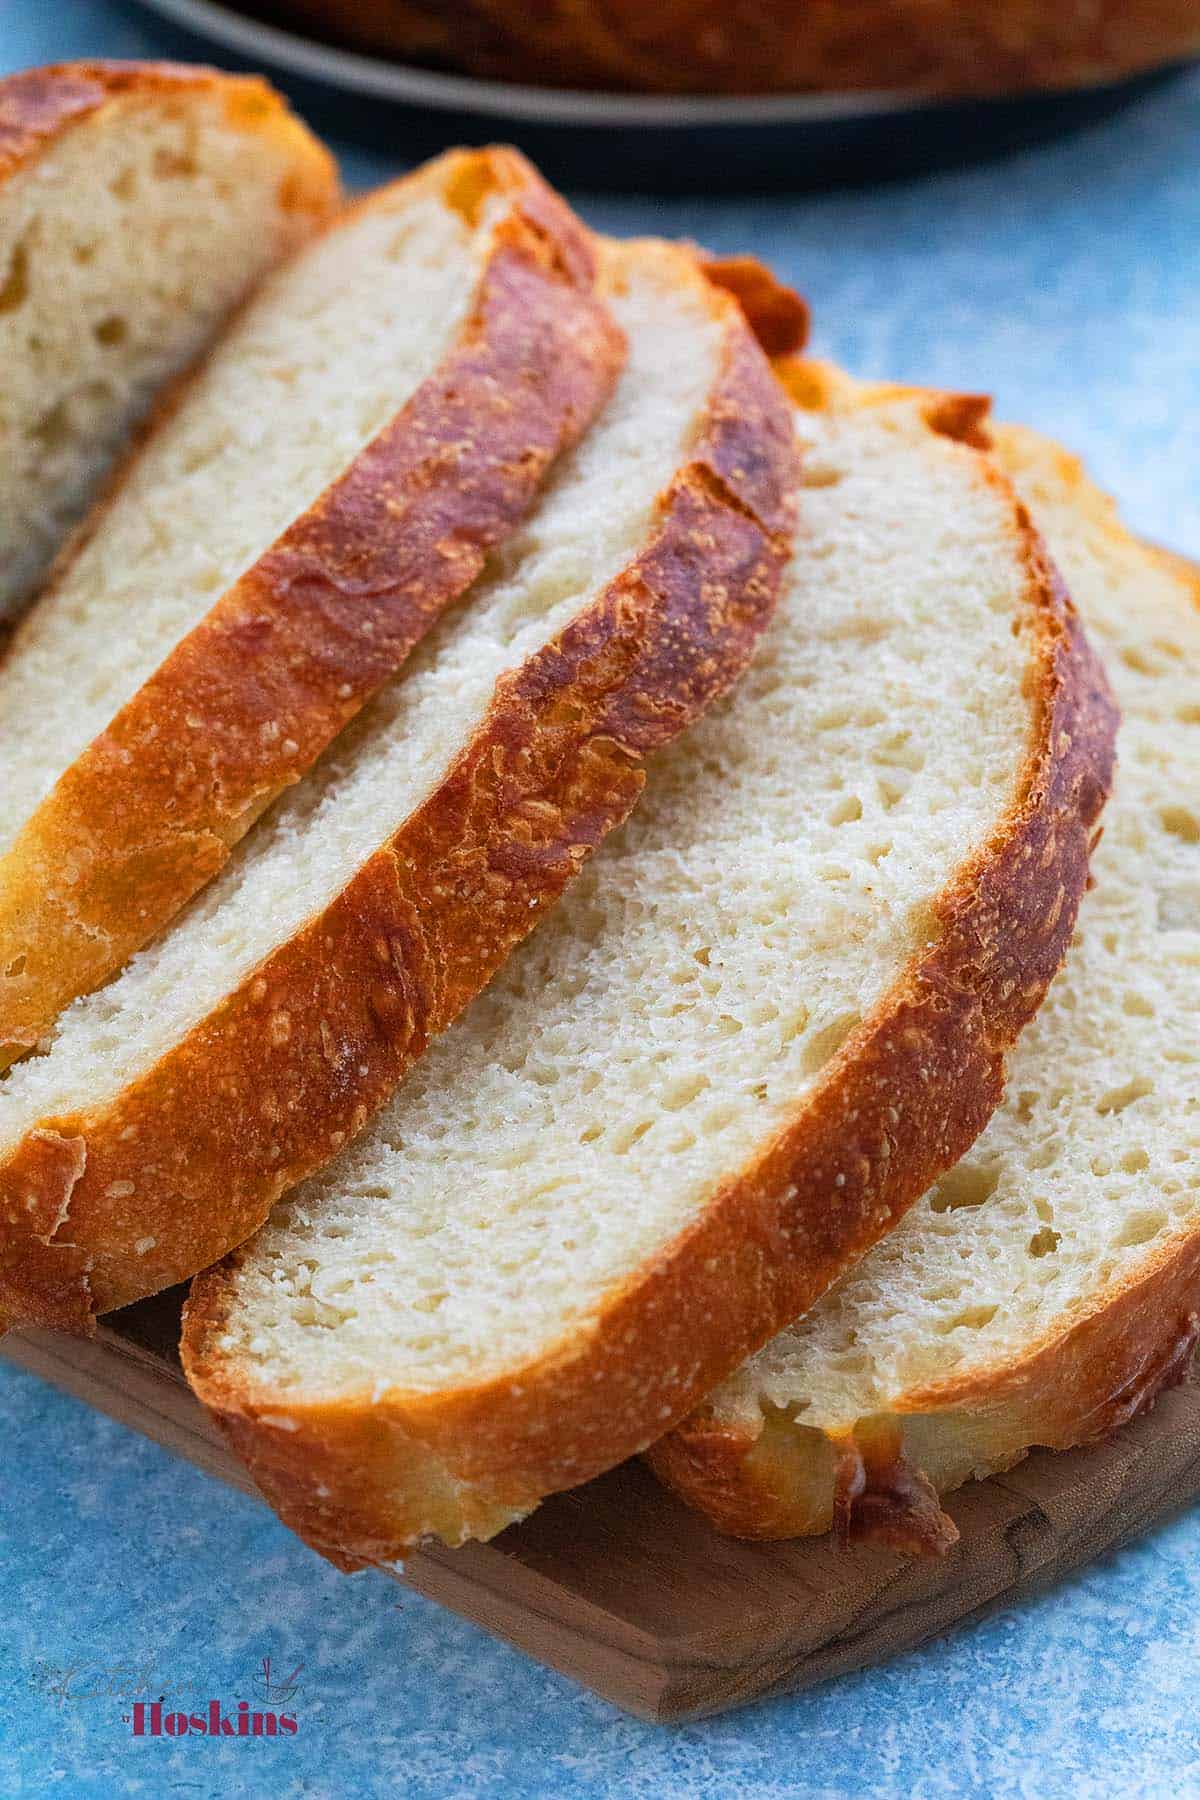
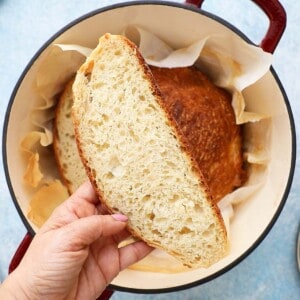
This Dutch Oven Bread has a perfectly crusty texture and a soft, chewy crumb. With just 5 minutes of prep, there is no kneading and it looks like artisan loaf, but made with no effort - A quick and easy no-knead bread you'll love!
First published in New York Times, a no-knead bread, developed by Jim Lahrey of the Sullivan Bakery in Manhattan, was a major breakthrough for home bakers, to achieve a professional-looking artisanal loaf at home.
Enameled cast iron 6-quart Dutch oven with tight-fitting lid is best for this recipe. However, I have included instructions on how to make the bread without a dutch oven, or try the easy no knead dinner rolls with avocado.
Artisan loaves develop their complex flavor from a slow overnight fermentation in the fridge, which transforms starches into sugars for richer taste.
However, I wanted a quick no-knead Dutch oven bread recipe with just 2 hours of rising time, perfect for dinner alongside my family's favorite pasta dishes or comforting soups. It is one of the best homemade bread recipes in the world!
Jump to:
Why this recipe works?
A Dutch oven’s thick walls and compact size trap steam, creating a crisp crust and open crumb. The steam heats the no knead loaf rapidly, expanding air bubbles for a lighter texture. It also keeps the crust soft during baking, allowing for expansion, and forms a shiny, crisp crust as it dries.
Fool-proof no-knead bread recipe! If your dough feels stiff, mix in more water. Very wet, stir in more flour. Have more time? Let it ferment in the fridge!
Ingredients
Scroll down to the recipe card below for full information on ingredients and amounts.
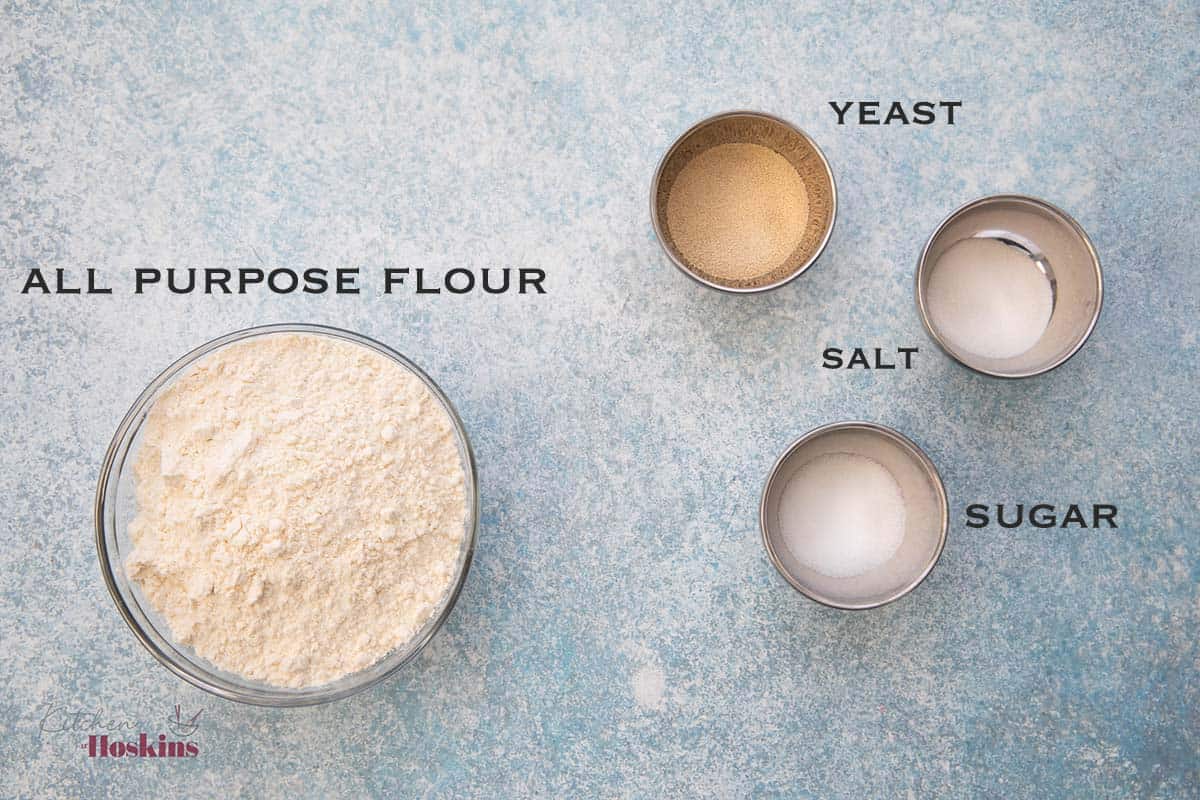
- All purpose flour - It has 10 to 12 percent protein, adds structure and is perfect for home bakers.
- Yeast - This recipe uses rapid-rise or instant yeast, which does not need to be dissolved in water.
- Salt - Its role is much more than adding flavor. Salt strengthens gluten to form a chewy bread.
- Sugar - I add some sugar to add sweetness and help the crust caramelize efficiently. It also reacts with the proteins to form a wonderful flavor and dark brown color.
- Water - A dough with a higher level of hydration, is more capable of expanding, promoting the formation of larger bubbles.
Pro tip: Like more chew in your homemade no-knead dutch oven bread? Use bread flour instead! With 12 to 14 percent protein, bread flour is designed to produce a lot of gluten, resulting in a chewy dutch oven bread.
Variations
No-Knead Dutch Oven Bread is a basic blank canvas that can be customized to make it your own. Here are some ideas to try:
- Garlic and herbs - Add chopped fresh herbs like rosemary, thyme, or basil, and minced garlic to the dough.
- Olives - Add chopped olives for a Mediterranean flair.
- Sun dried tomatoes - Drained and chopped sun dried tomatoes adds a chewy surprise.
- Cranberry walnut - Try mixing in chopped dried cranberries and walnuts.
- Dried fruits - Other dried fruits like raisins or dried apricots will be delicious as well.
How to make?
You can find full printable recipe below, but here is a quick overview of the procedure along with step-by-step photos.

1.Mix all purpose flour, yeast, salt, and sugar in a large bowl.
2.Add water.
💡 Did you know? Yeast is a living organism that converts sugars and starches into carbon dioxide and alcohol. It activates with water heated to 110-115°F; temperatures above 135°F kill it, and cooler water won’t activate it.
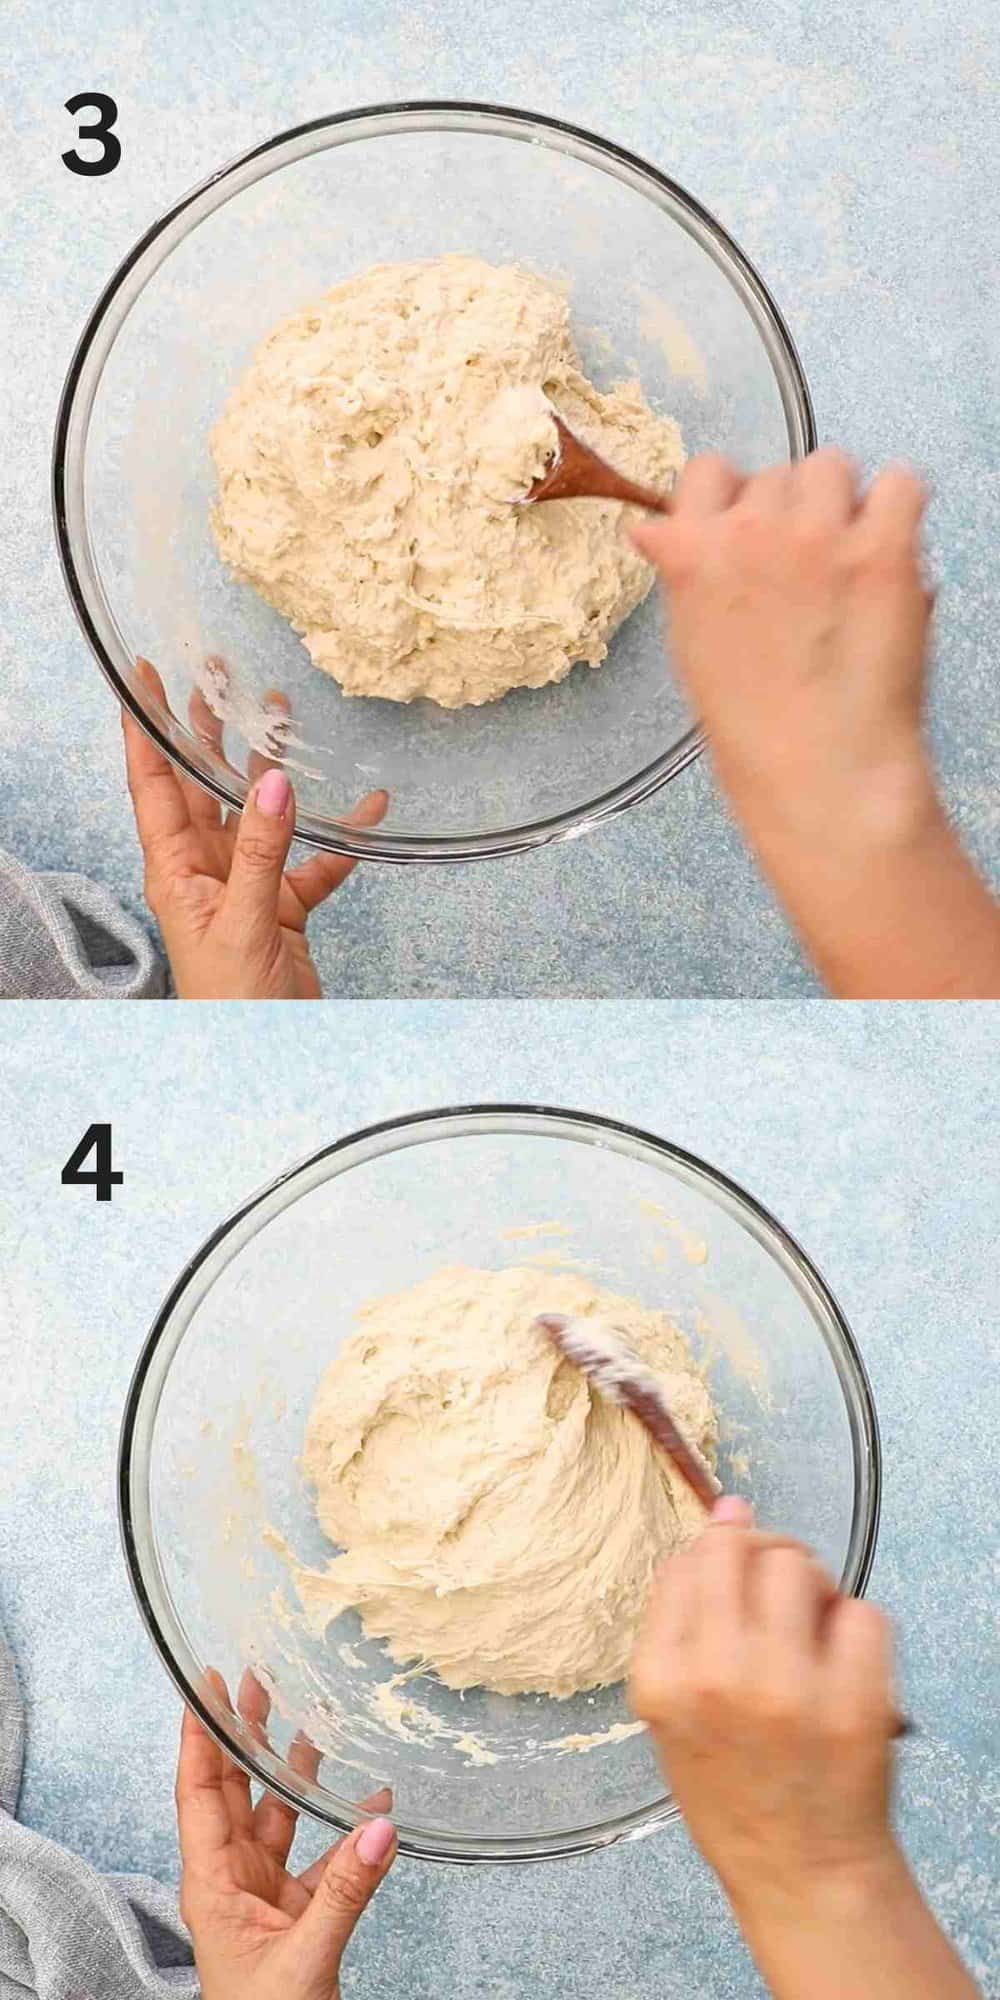
3 & 4. Using a wooden spoon, mix until all the flour is incorporated. Dough will be wet and shaggy.

5 & 6. Cover the bowl with a plastic wrap and then wrap tightly with a kitchen towel. Let rise in a warm area for about 2 hours or doubled in volume.
Pro tip: Refrigerate 12 to 18 hours for better flavor, before proceeding on to the next step.
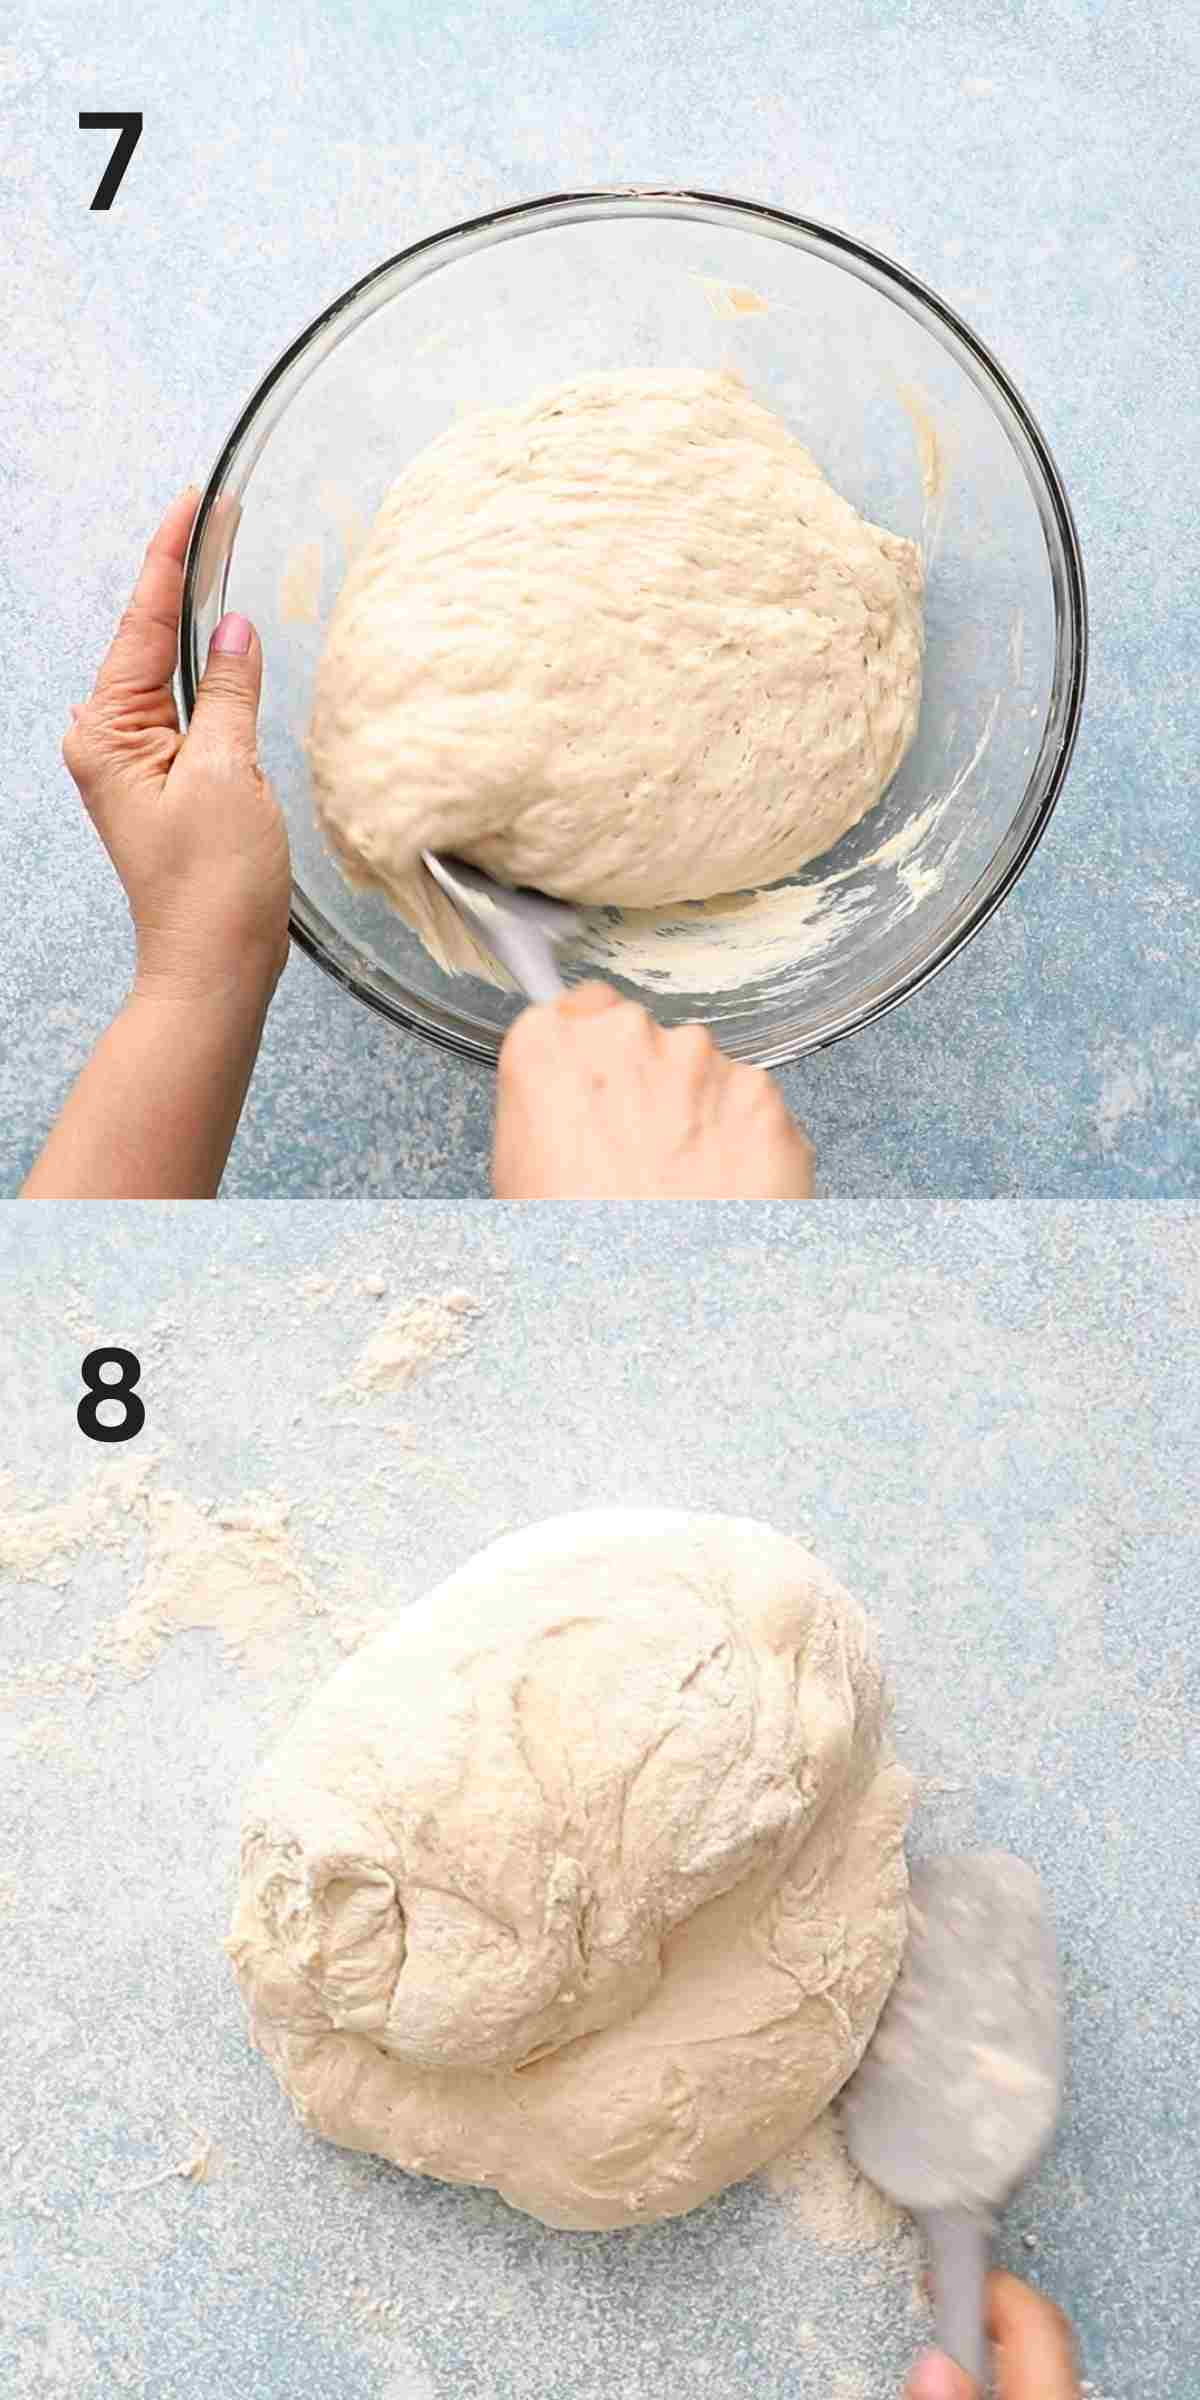
7 & 8. Sprinkle work surface with some flour. Using a greased rubber spatula, scrape dough, out of bowl onto the floured surface. Sprinkle top with ½ tablespoon flour. Using the rubber spatula, fold the sides inwards, about 6 folds, to roughly form a roundish shape. Don’t be too meticulous here.
Tip: Don't make a perfectly smooth ball! Rougher edges results in a rustic loaf!
Pro tip: Turn the dough and not punch! To create a coarser crumb, fold the dough over onto itself. It reactivates the yeast without pressing out as much air, when compared to punching down the dough, as in most bread recipes.
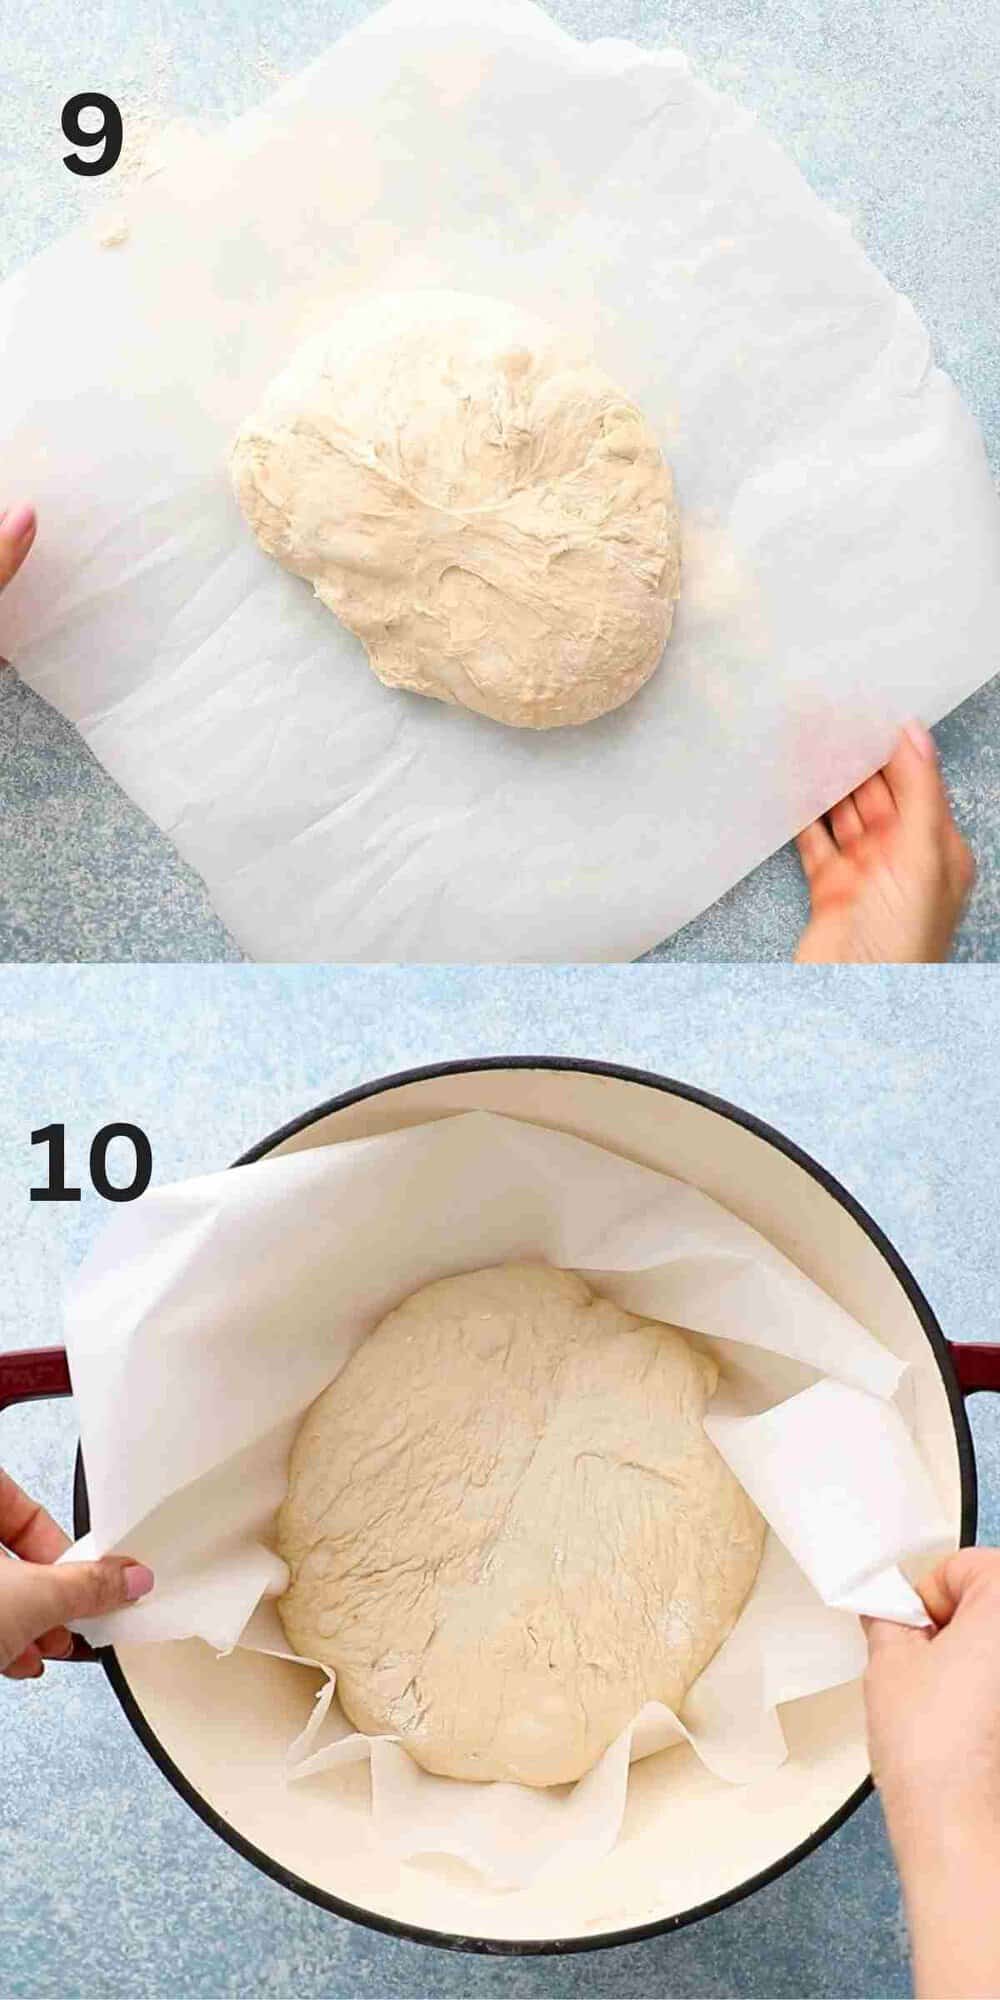
9. Slide a large piece of parchment paper ( I like to spray of coating of cooking spray on the parchment paper) next to the dough, then flip the dough onto the middle of the paper. Hold the four corners of the paper and place it in a large bowl or pot, and wrap the bowl or pot with a kitchen towel. Let rise for 15 minutes.
Tip: A 12-inch by 18-inch sheet of parchment paper works best.
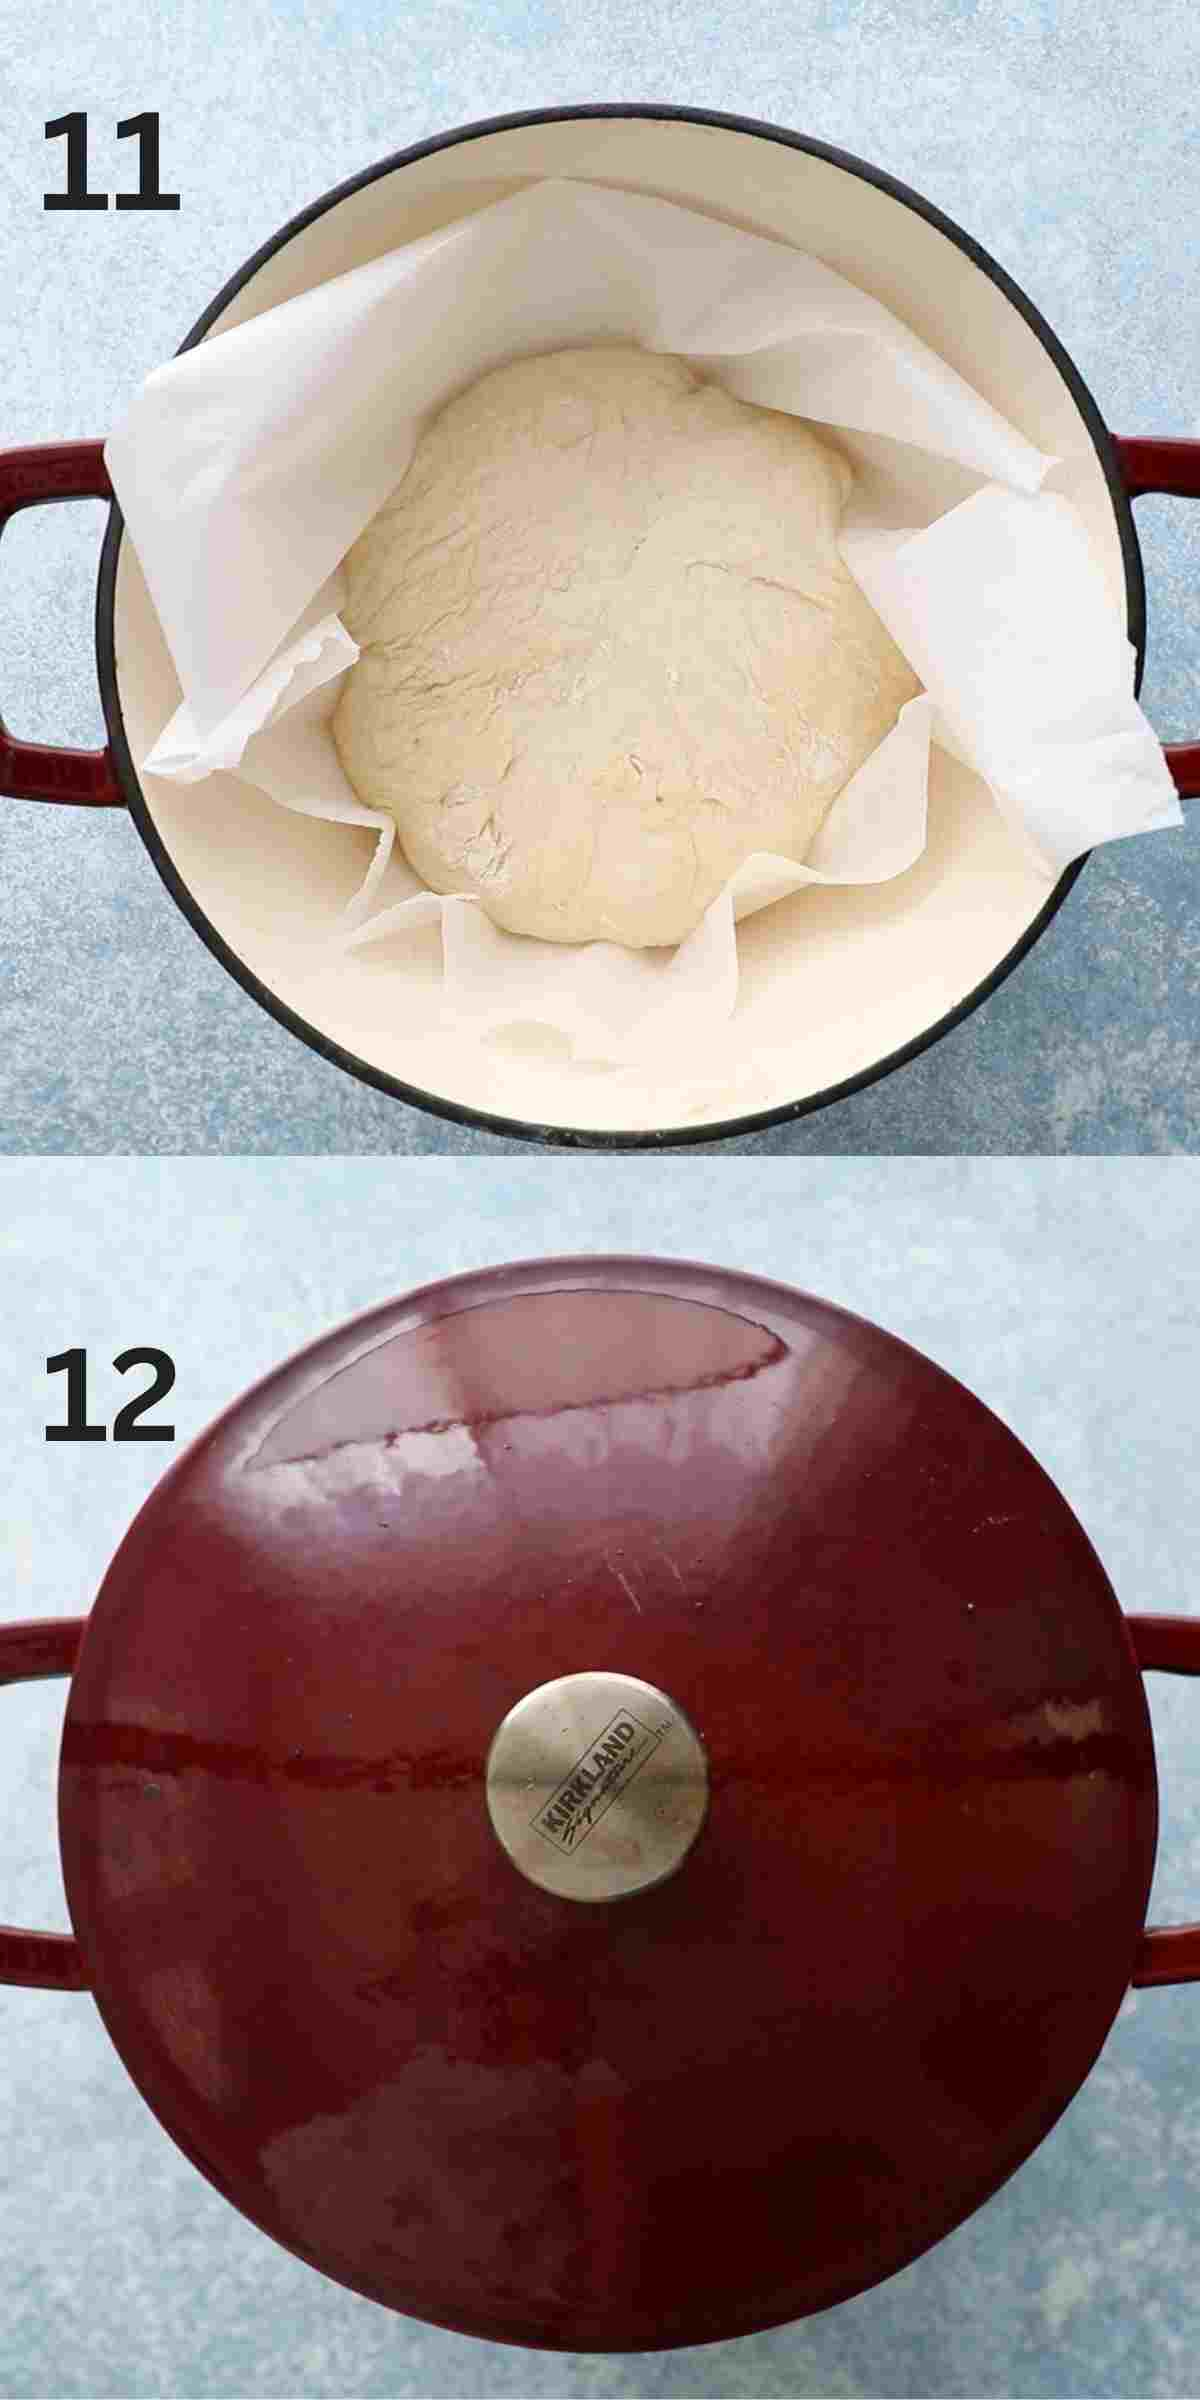
10. After 15 minutes, adjust oven rack to the lower third position, place a Dutch oven with a lid, and preheat to 450°F for 30 minutes. When 30 minutes are elapsed, remove the piping hot Dutch oven from the oven, place it on a rack and open the lid. Transfer the dough, along with the paper, into the pot.
Tip: Hot oven results in more rise! Cranking up the heat maximizes the initial lift in the yeasted Dutch oven bread, resulting in a higher rise.
Pro tip: Score the dough for a more artisanal look! Using a sharp serrated knife or single-edge razor blade, make a 6-inch long, ½-inch deep slash along the top of the dough, before placing it in the Dutch oven.
11 & 12. Place the lid back on and bake for 30 minutes covered. Uncover and then continue baking for 15 to 20 minutes or the top looks deep brown and crispy.
Want To Save This Recipe?
How to serve?
Dutch oven bread is best eaten the day it's made, slathered with salted softened butter. It is perfect to make into sandwiches, dunked into soups, make into garlic bread, perfect to mop up arrabbiata sauce or just snack plain! It's that good!
How to store?
- At room temperature: Wrap cooled dutch oven bread in double layer of plastic wrap will last for up to 2 days.
- Freezer: Wrap bread in a layer of plastic wrap, and then in a sealed zip lock bag and freeze for up to 3 months. Leave overnight at room temperature to thaw.
Pro tip: To recrisp crust, place unwrapped dutch oven bread in a pre heated 450 degree oven for 6 to 8 minutes.
Helpful tips
- Overnight rise – Rise dough per recipe, then leave in bowl and refrigerate up to 2 days. Shape into round and place on paper per recipe, then leave for 30 to 60 minutes to take the chill out of it, then bake per recipe. Cold dough won’t rise as well.
- Use bread flour - Bread flour will give a chewy, fluffy texture like bakery Artisan bread because it has higher protein.
- Yeast - Use yeast labeled “instant”, “rapid rise” or “active dry yeast”.
- Water temperature – Ideal temperature is 110 to 115 degrees. A simple trick to check, is to drop a few drops of water on your inside wrist. No hot or cold sensations? You're good to go!
- Pot size does not matter as long as it’s about 10 inches or larger. Pot acts as a steamer and does not shape the Dutch oven bread.
Recipe FAQs
No-knead Dutch oven bread is a fantastic choice for those who value both ease and flavor, thanks to its simplicity and delicious results. However there are some pros and cons with this method.
The pros of a no-knead bread is that requires no kneading, reducing hands on time and also you don't knead any special appliances like a stand mixer. The Dutch oven method creates a well-steamed environment, resulting in a crispy crust and airy crumb.
The cons include needing a heavy-duty Dutch oven, which might be available to everyone. The no-knead dough is quite sticky and wet, making it challenging to handle and shape, especially for beginners. Additionally, you must be cautious when dealing with a very hot oven and Dutch oven.
Prepare bread as instructed. Preheat oven with a 9-inch metal baking pan and a loaf pan (glass may shatter) for 30 minutes. Meanwhile have some water boiling in a kettle.
Place the risen loaf in the 9-inch metal baking pan and immediately transfer it into the hot oven. Pour some boiling hot water into the empty loaf pan (this creates a steamy environment). Bake until deep golden in color.
Your Dutch oven bread turned out dense instead of light and airy, which could be due to any of the following reasons:
1. The dough didn’t rise enough, which can result in a dense loaf.
2. Using a high protein flour or whole wheat flour instead of all purpose flour.
3. Incorrect measurement of flour or water.
4. The yeast is either expired or not properly activated, which will not produce enough gas, leading to a dense loaf.
5. If the dough hasn't risen long enough, it might not have developed enough air bubbles for a light texture.
More dinner recipes


Dutch Oven Bread
Equipment
Ingredients
- 3 ¼ cups all purpose flour addional flour for dusting
- 2 teaspoons yeast
- 2 teaspoons salt
- 1 teaspoon sugar
- 1 ½ cups luke warm water (you might need an addional
Instructions
Dough
- Mix flour, yeast, salt and sugar in a large bowl.
- Add water, then use a wooden spoon to mix until all the flour is incorporated. Dough will be wet and shaggy.Tip: Yeast gets activated with water that is heated to 110 to 115 degrees Fahrenheit. Any hotter than 135 degrees will kill the yeast and cooler water will not help activate the yeast.
Rise
- Cover the bowl with a plastic wrap and then wrap tightly with a kitchen towel. Let rise in a warm area for about 2 hours or doubled in volume. Overnight method - Refrigerate 12 to 18 hours for better flavor, before proceeding on to the next step.
Shape dough
- Sprinkle work surface with some flour. Using a greased rubber spatula, scrape dough out of bowl onto the floured surface. Sprinkle top with ½ tablespoon flour.
- Using the rubber spatula, fold the sides inwards (about 6 folds) to roughly form a roundish shape. Don’t be too meticulous here. Rougher edges results in a rustic loaf!Pro tip: Turn the dough and not punch!
- Slide a large piece of parchment paper ( I like to spary of coating of cooking spray on the parchment paper) next to the dough, then flip the dough onto the middle of the paper. Hold the four corners of the paper and place it in a large bowl or pot (along with the parchment) and wrap the bowl or pot with kitchen towel. Let rise for 15 minutes.
Baking
- After 15 minutes, place an empty dutch oven with lid, on the lower third of the oven. Preheat to 450°F for 30 minutes.
- When 30 minutes is elapsed, remove the piping hot dutch oven from oven, and place it on a rack and open the lid. Transfer the dough, along with the paper into the pot. Place the lid back on and bake for 30 minutes covered. Tip: Be careful when working with the hot pot!Pro tip: Score the dough for a more artisanal look! Using a sharp serrated knife or single-edge razor blade, make a 6-inch long, ½-inch deep slash along the top of the dough, before placing it in the Dutch oven.
- Uncover and then continue baking for 15 to 20 minutes or the top looks deep brown crispy. Place pan on a wire rack to cool completely before slicing.
Notes
Nutrition
Nutritional information, based on third-party calculations, should be seen as estimates, not guarantees, as various factors like product types, brands, processing methods, and more can alter the nutritional content in recipes.
Did you make this recipe? I’d love your feedback! Please let me know by leaving a comment, a star rating or review below.
All contents and images are my original work, unless and otherwise mentioned. Please do not use my recipes or images without linking back to www.kitchenathoskins.com. If you wish to republish a recipe, please rewrite in your own words and don’t forget to include a link back to the original recipe.
Some of the links above are affiliate links, which pay me a small commission for my referral at no extra cost to you! I am a participant in the Amazon Services LLC Associates Program, an affiliate advertising program designed to provide a means for us to earn fees by linking to Amazon.com and affiliated sites. Thank you for supporting kitchenathoskins.com.


Christina
Hi. When would you incorporate the olives? C
Maria Doss
Hi Christina, You can add the olives between steps 1 and 2 - After mixing the dry ingredients, toss in the olives, then add the water and proceed with step 2. Hope this helps! - Maria