

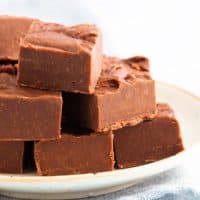
This Chocolate Peanut Butter Fudge is an easy homemade fudge recipe! Made using condensed milk, it can be easily made in the microwave or on the stovetop.
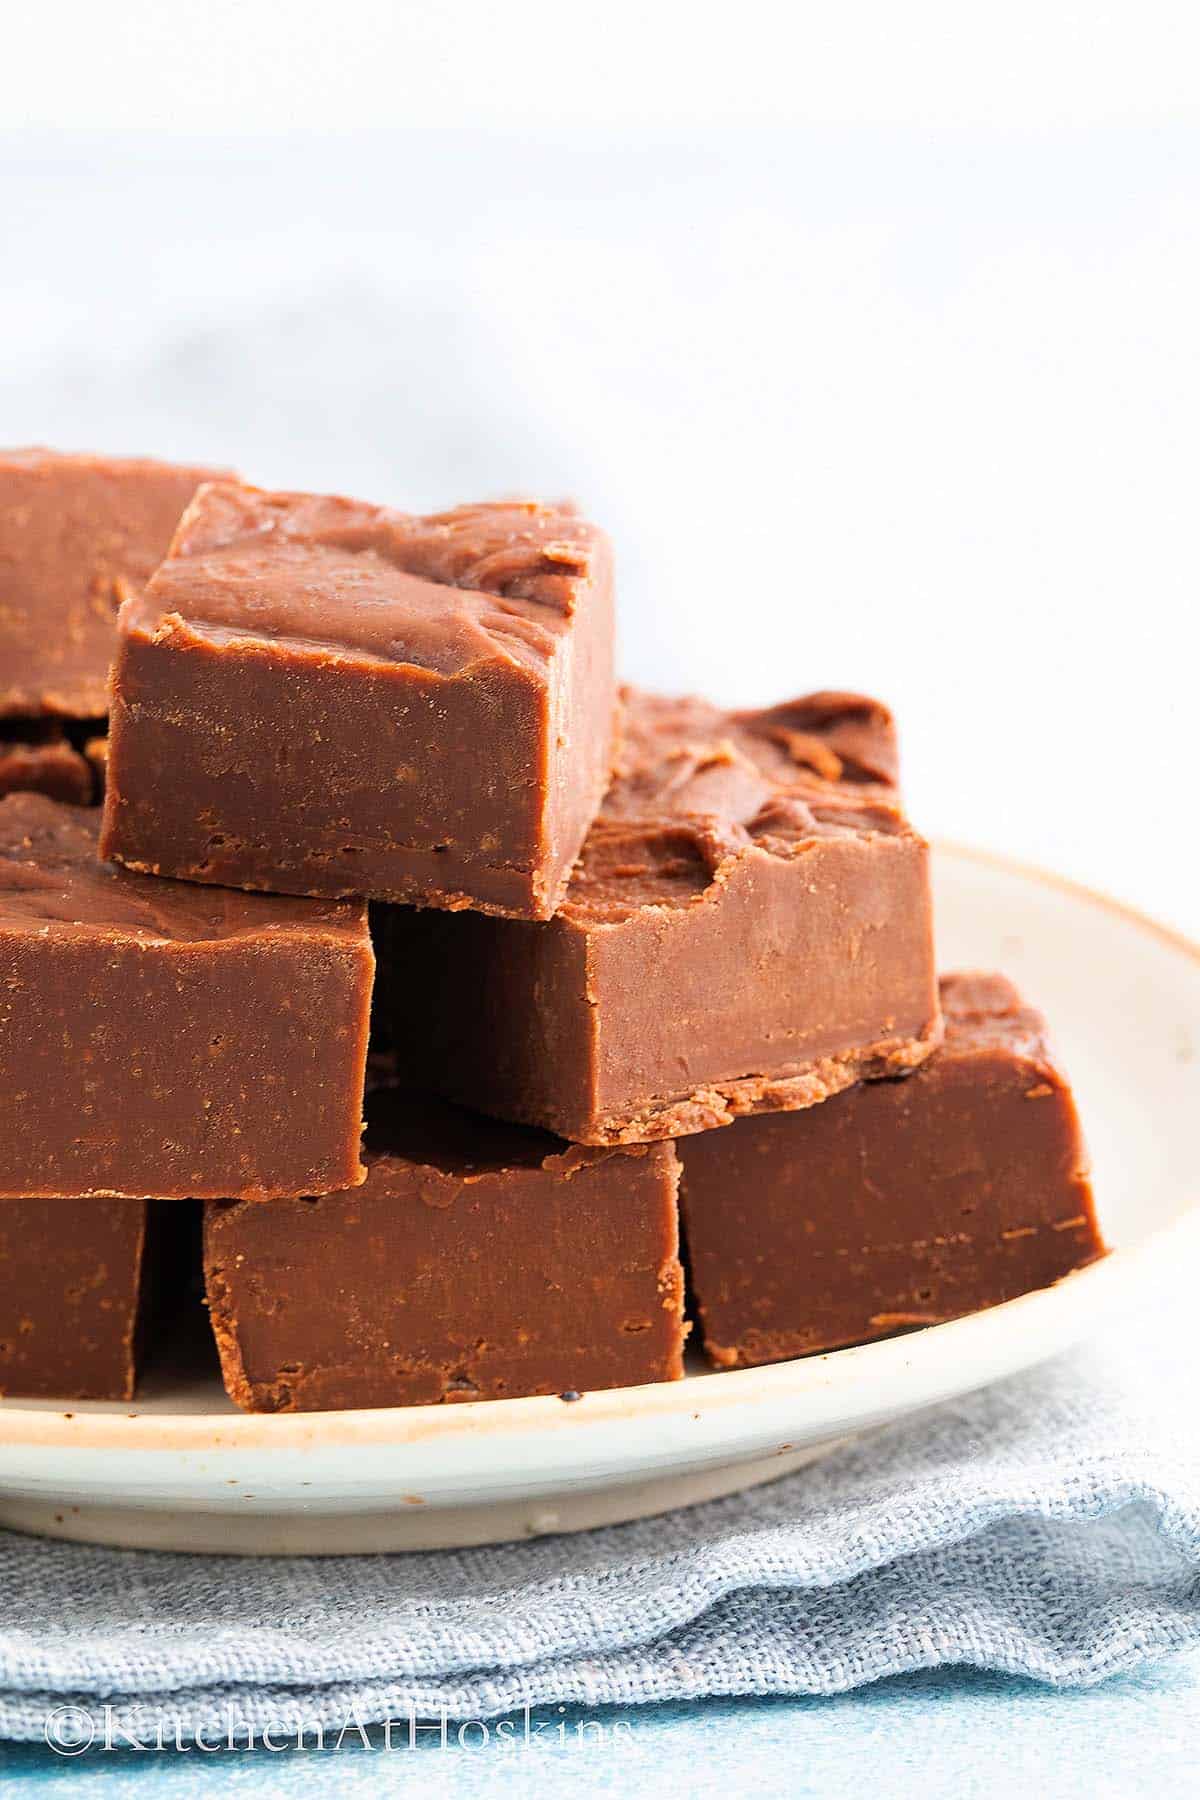
Unlike traditional old-fashioned fudge, this easy microwave recipe skips the candy thermometer and tricky sugar syrup. It’s quick and easy to make on the stovetop or in the microwave—and the result is irresistibly smooth, creamy, and melt-in-your-mouth delicious!
Jump to:
- Ingredients you'll need to make peanut butter fudge at home
- Chocolate Peanut Butter Fudge
- Substitutions & Variations
- How to make chocolate peanut butter fudge in the microwave?
- Best pans to set the homemade fudge
- Stovetop Method
- Frequently asked questions
- Tips for Success
- More peanut butter and chocolate recipes
Ingredients you'll need to make peanut butter fudge at home
Scroll down to the recipe card below for full information on ingredients and amounts.
- Peanut Butter - For best results, use a smooth, no-stir peanut butter like Jif or Skippy. These commercial varieties ensure a consistent texture and flavor, unlike natural peanut butter which tends to separate and can cause the pb fudge to become greasy or gritty.
- Chocolate Chips - Semi-sweet chocolate chips are perfect for this recipe—they melt smoothly and quickly in the microwave. I prefer using Ghiradelli semi sweet chocolate chips! Nestle brand semis weet chocolate tends to be more sweeter and makes the peanut butter fudge slightly more sweet.
- Sweetened Condensed Milk - A 14-ounce can of sweetened condensed milk is the magic behind this easy chocolate fudge.
- Flavorings - A splash of vanilla extract and a pinch of salt enhances the sweetness.
Chocolate Peanut Butter Fudge
Equipment
Ingredients
- 1 cup semi sweet chocolate chips I recommend Ghiradelli
- 1 can sweetened condensed milk 14 ounce
- ¾ cup creamy peanut butter
- 1 teaspoon vanilla extract
- salt, as desired
Instructions
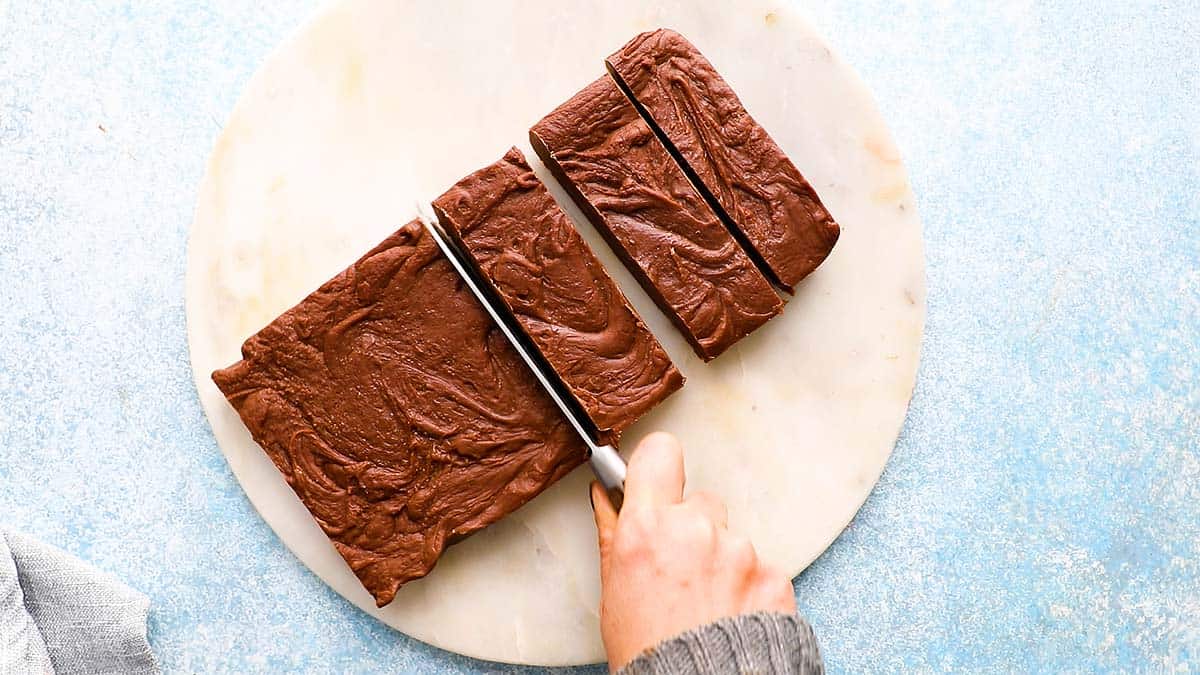
- Line a standard loaf pan or a 8-inch square pan with parchment paper, so that covers the bottom and sides of the pan. Tip: Loaf pan keeps the squares on the thicker side whereas a 8-inch square pan will be yield thinner pieces. However, I don't recommend using a 9-inch square pan, because it might make the candy to thin.
Microwave method
- Add chocolate chips, sweetened condensed milk and peanut butter into a large microwave safe bowl. Microwave for 50 to 80 seconds, stirring every 20 seconds, until it has melted and smooth.
- Stir in vanilla extract and immediately transfer mixture into the prepared loaf pan, smooth top and sprinkle sea salt on top. Refrigerate for at least 6 hours or until firm.
Stovetop method
- In a medium sauce pan, bring 1 cup of water to simmering over low heat. Place a glass bowl on top of the pot so it rests above the simmering water, but doesn't touch it.
- Add the chocolate chips, peanut butter and condensed milk into the bowl and allow the steam to heat the bowl and melt everything. Stir occasionally until completely melted and smooth.
- Once melted, remove the bowl from the pot and stir in vanilla extract. Immediately transfer mixture into the prepared loaf pan, smooth top, sprinkle some salt on top and refrigerate for at least 6 hours or until firm.
- Cut into pieaces while it's still cold, right out of the fridge and store in an air tight container in the refrigerator.
Notes
Nutrition
Nutritional information, based on third-party calculations, should be seen as estimates, not guarantees, as various factors like product types, brands, processing methods, and more can alter the nutritional content in recipes.
Substitutions & Variations
- Make a swirl - To create a marbled effect, melt chocolate and condensed milk together and spread into the pan. Add dollops of peanut butter on top and swirl it in using a butter knife, like in marbled sheet pan pancakes.
- Add nuts - Add chopped nuts like roasted peanuts, walnuts, or pecans into the fudge mixture for a crunchy texture.
- Peanut butter cups - Place chopped chunks of peanut butter cups on top of the fudge mixture, before it sets and gently press it in to adhere for added visual interest and texture. Have more peanut butter cups? Use them to make these adorable Easter nests.
- Salted caramel - Drizzle a layer of salted caramel sauce on top of the fudge before it sets.
- S'mores - Place mini marshmallows and crushed graham crackers on top before it sets.
- Peanut and jelly - Swirl in a layer of jelly or jam to create a beautiful pattern.
- Rocky road - Press mini marshmallows and chopped nuts to create a rocky road-inspired fudge.
- White chocolate - Create a marbled effect by swirling melted white chocolate through the chocolate fudge mixture before it sets.
- Not a fan of peanut butter? Use almond butter instead.
How to make chocolate peanut butter fudge in the microwave?
Scroll down to the recipe card below for full information on ingredients and amounts.

1.Add chocolate chips, sweetened condensed milk and peanut butter into a microwave safe bowl.
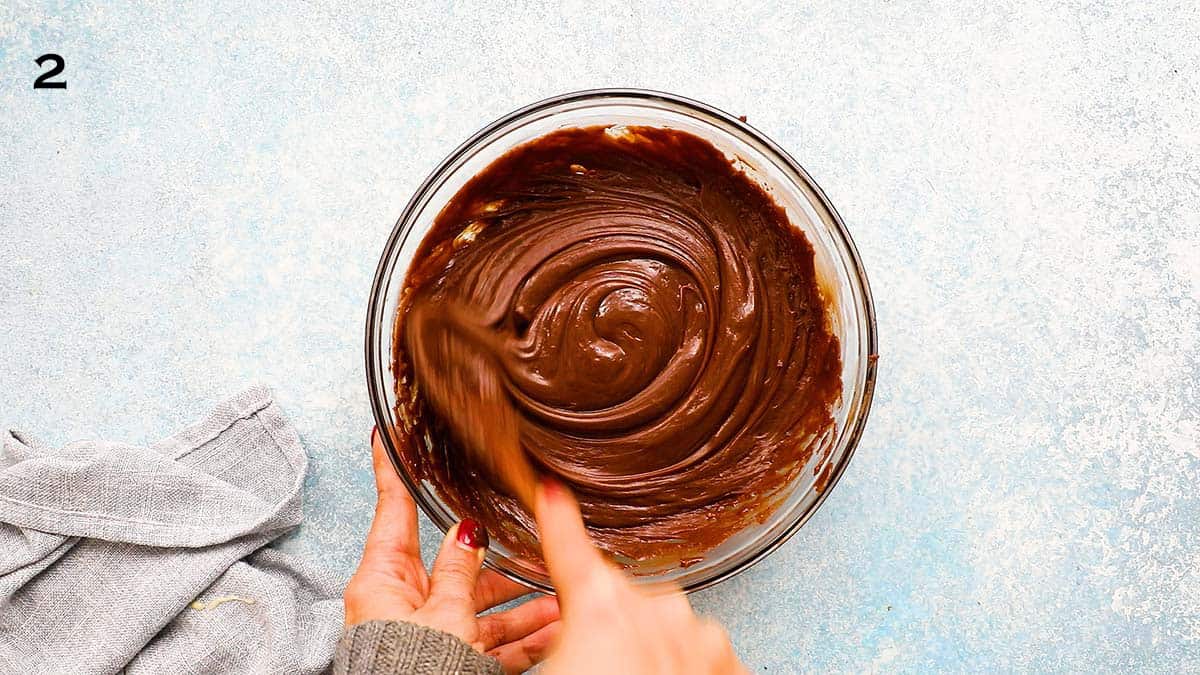
2. Microwave for 50 to 80 seconds, stirring every 20 seconds, until it is melted and smooth. Stir in vanilla extract.
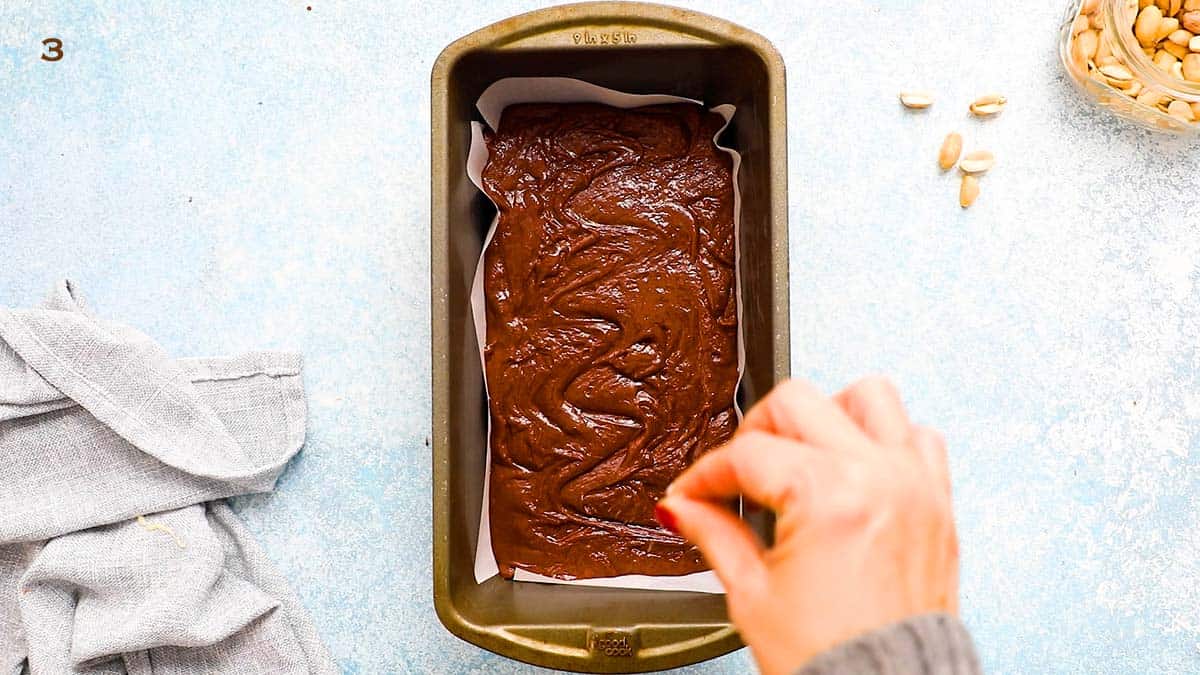
3. Immediately transfer mixture into the parchment lined loaf pan, smooth top and sprinkle some sea salt on top. Refrigerate for at least 6 hours or until firm.
Want To Save This Recipe?
Best pans to set the homemade fudge
I recommend using a 9.5 x 5 Inch standard loaf pan , which keeps the fudge squares on the thicker side. A 8-inch square pan will work, but the chocolate & peanut butter fudge squares will be thinner. However, I don't recommend using a 9-inch square baking pan, because it might make the candy to thin. Whichever size you use, line the pan with parchment paper so you can easily lift the whole block out of the pan after it sets.
Stovetop Method
1. In a medium sauce pan, bring 1 cup of water to simmering over low heat.
2. Place a glass bowl on top of the pot so it rests above the simmering water, but doesn't touch it.
3. Add the chocolate chips, peanut butter and condensed milk into the bowl and allow the steam to heat the bowl and melt everything. Stir occasionally until completely melted and smooth.
4. Once melted, remove the bowl from the pot and stir in vanilla extract and salt.
5. Immediately transfer mixture into the prepared loaf pan, smooth top and chill.
Frequently asked questions
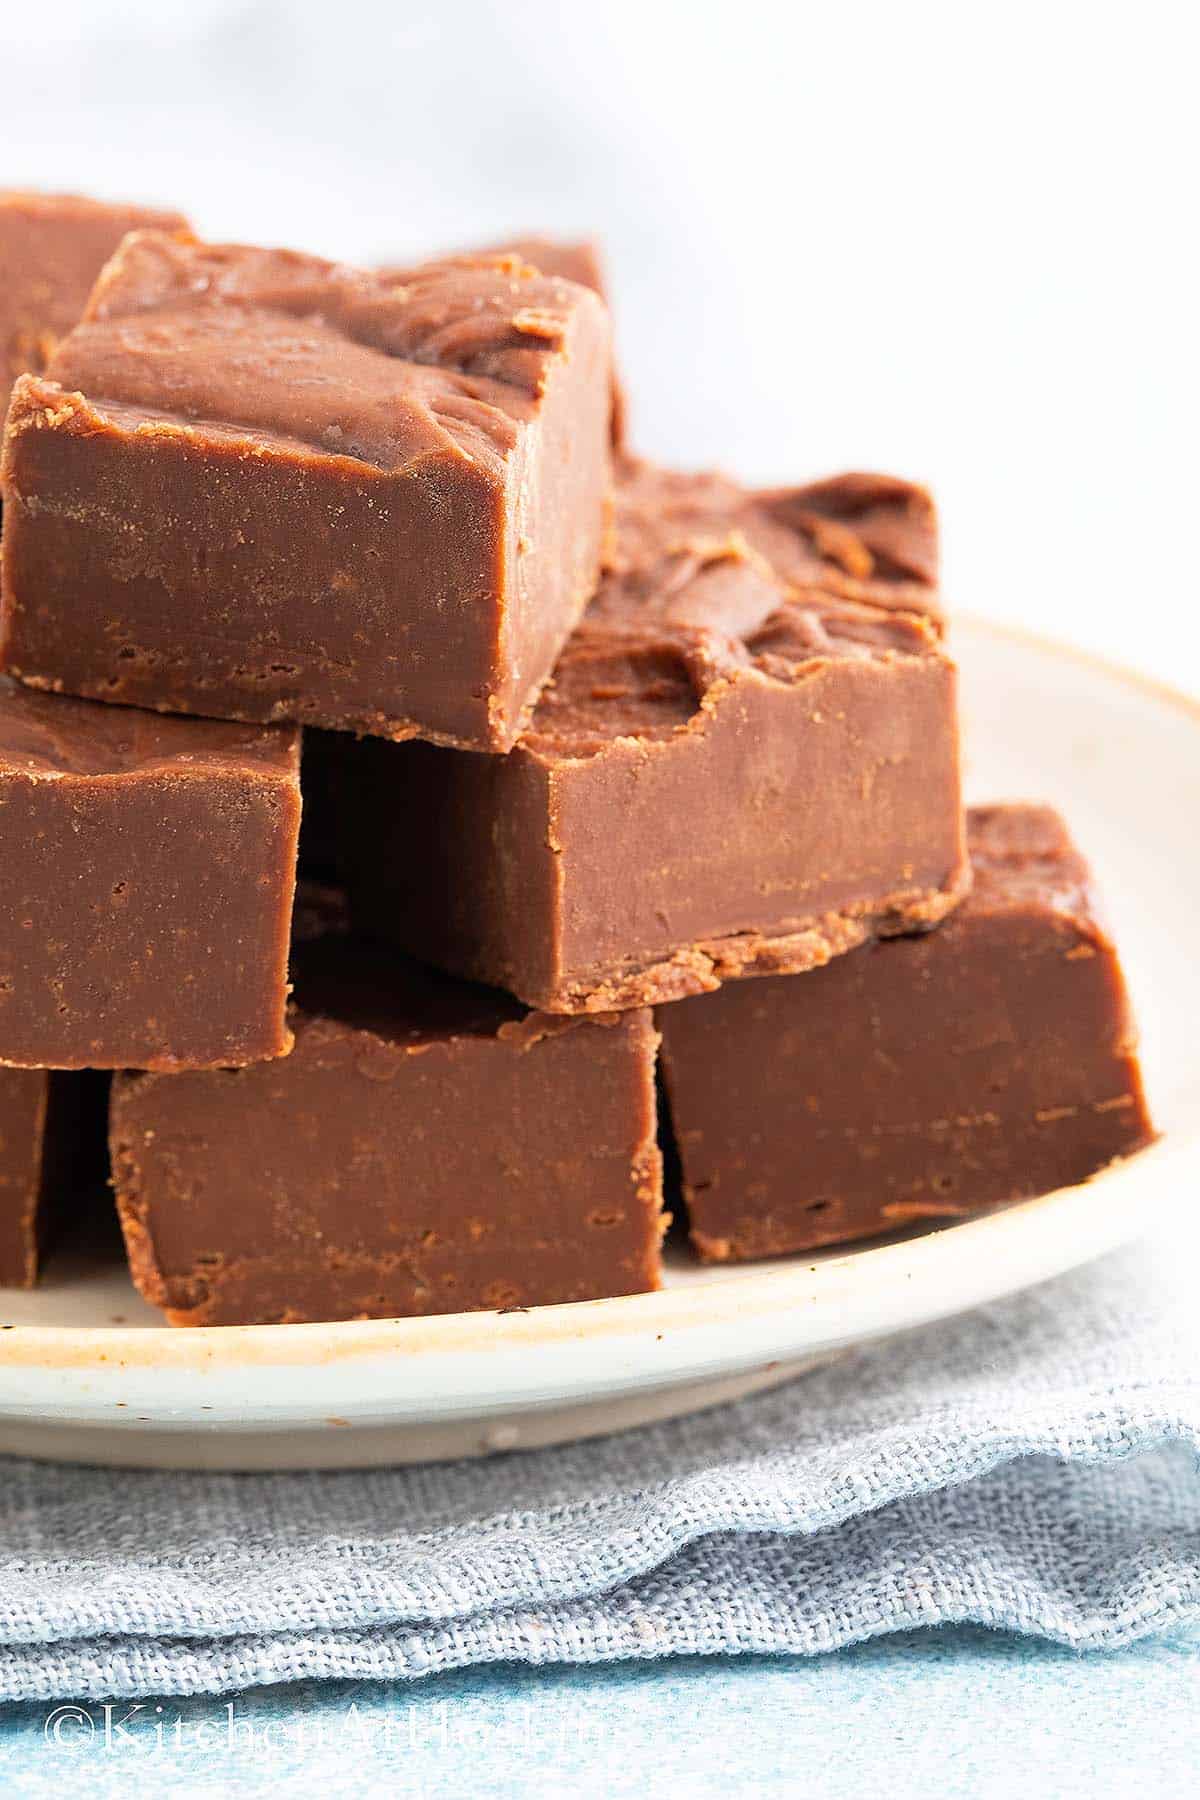
One batch of this rich pb fudge goes a long way—yielding about 32 pieces in an 8-inch square pan, or 16 pieces if made in a loaf pan. Since it’s quite indulgent, a little goes a long way!
Refrigerator: Store cut PB fudge in an airtight container in the fridge for up to 1 week. Keep the pieces separated with parchment paper to prevent sticking.
Freezer: For longer storage, you can freeze the entire block. Wrap it tightly in plastic wrap, then place it in a freezer-safe zip-top bag. When ready to enjoy, thaw overnight in the fridge and slice while still cold for clean cuts.
Yes, it’s best to store it in an airtight container in the refrigerator, where it will stay fresh for up to one month.
If your home stays cool—like during winter—you can also keep it at room temperature for up to a week. However, in warmer climates or summer months, refrigeration is recommended to prevent the fudge from softening or melting and to preserve its texture.
Even when the pan is greased, fudge can still stick once it sets, making it difficult to remove or cut into clean slices—especially if you’re planning to gift it. For best results, line the bottom and sides of the pan with parchment paper. This ensures easy removal and neat, professional-looking pieces every time.
Absolutely! This fudge recipe is very customizable, and adding mix-ins is a great way to enhance both texture and flavor. Here are a few easy and delicious ideas:
Chopped nuts: Stir in roasted peanuts, walnuts, or pecans for a satisfying crunch.
Peanut butter cups: Sprinkle chopped peanut butter cups over the fudge before it sets, then gently press them in for extra texture and visual appeal.
S’mores-style: Add mini marshmallows and crushed graham crackers on top before the fudge sets.
Rocky road fudge: Stir in mini marshmallows and chopped nuts for a classic rocky road–inspired twist.
These mix-ins make the fudge even more fun, festive, and perfect for gifting or sharing.
For best results, use a smooth, no-stir peanut butter like Jif or Skippy. These commercial varieties provide a consistent texture and flavor, while natural-style peanut butter tends to separate and can make peanut butter fudge greasy or gritty.
Yes—this recipe is perfect for holiday prep! You can make the fudge in advance, cut it into pieces, and store it in an airtight container in the refrigerator for up to 1 week. Be sure to separate the layers with parchment paper to prevent sticking.
For longer storage, freeze the fudge as a whole slab. Wrap it tightly in plastic wrap, then place it in a freezer-safe zip-top bag. When you’re ready to serve, thaw it overnight in the fridge and slice while it’s still cold for clean, neat cuts.
For gifting, I love placing each square in festive cupcake liners or wrapping them in parchment paper—it keeps things tidy and makes the fudge look extra special.
Tips for Success
- Customize the thickness: Want thick, chunky pieces? Use a loaf pan. Prefer thinner squares? Go with an 8-inch square pan for a more classic fudge size.
- Line your pan: Always line your pan with parchment paper, leaving an overhang. This makes it super easy to lift the fudge out in one piece for slicing.
- Use high-quality chocolate: For the best flavor and texture, choose good-quality chocolate chips. I recommend Ghirardelli semi-sweet chips. Brands like Nestlé Toll House can make the fudge much sweeter than intended.
- Chill before serving: Store in the refrigerator until you’re ready to serve. This keeps it firm and easy to slice cleanly.
More peanut butter and chocolate recipes


I hope you love this delicious and easy recipe – be sure to give it a review below! Also don’t forget to follow Kitchen at Hoskins on TikTok, Facebook, Instagram, Pinterest, and YouTube!
Bobbi
This recipe call for only 1 cup of Chocolate Chips but all the others I’ve looked at call for 3 cups. Is 1 cup actually enough?
Maria Doss
Hi Bobbi,
A single cup serves as the ideal measurement, effectively balancing the sweetness when paired with condensed milk, which is inherently very sweet. More chocolate chips with added sugar would result in an overly sugary fudge. Hope it helps, Maria
Jessica
Can I make this recipe on the stove instead of in the microwave?
Maria Doss
Absolutely - Here are the steps:
1. In a medium sauce pan, bring 1 cup of water to simmering over low heat.
2. Place a glass bowl on top of the pot so it rests above the simmering water, but doesn't touch it.
3. Add the chocolate chips, peanut butter and condensed milk into the bowl and allow the steam to heat the bowl and melt everything. Stir occasionally until completely melted and smooth.
4. Once melted, remove the bowl from the pot and stir in vanilla extract and immediately transfer mixture into the prepared loaf pan. Proceed as with the remaining part of the recipe.
- Maria