
Homemade Apple Galette with Pie Crust is an easy apple pie with half the effort and all the flavor! This rustic apple dessert has a buttery, flaky crust and a perfectly spiced apple filling — perfect for Thanksgiving and the holidays!
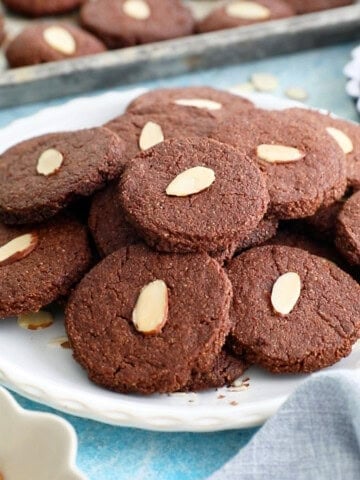
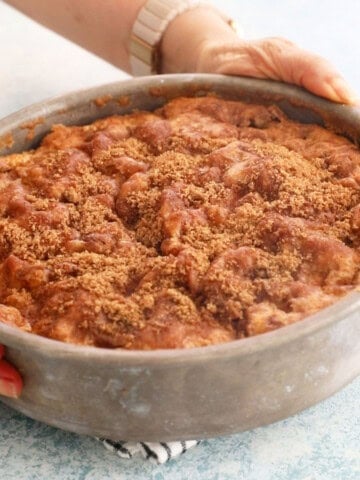
If you are looking for more delicious pies, try our apple cranberry hand pies or the sweet potato pie next!

Why You'll Love This Apple Galette

If making a traditional apple pie feels intimidating, an apple galette is the perfect place to start! It’s essentially a free-form apple pie that’s much easier to put together, with no pie plate or perfect crimped edges to worry about, like our apple hand pies.
My apple galette features a flaky, buttery homemade pie crust filled with tender apple slices tossed in brown sugar and warm cinnamon. You can also use store-bought pie crust to make things even easier. Serve it warm with a scoop of vanilla ice cream, and you have one seriously delicious fall dessert!
-maria doss
Jump to:
You can make galettes with either puff pastry or pie crust, but I prefer pie crust for this apple galette. Apples release a lot of moisture as they bake, and pie dough creates a sturdier base that holds up well to the juicy filling and bakes into a tender, flaky crust. Puff pastry has delicate, airy layers that can struggle to stay crisp under a moist fruit filling.
One of my favorite things about galettes is how much easier they are to make than traditional pies. There’s no pie plate to fuss with or perfectly crimped edges to worry about—just fold the crust around the fruit and bake! If you’re planning your Thanksgiving desserts, try my persimmon galette too. It’s another delicious way to enjoy seasonal fruit.
Tips for Success
- Storage: Keep any leftover apple galette in an airtight container at room temperature for up to 1 day, or refrigerate for up to 3 days.
- Reheating: While the galette is delicious chilled, you can refresh it in a 300°F oven for 5–10 minutes before serving.
- Apple types: Use Gala, Fuji, Golden Delicious, Honeycrisp, or Granny Smith apples. You can also mix two varieties for a more flavorful and textured filling.
- Pie crust: I use my favorite all-butter pie crust recipe, but you can also use your homemade dough or a store-bought crust like Pillsbury.
Apple Galette FAQ'S
The key to a crisp, flaky apple galette is managing the moisture from the apples while helping the bottom crust bake properly. Here are a few simple tips to help prevent a soggy bottom.
1. Drain excess apple juices – Toss the sliced apples with sugar and spices, then let them sit for 10 to 15 minutes. The sugar draws out some of the apples’ natural juices, so drain off the excess liquid before arranging the apples on the crust. This helps keep too much moisture from soaking into the dough as it bakes.
2. Add a thickener – Toss the apple slices with a little cornstarch along with the sugar and spices. As the galette bakes, the cornstarch thickens the juices released by the apples, helping create a luscious filling without leaving the bottom crust swimming in liquid.
3. Bake in the lower third of the oven – Position the galette in the lower third of your oven rather than the center. This brings the bottom crust closer to the heat source, helping it bake through and turn golden.
4. Choose pie crust over puff pastry – For this apple galette, I prefer pie crust because it creates a sturdier base that holds up well to the juicy apple filling. It bakes into a tender, flaky crust without being weighed down as easily by the fruit’s moisture.
5. Keep the pie crust cold – After rolling out the dough, place it in the refrigerator while you prepare the apples. Cold dough helps the butter stay firm, which helps develop a flaky crust and helps the galette hold its shape as it bakes.
Can I Make an Apple Galette With Premade Pie Crust?
Absolutely! While I prefer my homemade butter pie crust for its rich flavor and flaky, tender texture, store-bought pie crust works well, too. It’s a great shortcut when you want a homemade apple galette without the extra prep.
You’ll need just one sheet of store-bought pie crust for this recipe. Simply roll it out if needed, add the apple filling, fold the edges over, and bake until golden and flaky!
Both apple pie and apple galette feature tender, cinnamon-spiced apples wrapped in buttery pastry, but the way they’re assembled and baked is quite different. Apple pie is structured and baked in a pie dish, while an apple galette is a rustic, free-form dessert that’s much easier to put together.
Here are the main differences:
1. Baking dish – Apple pie is baked in a pie dish, which gives it its familiar shape and holds the filling in place. A galette is baked flat on a standard baking sheet, with the edges of the dough folded casually over the fruit.
2. Crust-to-fruit ratio – Apple pie typically has a deeper layer of filling enclosed in pastry, often with a top crust as well. A galette has a shallower layer of apples, giving you a lovely balance of tender fruit and crisp, buttery crust in every bite.
3. Ease of preparation – Apple pie usually requires a little more attention to shaping the crust, crimping the edges, and adding a top crust or vents. A galette is much more forgiving: simply roll out the dough, arrange the apples in the center, and fold the edges over.
In short, apple pie is a great choice when you want a classic, neatly shaped dessert, while an apple galette is perfect when you want all those familiar apple pie flavors with less fuss. Its rustic look means that a few uneven folds or imperfect edges are part of the charm!
A rimmed half-sheet pan is ideal for baking an apple galette. I prefer a light-colored, uncoated baking sheet because it helps the crust bake evenly and develop a beautiful golden color without browning too quickly on the bottom.
I also recommend lining the pan with parchment paper. It prevents the galette from sticking and makes cleanup much easier, especially if any apple juices bubble out during baking.
Try to avoid dark-colored baking sheets, which absorb more heat and can cause the bottom crust to brown too quickly before the galette is fully baked.
Peeling the apples is entirely up to you, but I recommend it for the best texture. Without the skins, the apples soften more evenly as they bake, giving you a tender filling without any chewy bits of peel.
If you prefer to leave the skins on, that works, too! They add color, retain more of the apples’ nutrients, and save you some prep time. Keep in mind that the skins can stay slightly chewy after baking, and the apple slices may not be as tender or uniform.
Apple galette is delicious warm, at room temperature, or even chilled. On its own, it’s a simple, rustic treat, but a scoop of vanilla ice cream or a drizzle of caramel sauce takes it to the next level. A dollop of whipped cream is also wonderful. This cozy dessert is perfect for Thanksgiving, the holidays, a weekend treat, or even a sweet fall brunch.
More easy desserts with apples

Apple Galette with Pie Crust
Ingredients
- 1 (single crust) butter pie crust (click link for the recipe or use store-bought)
- 1 ½ pounds apples (680 gms) about 3 large
- ¼ cup packed light brown sugar (64 grams)
- 1 tablespoon lemon juice
- 2 teaspoons cornstarch
- 1 teaspoon ground cinnamon
- 1 teaspoon vanilla extract
- ¼ teaspoon salt
- ¼ teaspoon freshly grated nutmeg
- 1 egg (for egg wash)
- 1 tablespoon coarse or white granulated sugar
- vanilla icecream for serving
Instructions
- Prep. Take the pie crust out of the refrigerator and let it soften slightly for 10 to 15 mins, so it’s easier to roll. Line a large, rimmed baking sheet with parchment paper.
- Prep apples. Peel the apples, remove the cores, and slice them into ¼-inch thick pieces.
- Make filling. Place the sliced apples in a large bowl and add ¼ cup packed brown sugar, 1 tablespoon lemon juice, 2 teaspoon cornstarch, 1 teaspoon cinnamon, 1 teaspoon vanilla, ¼ teaspoon salt, and ¼ teaspoon nutmeg. Toss well until everything is evenly coated and the brown sugar starts to dissolve. Set aside for about 10 minutes while you roll out the pie crust and prepare the egg wash.

- Make egg wash. Beat the egg with a teaspoon of water in a small bowl.
- Preheat oven to 375°F (190°C).
- Roll the crust. On a lightly floured surface, roll out the pie dough into a 13-inch circle and gently transfer it to the prepared baking sheet. Check the crust for any small tears — if you find any, gently pinch or press them together to seal. This helps prevent the juices from leaking out while the galette bakes.
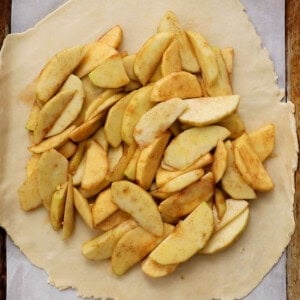
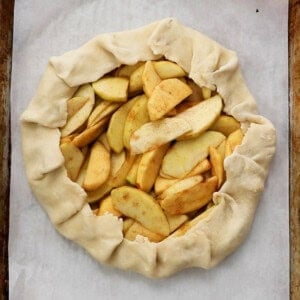
- Fill. Toss the apples to mix them again. Use a slotted spoon to lift the apples from the bowl, leaving the excess juices behind. Arrange the apples evenly in the center of the dough, leaving a 2-inch border around the edges. Reserve the remaining juice for later.
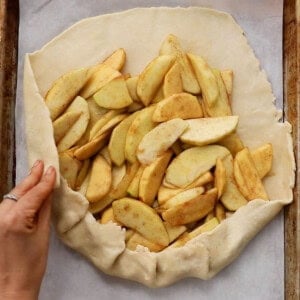
- Shape. Carefully lift one edge of the dough and fold about 2 inches over the apples. Continue folding around the galette, overlapping the dough every couple of inches. Gently pinch the pleats to hold them in place, but avoid pressing the dough into the fruit.
- Brush and Bake. Brush the exposed crust with the egg wash, then sprinkle it with coarse sugar. Bake for 50 minutes to 1 hour, or until the crust is a deep golden brown in color.
- Finish. Transfer the pan to a wire rack and brush the remaining apple juices over the baked crust, dabbing some over the apples as well.
- Serve. Serve the galette warm or at room temperature with vanilla ice cream, or enjoy the leftovers chilled straight from the fridge—it’s delicious either way.


Notes
Nutrition
Nutritional information, based on third-party calculations, should be seen as estimates, not guarantees, as various factors like product types, brands, processing methods, and more can alter the nutritional content in recipes.
How To Make An Apple Galette?
Scroll down to the recipe card below for full information on ingredients and amounts.


MADE THIS RECIPE AND LOVED IT? 💚 Please leave a ⭐️STAR rating and COMMENT below- I love to hear your feedback! Tag me with your creations on Instagram and find me on Facebook.
Hi, I’m Maria! I share easy, flavor-packed dinners, high-protein meals, and irresistible baking ideas. If you’ve ever asked, “Don’t know what to cook tonight?” you’re in the right place. And yes—there’s plenty here for breakfast, snacks, and dessert too. More about maria ->