These Halloween Bone Cookies are made without cookie cutters! It is an easy, unique cookie to make from scratch and is a fun baking project for kids to make and safe for humans. Recipe includes step-by-step photos!
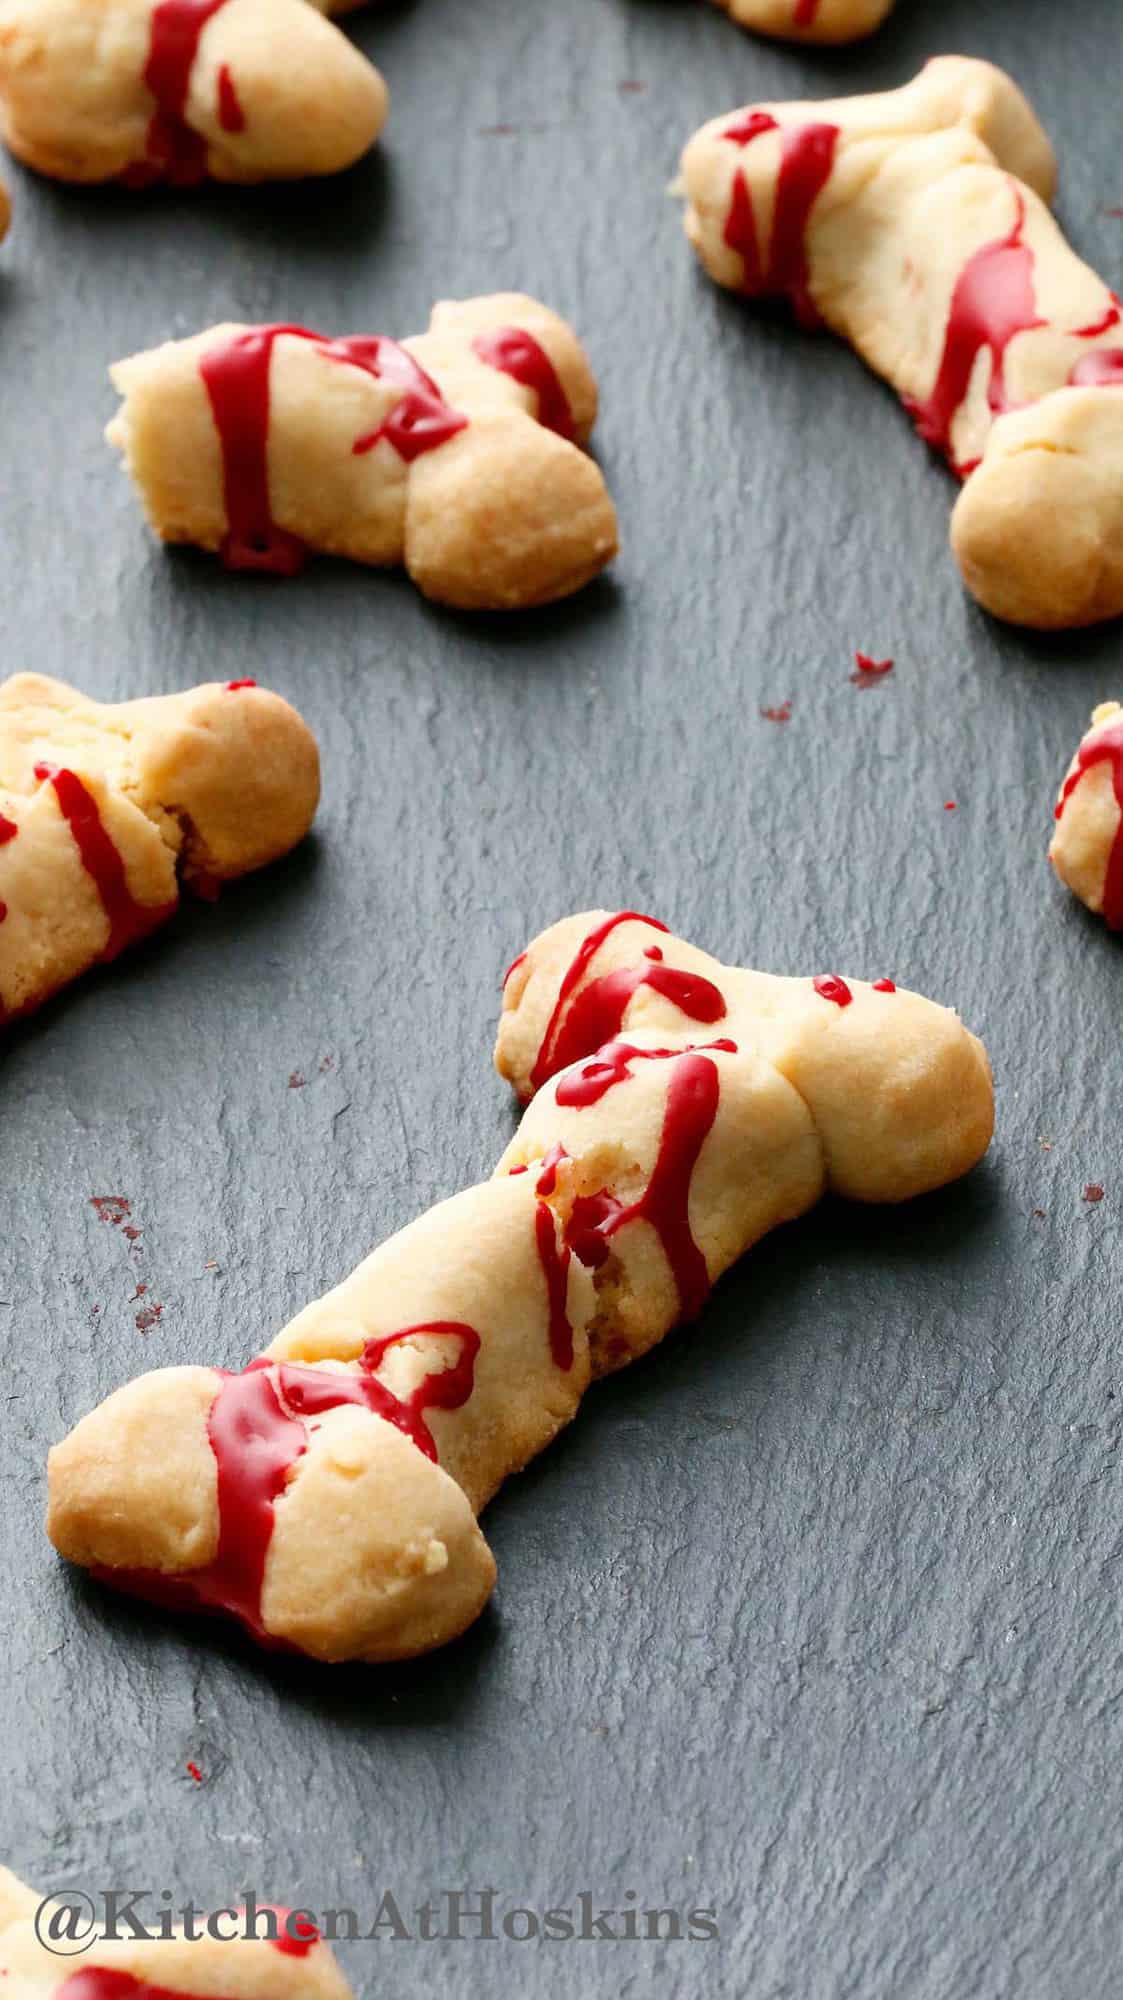
If you are familiar around here, then you might be aware of my love affair with the spooky Halloween season. The costumes, candies, haunted attractions, corn mazes, trick-or-treating are so much fun and the most favorite of all has got to be the unique Halloween foods.
I kick start this season with bloody biscuits. These are so much fun to make without eggs, don't need any special cookie cutters like the candle cookies and they are easy and safe for humans.
Bone biscuits are typically linked to our furry companions, but this recipe is a delightful twist: it's a basic shortbread cookie dough molded into bone shapes and baked to perfection. Designed for humans, these cookies are meant to be enjoyed by us, not our pets!
Jump to:
Why you'll love it?
- Fun for kids to make
- Eggless cookie
- No cookie cutter needed
- Creative and unique Halloween food idea
- Great make ahead recipe
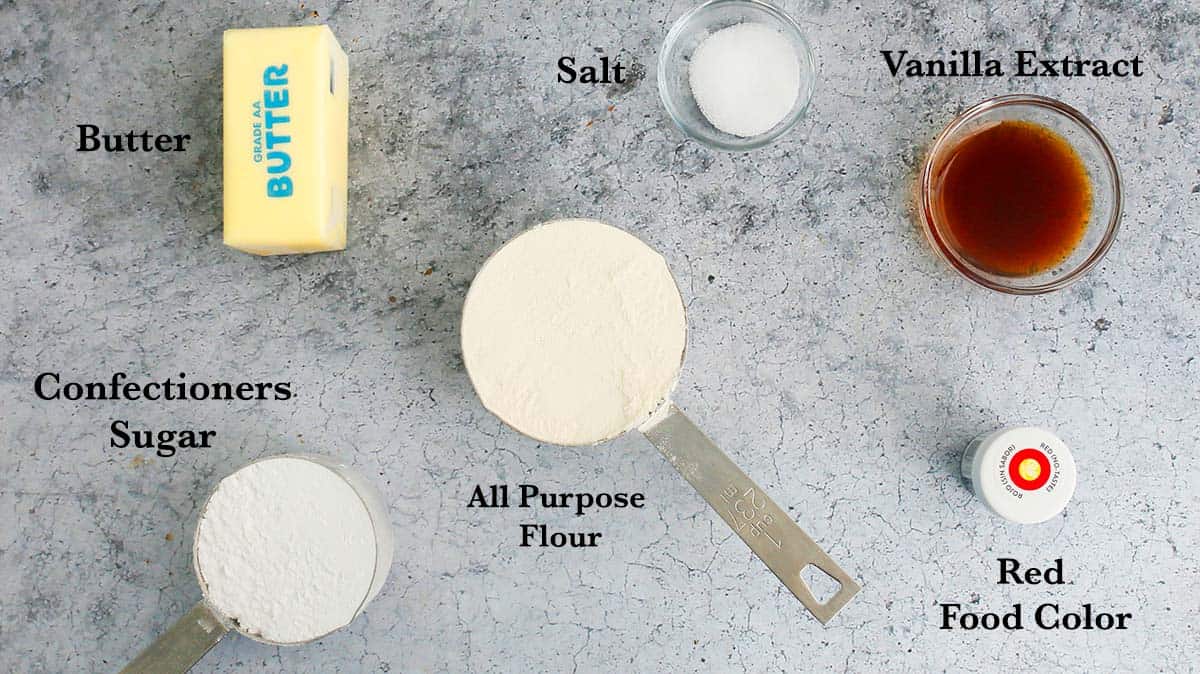
Ingredients
Scroll down to the recipe card below for full information on ingredients and amounts.
The ingredients for this recipe are pretty standard for a basic shortbread cookie. However, I’d like to highlight a few that you might have questions about:
- Butter -Use unsalted room temperature butter. Skip salt if using salted butter.
- Confectioners sugar - Confectioners' sugar contains a small amount of cornstarch, which contributes to a tender cookie texture compared to using regular sugar.
- Red food Color - It is important to use Gel food coloring. You can easily find red gel food coloring in most major US grocery stores, Michels, Joanns or Amazon.
🟥 Food coloring - I prefer using gel food coloring over liquid. While both options will work, liquid coloring requires a significant amount to achieve a deep, blood-like hue, which can make the icing too runny. I used Wilton's Red Gel.
How to make Halloween bone cookies?
You can find full printable recipe below, but here is a quick overview of the procedure along with step-by-step photos.
Want To Save This Recipe?
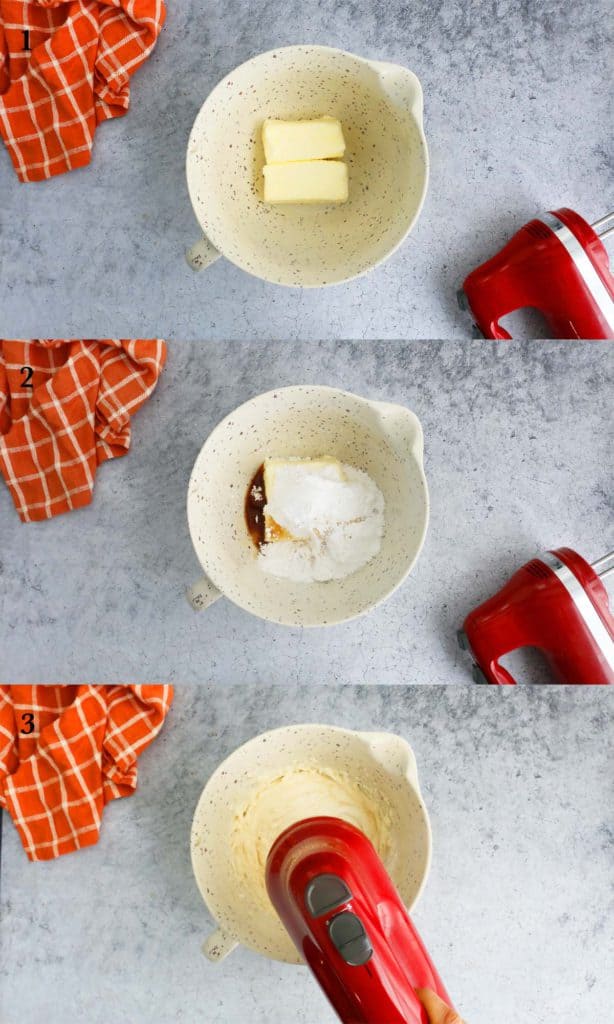
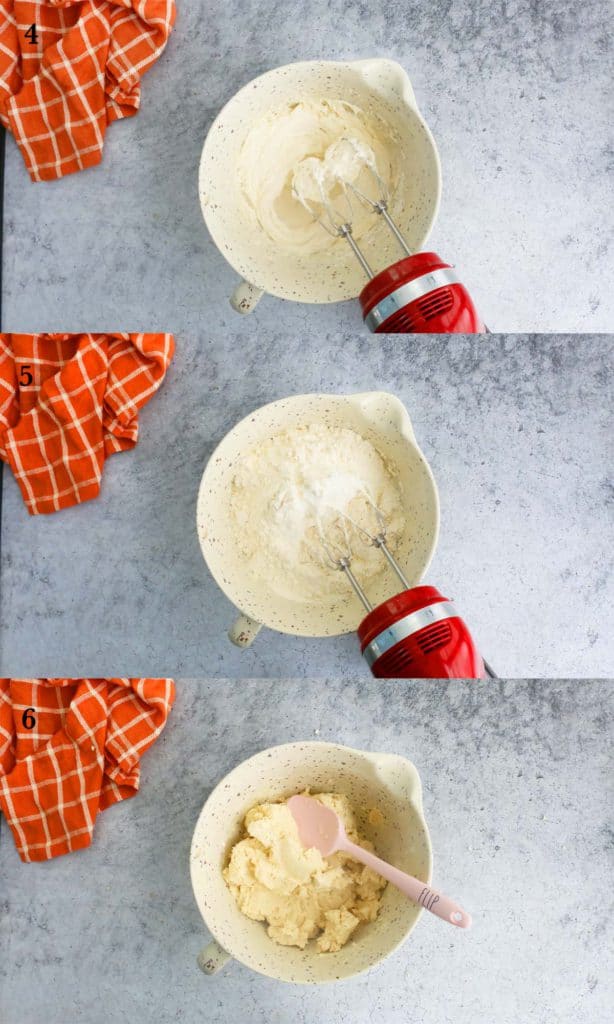
Step 1 - Make cookie dough. Cream butter, confectioners sugar, vanilla extract and salt together, until smooth and fluffy. Mix in flour and a touch of milk to get a smooth and firm dough.
Dough Consistency
Aim for a dough that is slightly firm, but not too soft. If the dough is too firm, the biscuits will turn out hard; if it's too soft, they will spread during baking, resulting in flatter, less defined bone shapes.
The beauty of this recipe is its forgiving nature. If you find the dough crumbling while rolling, simply add a few drops of milk. Conversely, if the dough feels too soft, mix in a few teaspoons of additional flour to achieve the perfect consistency.
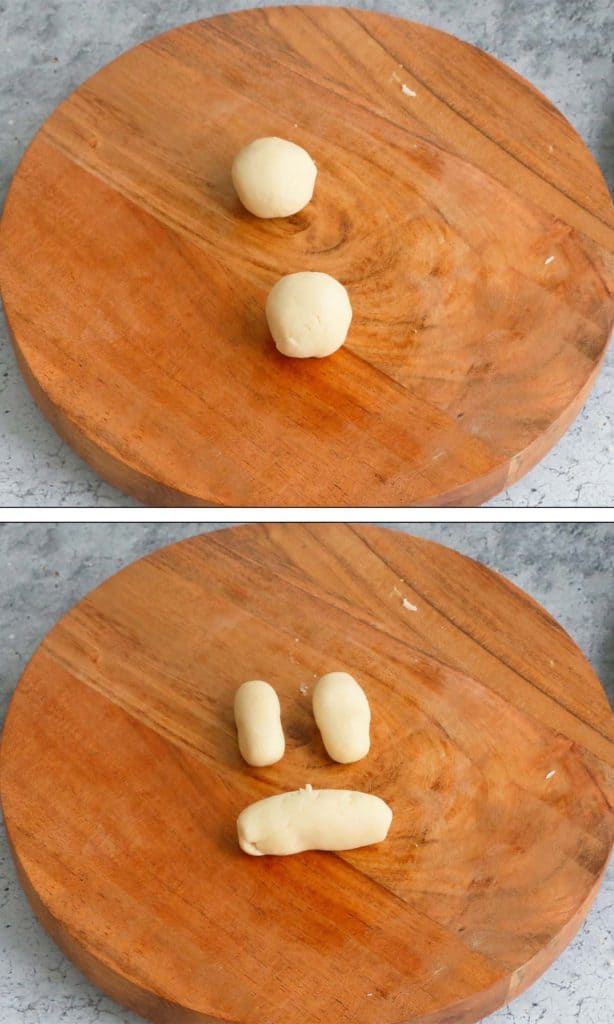
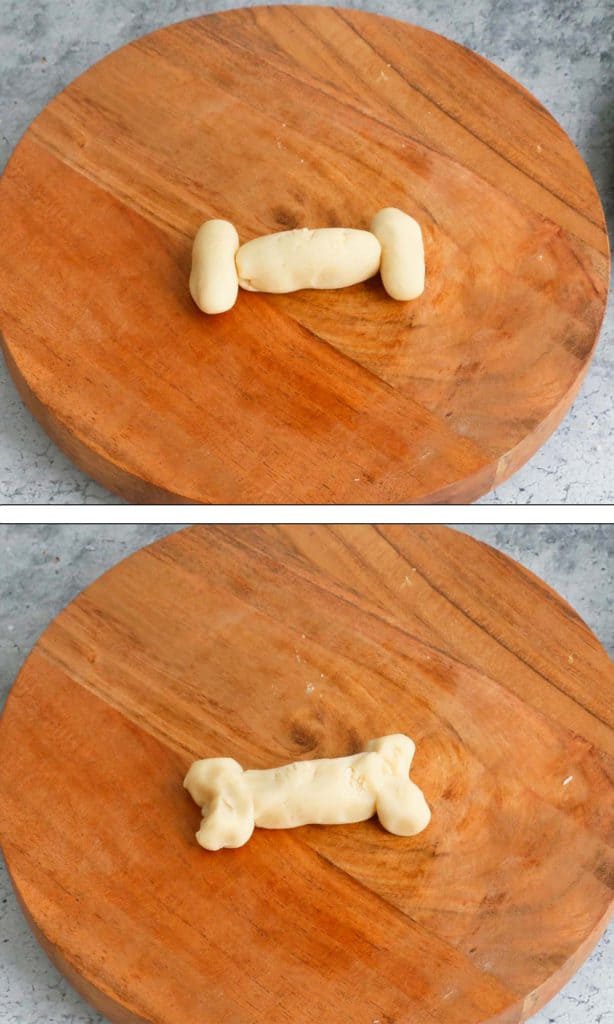
Step 2 - Shape bones: Working with one tablespoon measure dough, roll into a 2 to 3 inch size log. Working with another tablespoon dough, make two thick logs and pinch them to get the bone shape at the end of the first log. Pinch seams to adhere. Repeat process to make remaining biscuits. Place shaped ones on a parchment lined baking sheet and chill overnight.
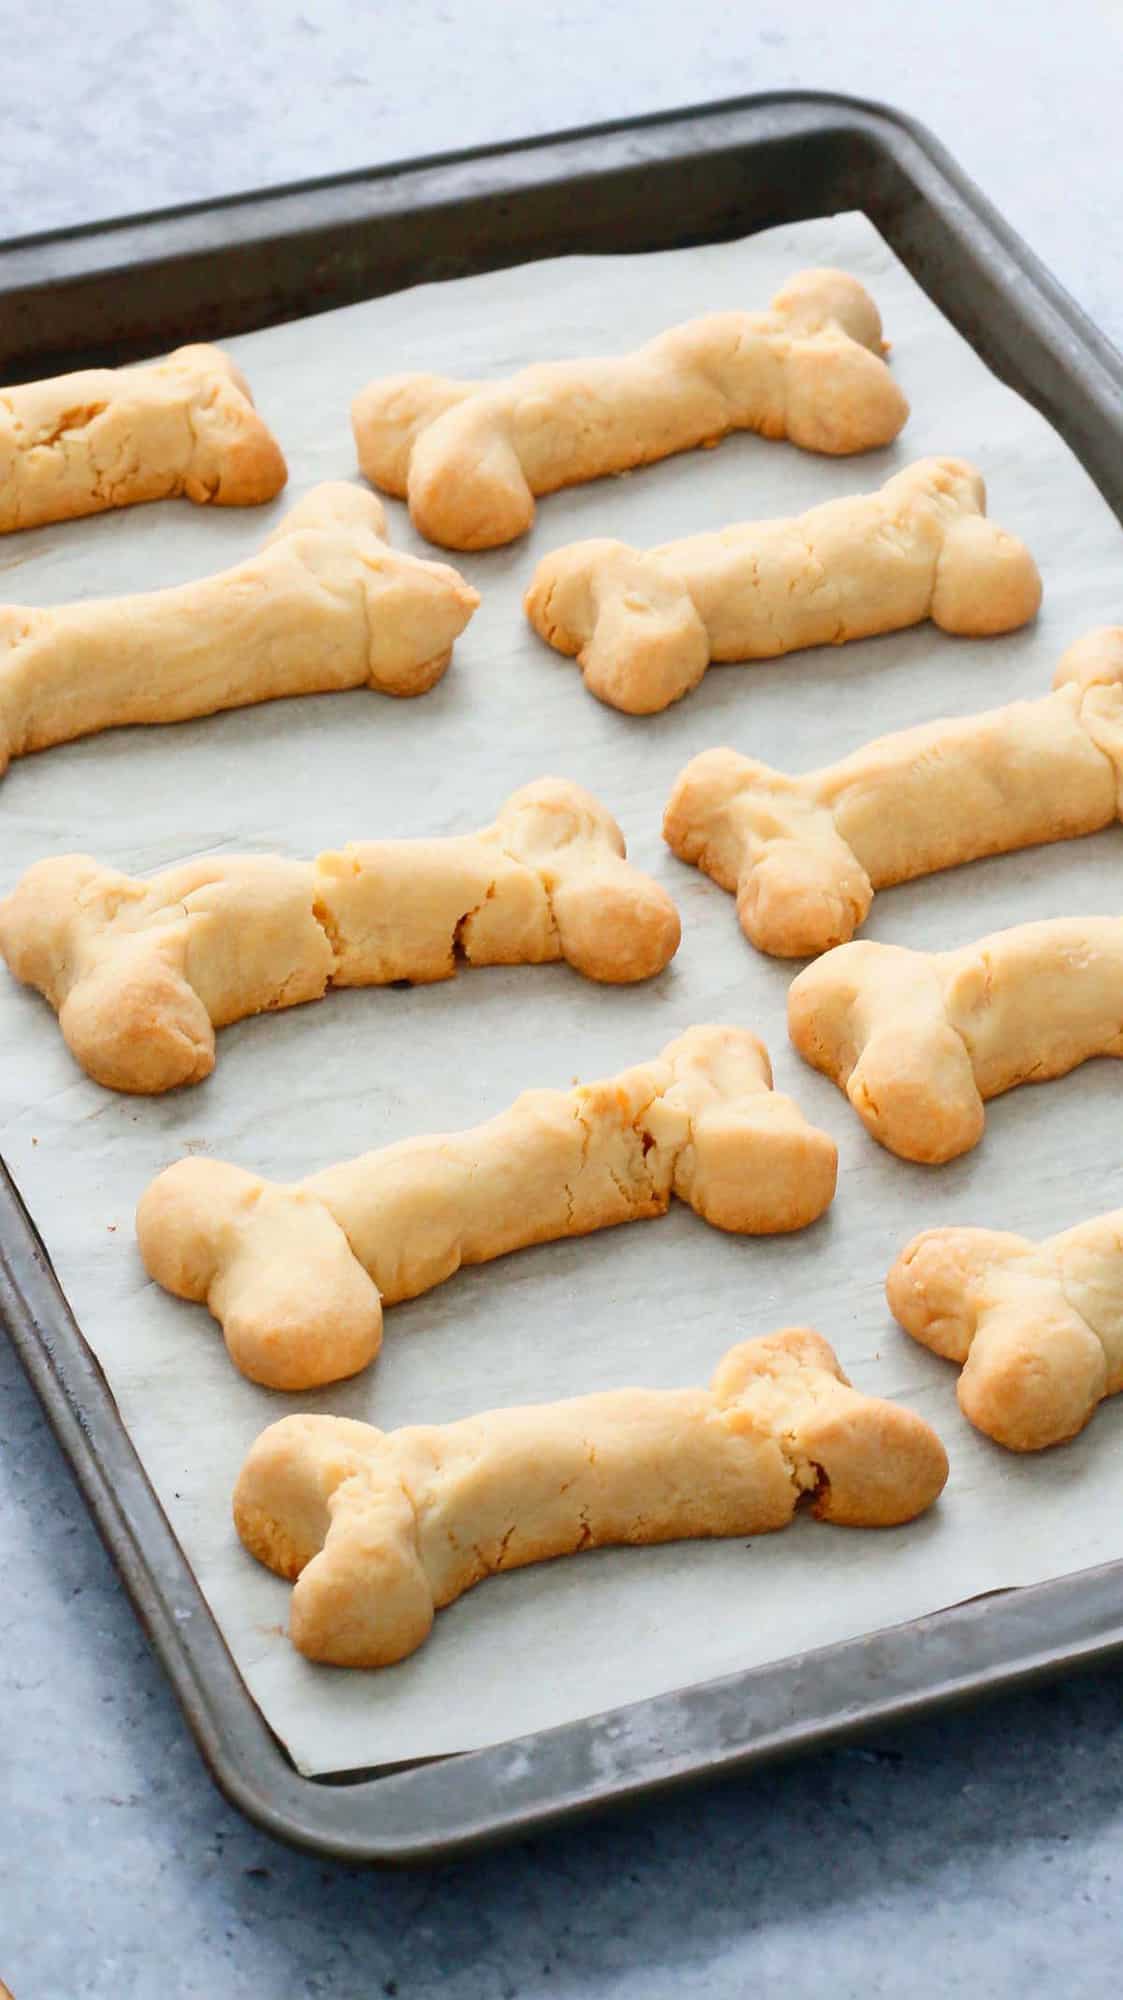
Step 3 - Bake at 350°F for 20 to 25 minutes, or until deep golden on the bottom and golden brown tops. Cool completely.
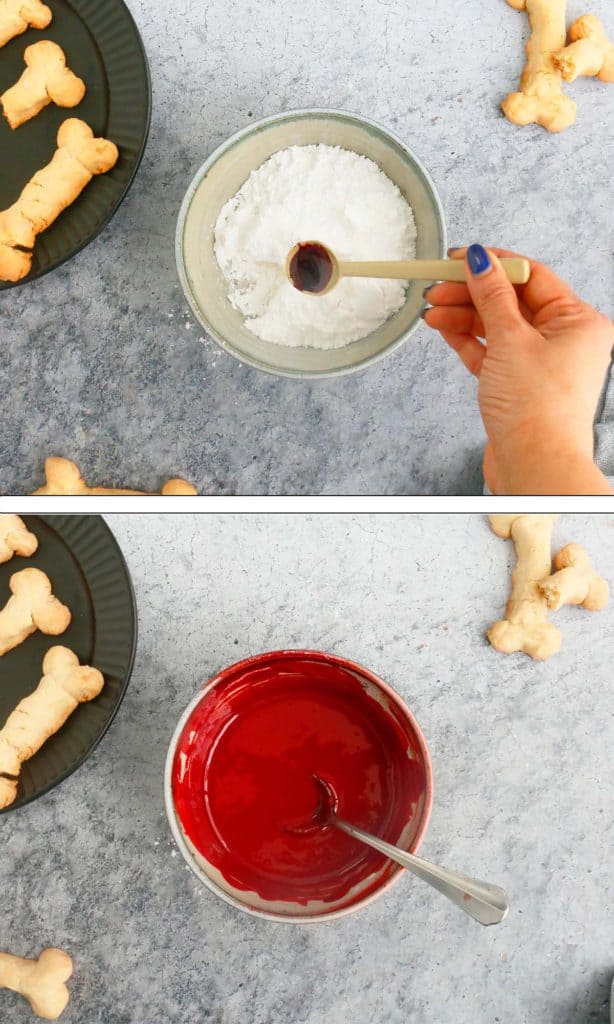
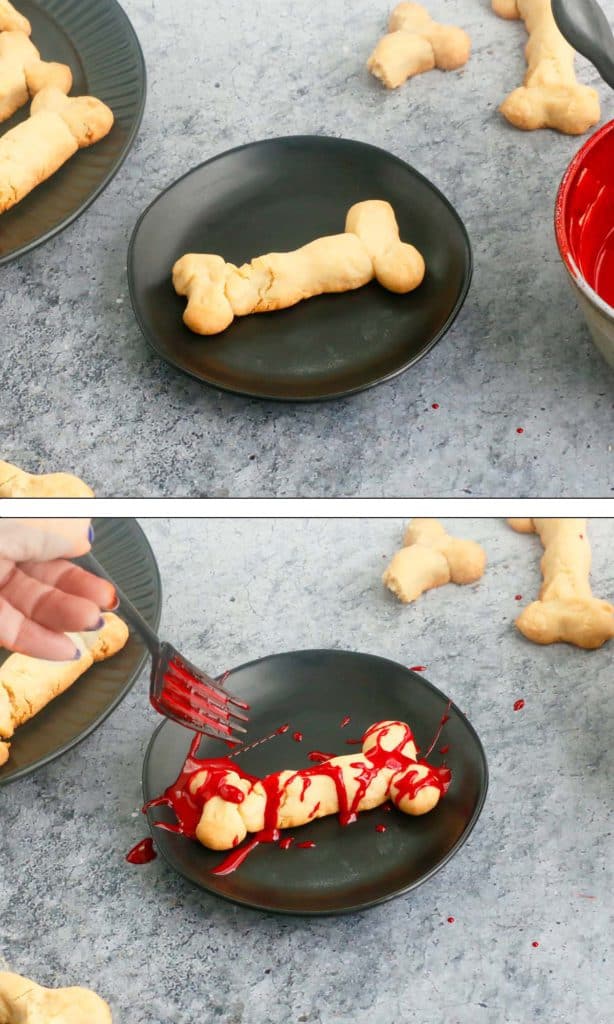
Step 4 - Decorate: Mix confectioners sugar, red food coloring and a dash of water to make a blood colored icing with dripping consistency. Using fork or a spoon, randomly drizzle icing on top to give a bloody effect. Let icing set for a few hours before serving.

Storage
Decorated bone cookies can be stored in a sealed container at room temperature for up to 4 days, whereas the cookies without icing can be stored in a tightly sealed container at room temperature for up to 10 days.
To freeze, the cookies can be frozen for one to two months, however make sure to freeze them without any decoartion or icing. Leave them overnight at room temperature to thaw, decorate with blood icing and then store after icing sets.
Troubleshooting
If the cookies expand while baking, it likely means the dough wasn't firm enough or wasn't chilled sufficiently. A quick fix is to check them around the 10-minute mark. If you notice they’re spreading, carefully remove the baking sheet from the oven and gently press the center of each cookie with your fingertips (remember, the baking sheet will be hot!). Then, return them to the oven to finish baking.
Recipe tips
- Chill - We recommend chilling shaped dough overnight, which gives ample time for it to firm up before baking.
- Don't shape smooth cookies - Few cracks, slightly broken bones, uneven surfaces with a few dents are perfect in making spooky Halloween cookies.
- Food coloring- Approximately half an ounce, which is about half the container.
More Halloween cookie ideas

Halloween Bone Cookies
Ingredients
- 1 stick unsalted butter room temperature
- ½ cup + 2 tablespoons confectioners sugar
- 1 teaspoon vanilla extract
- ⅛ teaspoon salt
- 1 cup + 5 tablespoons all purpose flour
- 2 to 4 teaspoons milk
Bloody Icing
- ½ cup confectioners sugar
- Red gel food coloring as needed
Instructions
- Add butter, confectioners sugar, vanilla extract and salt into a medium bowl and beat with hand held electric beater for one minute, until smooth and creamy.
- Add flour and about 2 teaspoons of milk, mixing with a spoon until the dough comes together. It should be firm, but not overly so, and not too soft. Adjust the consistency by adding more milk as needed.Tip - If dough feels very soft, then mix a couple of tablespoons additional flour
Shape
- Working with about 1 tablespoon measure cookie dough, roll into a ball and then shape into a 2 to 3 inch log.
- Working with another 1 tablespoon measure cookie dough, divide dough in half, roll each half into a very thick log and then shape into bone ends (refer pictures). Pinch dough ends onto the first log to get the shape of a bone. Pinch seems to stick together.Tip - Don't try to make a perfect smooth shape, few cracks and uneven surface is better.
- Repeat process to make remaining bones and place them on a parchment lined baking sheet, spacing about an inch apart. Place baking sheet in the refrigerator overnight or several hours.
Bake & Decorate
- Preheat oven to 350°F.
- Bake cookies for 23 to 28 minutes (rotate pan halfway through baking) or until golden brown. Place baking sheet on a wire rack to cool completely.
- Add confectioners sugar (½ cup), about 1 teaspoon water and red food coloring (use as needed) to make blood colored icing of dripping consistency (adjust water and food color as needed).
- Using a small spoon, sparingly drizzle icing (be very random) on the cookies. Let rest for couple of hours or until icing is set.
Notes
Nutrition
Nutritional information, based on third-party calculations, should be seen as estimates, not guarantees, as various factors like product types, brands, processing methods, and more can alter the nutritional content in recipes.
Did you make this recipe? I’d love your feedback! Please let me know by leaving a comment or review below or snap a photo and share on Instagram.
Some of the links above are affiliate links, which pay me a small commission for my referral at no extra cost to you! I am a participant in the Amazon Services LLC Associates Program, an affiliate advertising program designed to provide a means for us to earn fees by linking to Amazon.com and affiliated sites. Thank you for supporting kitchenathoskins.com.



Leave a Reply