Spooky Halloween Trees are buttery, nutty, crisp, amazingly tender and made using only a round cookie cutter.

Spooky Halloween season continues with Halloween trees. They are a twist to my witch finger cookies, but with addition of walnuts that adds earthiness and tenderness.
Unilke the eggless cashew cookies, these Halloween trees have egg yolks in them. The yolk not only adds tenderness but also helps bind the dough.
If you are looking for more creepy treats this season, then you might like Halloween sandwiches or chocolate mice.
Jump to:
Why you'll love this recipe?
- Unique and creative Halloween cookie.
- No special tools needed. All you need is a basic round cookie cutter.
- Crisp, tender and melt in your mouth texture.
- Mildly sweet.
Ingredients
Scroll down to the recipe card below for full information on ingredients and amounts.
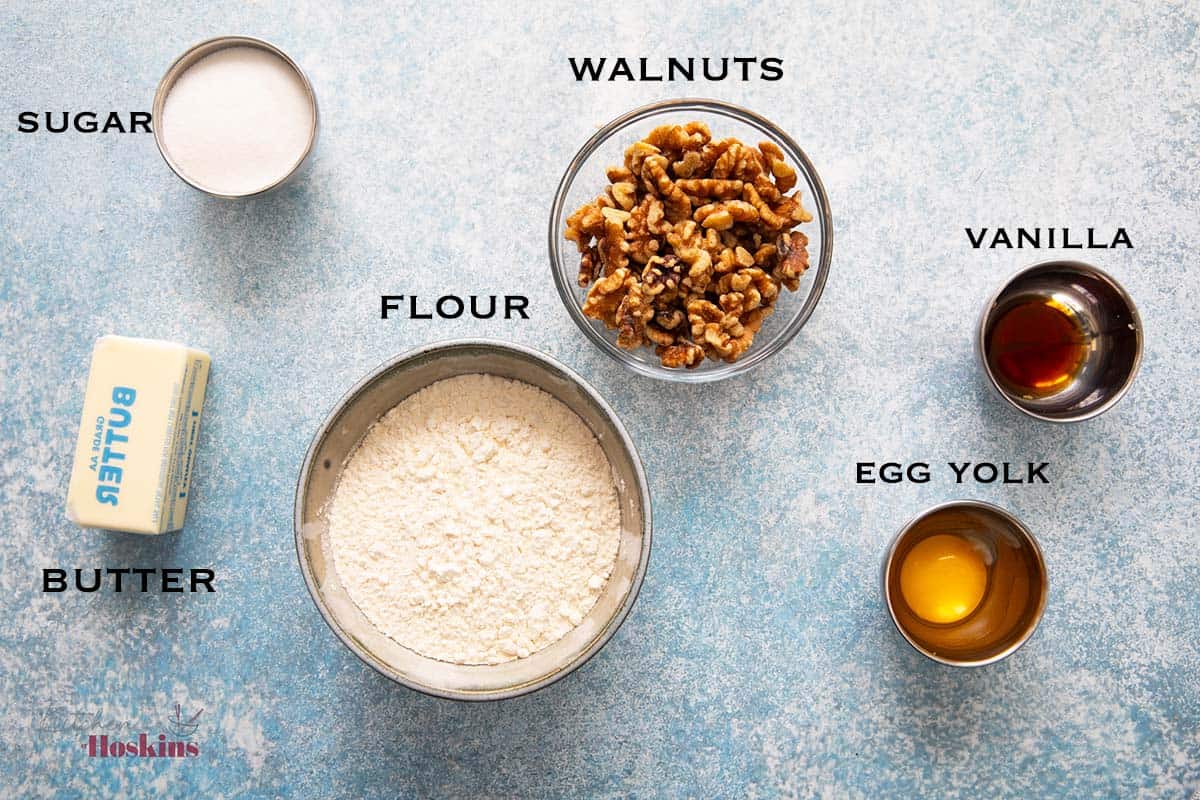
- Walnuts - Walnuts add an earthy flavor.
- Butter – Use softened room temperature butter to ensure proper creaming.
- All purpose flour – All purpose flour helps bind the minced walnuts.
- Sugar – Just half a cup of sugar makes the Halloween trees mildly sweet.
- Egg - I use just the yolk for richness and tenderness.
- Chocolate chips - Melted chocolate helps stick the candy eyeball to the Halloween trees.
- Candy eyes - I used large candy eyes from Amazon. You can find similar ones from Michels, Joanns or cake decorating stores.
How to make?
You can find full printable recipe below, but here is a quick overview of the procedure along with step-by-step photos.
Make cookie dough
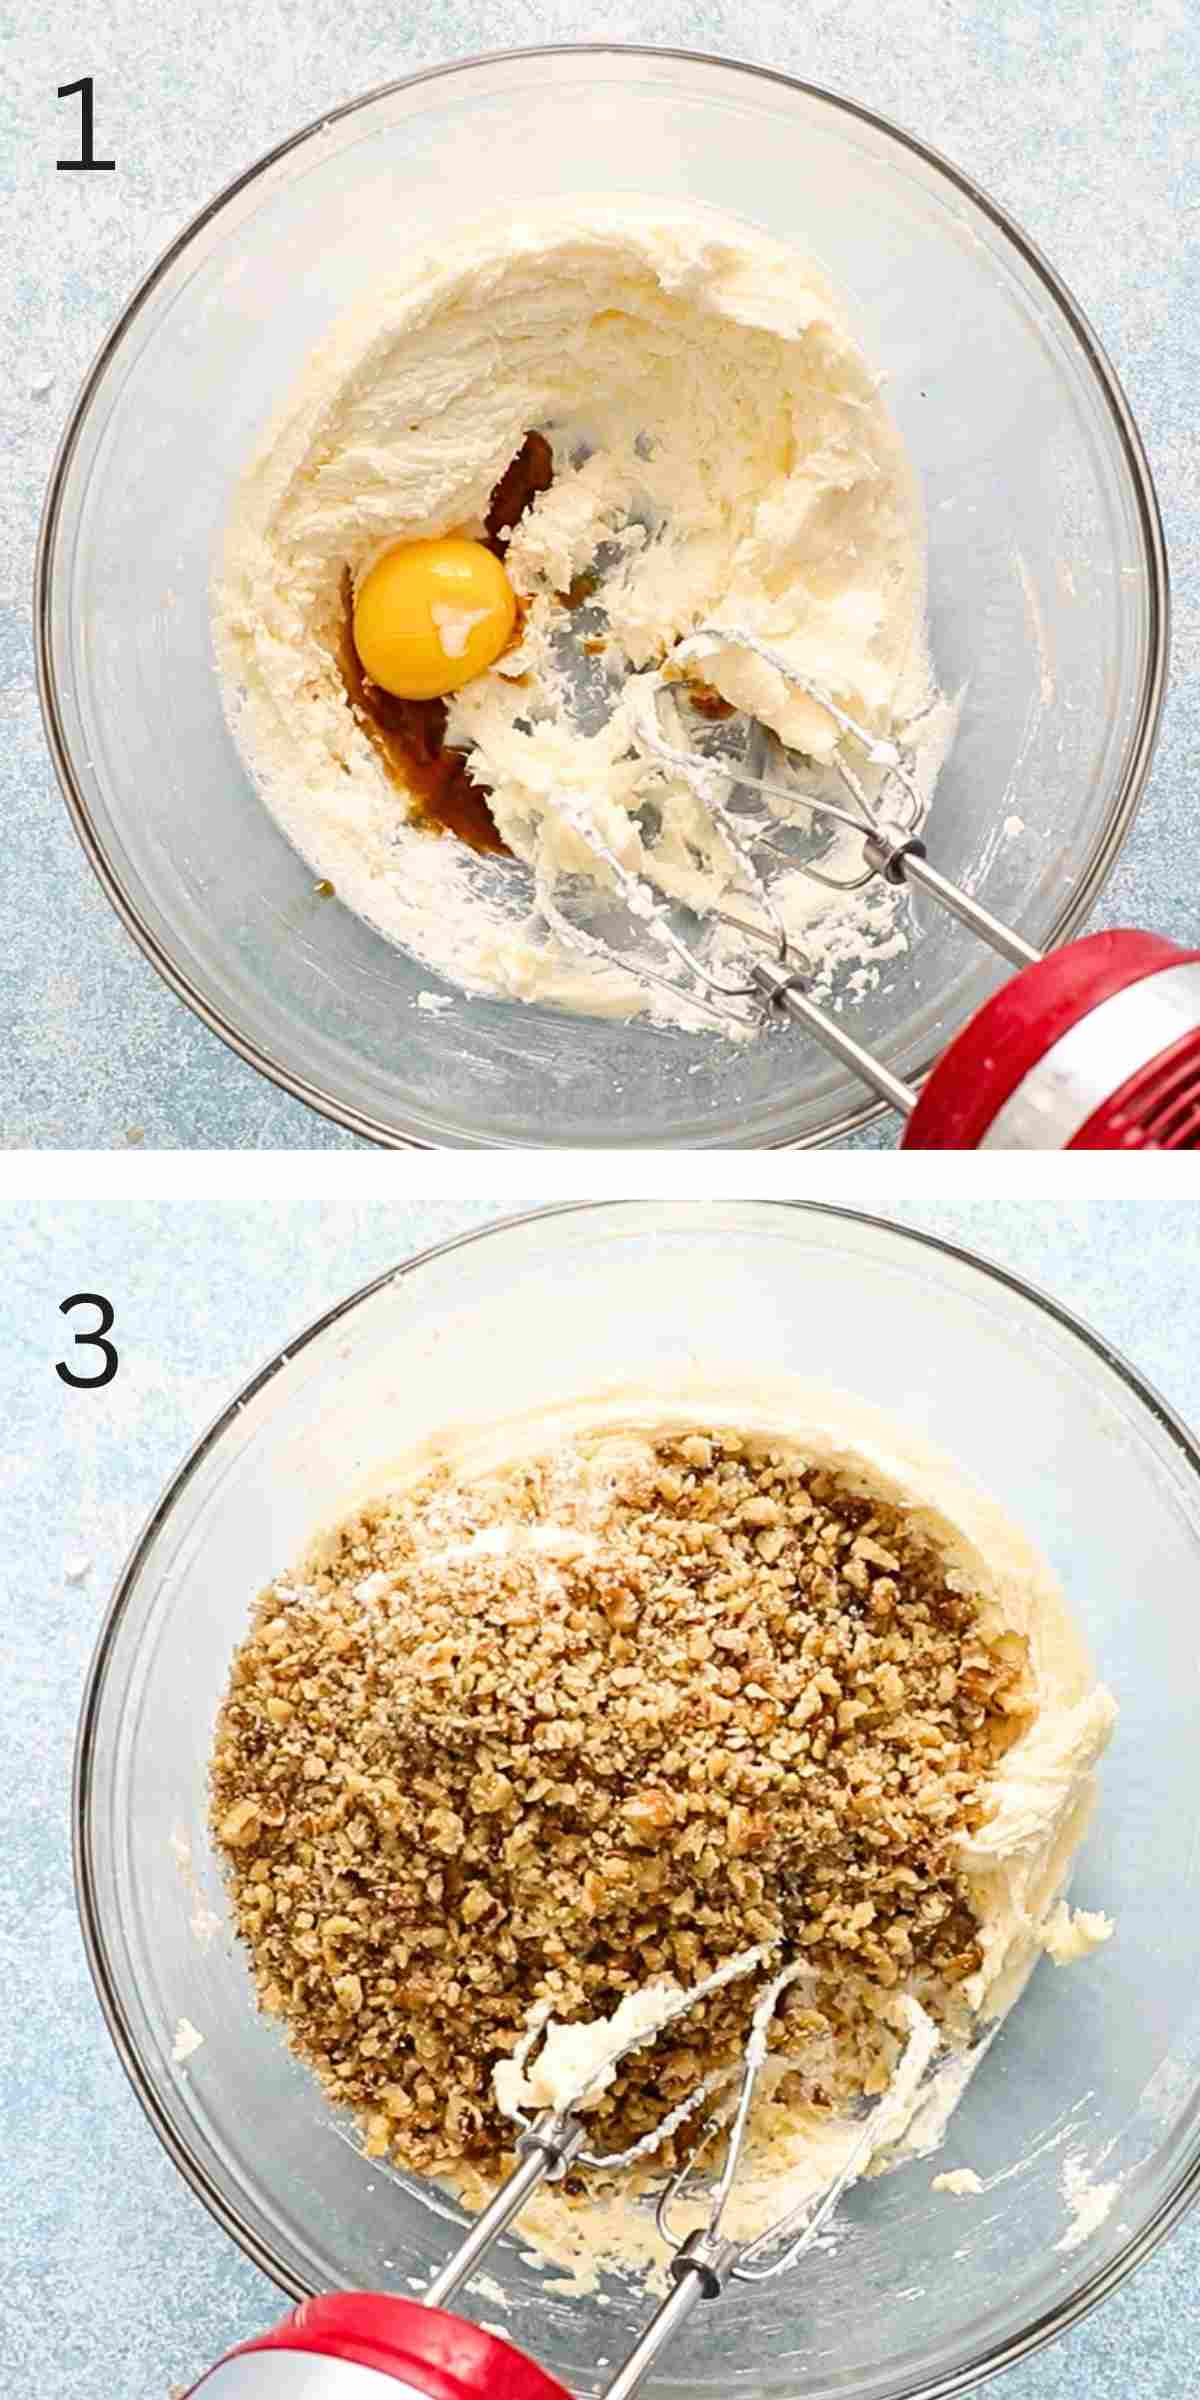
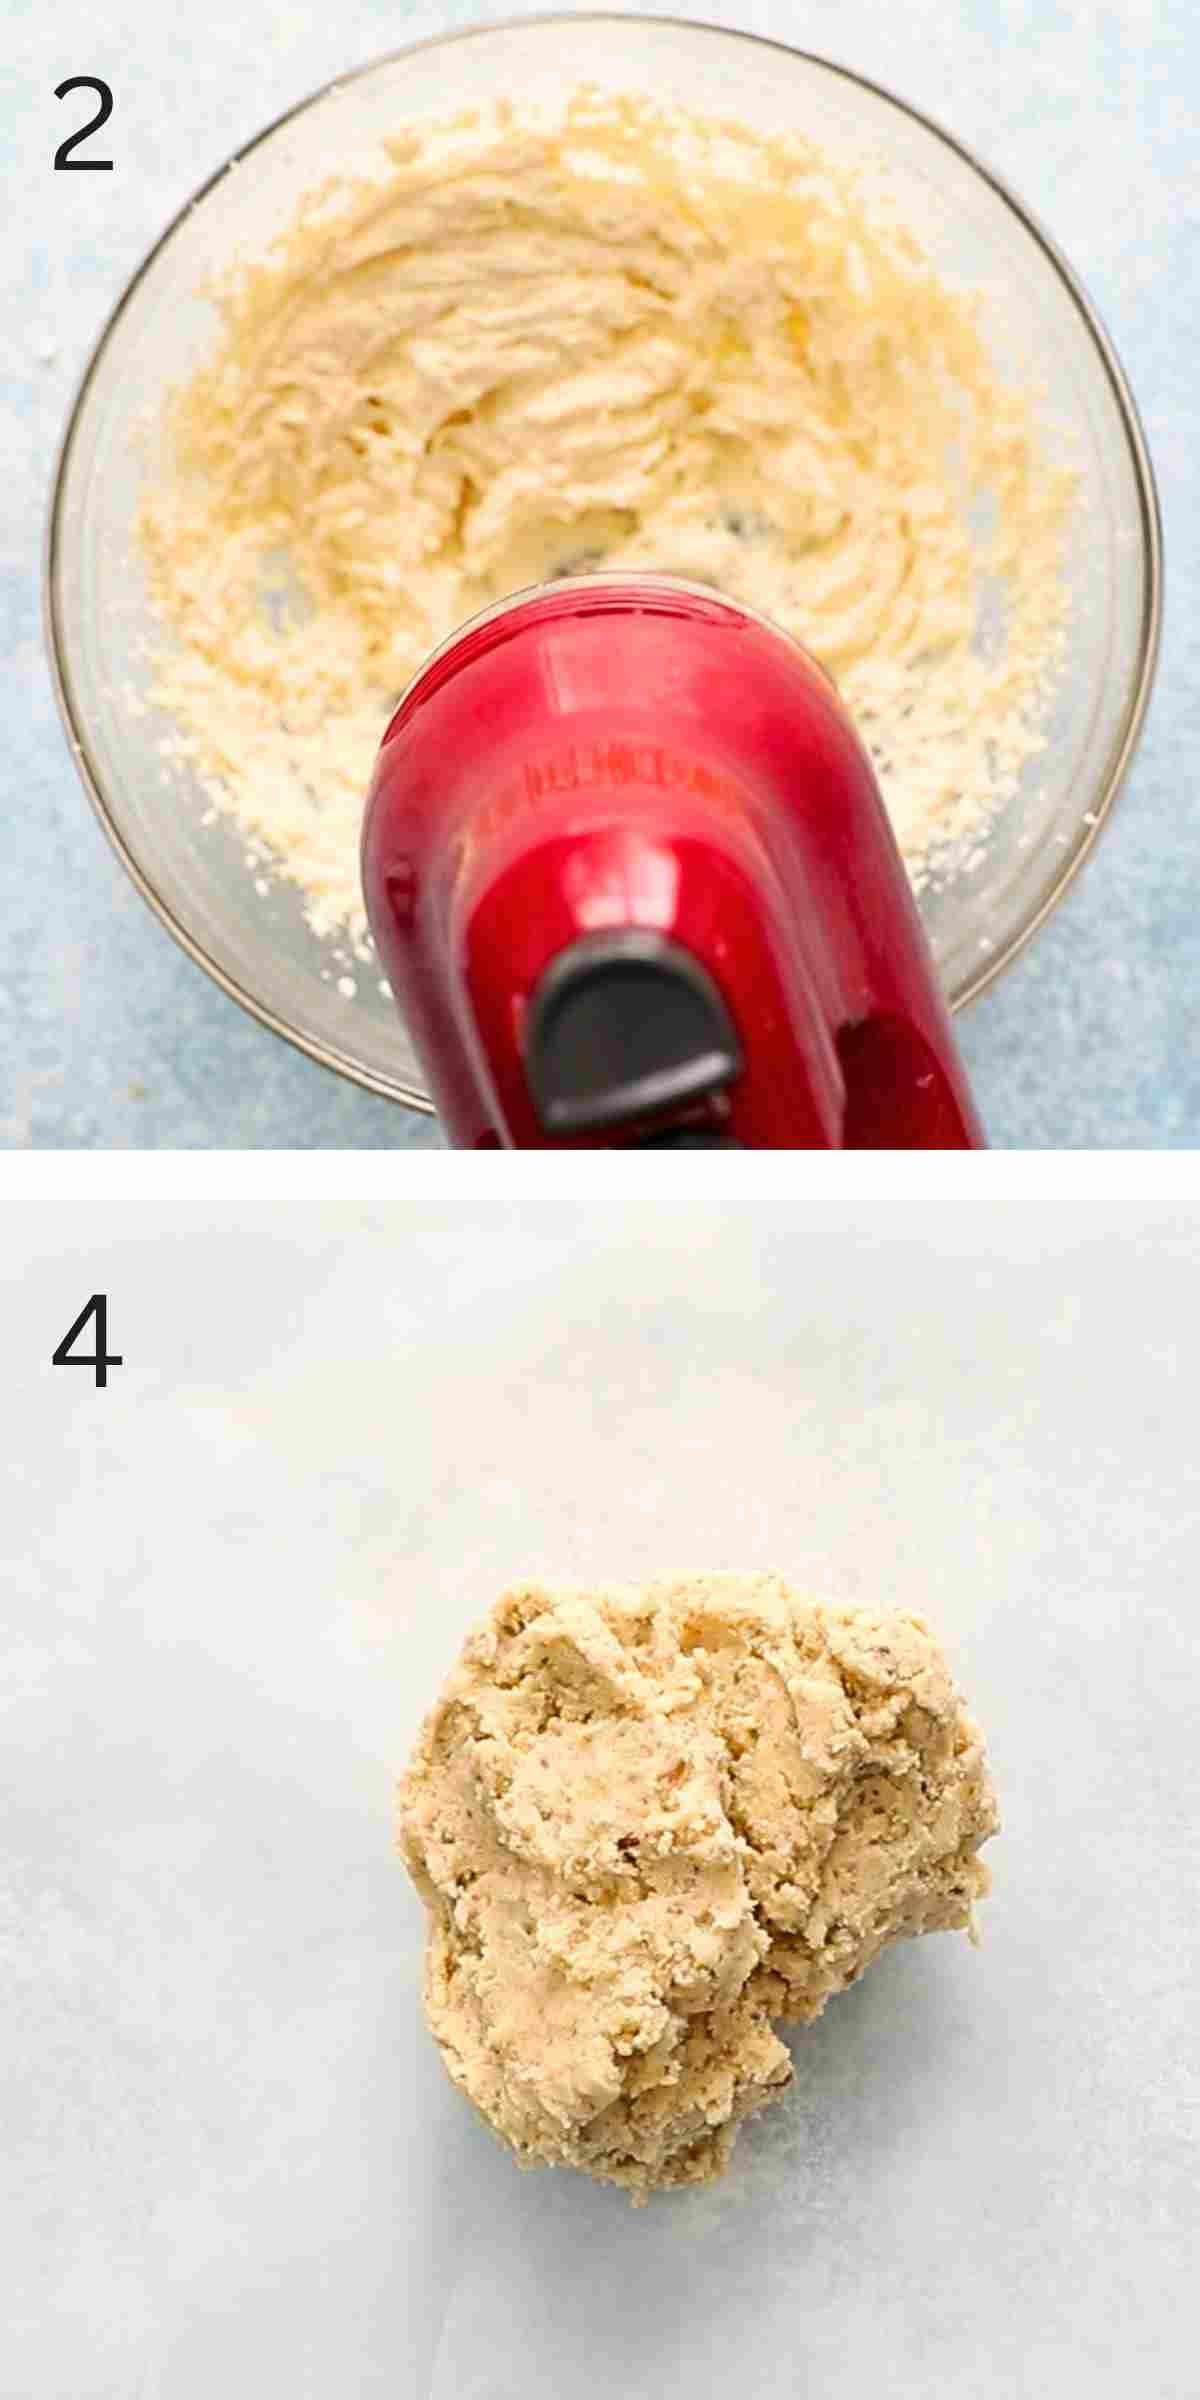
1 & 2. Cream butter and sugar using an electric beater for about 1 minute or until smooth and creamy. Add yolk and vanilla, cream for another minute.
3. Add minced walnuts, flour and salt.
4. Continue mixing until it forms a dough.
Tip: To mince walnuts, add walnuts into a food processor and process until they are finely minced.
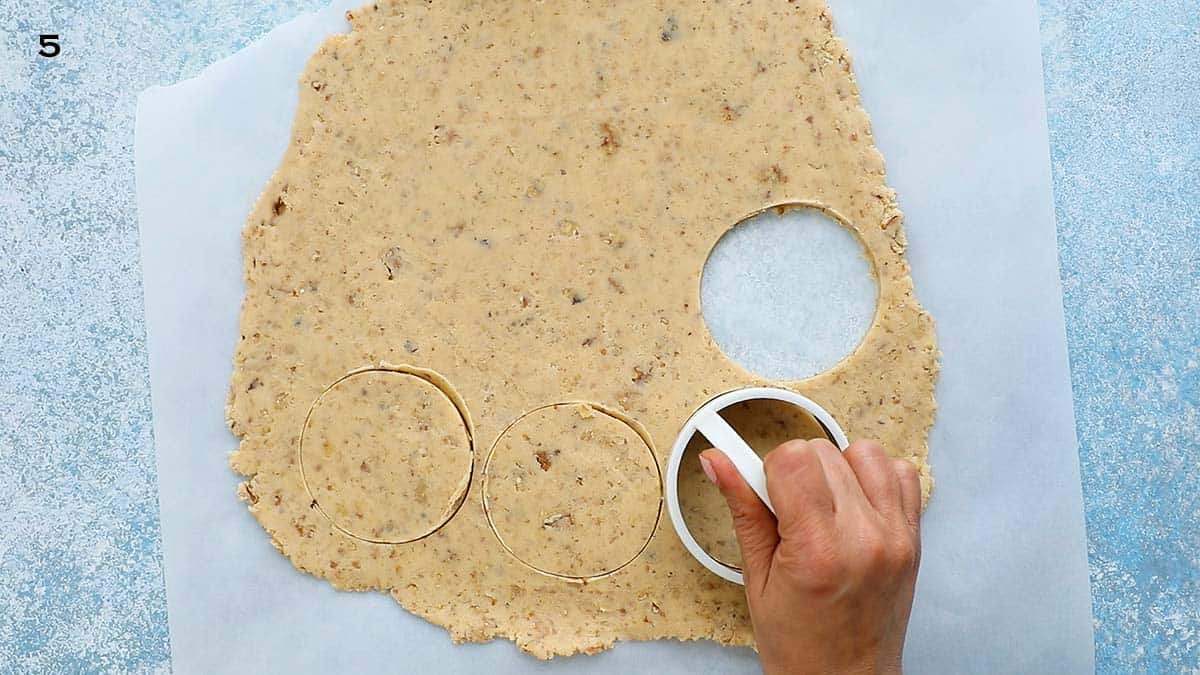
5.Shape dough into a flat disc and roll between two sheets of parchment paper, until slightly less than ¼ inch thick. Transfer dough, along with parchment papers, onto a baking sheet and place in the refrigerator for at least 4 hours (up to one day), until firm. Cut circles using a 3-inch round cookie cutter.
Shape cookies
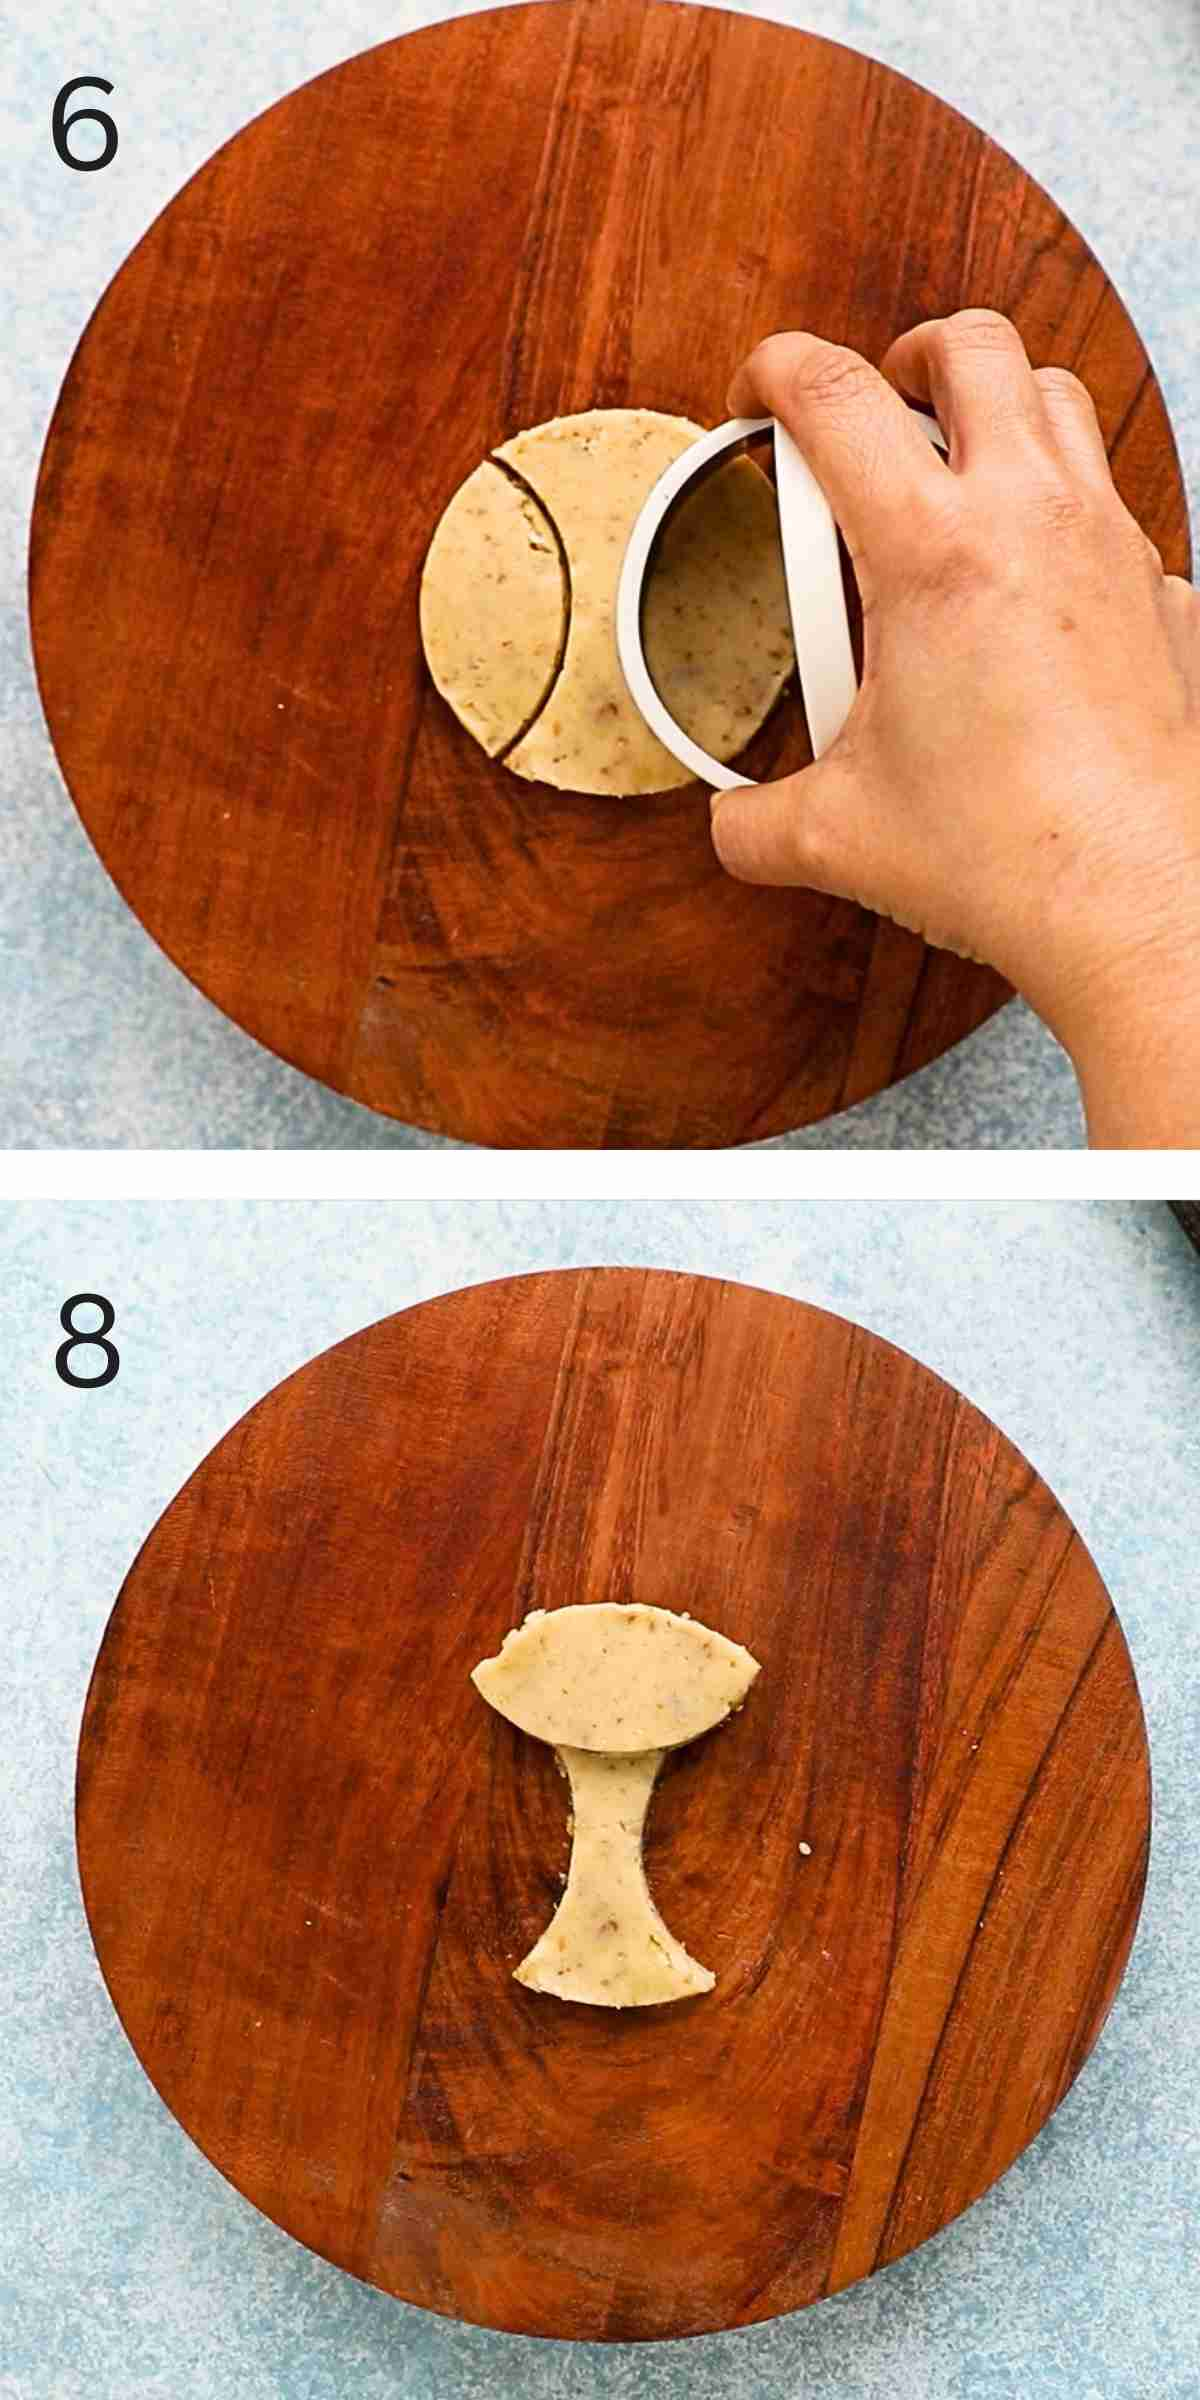
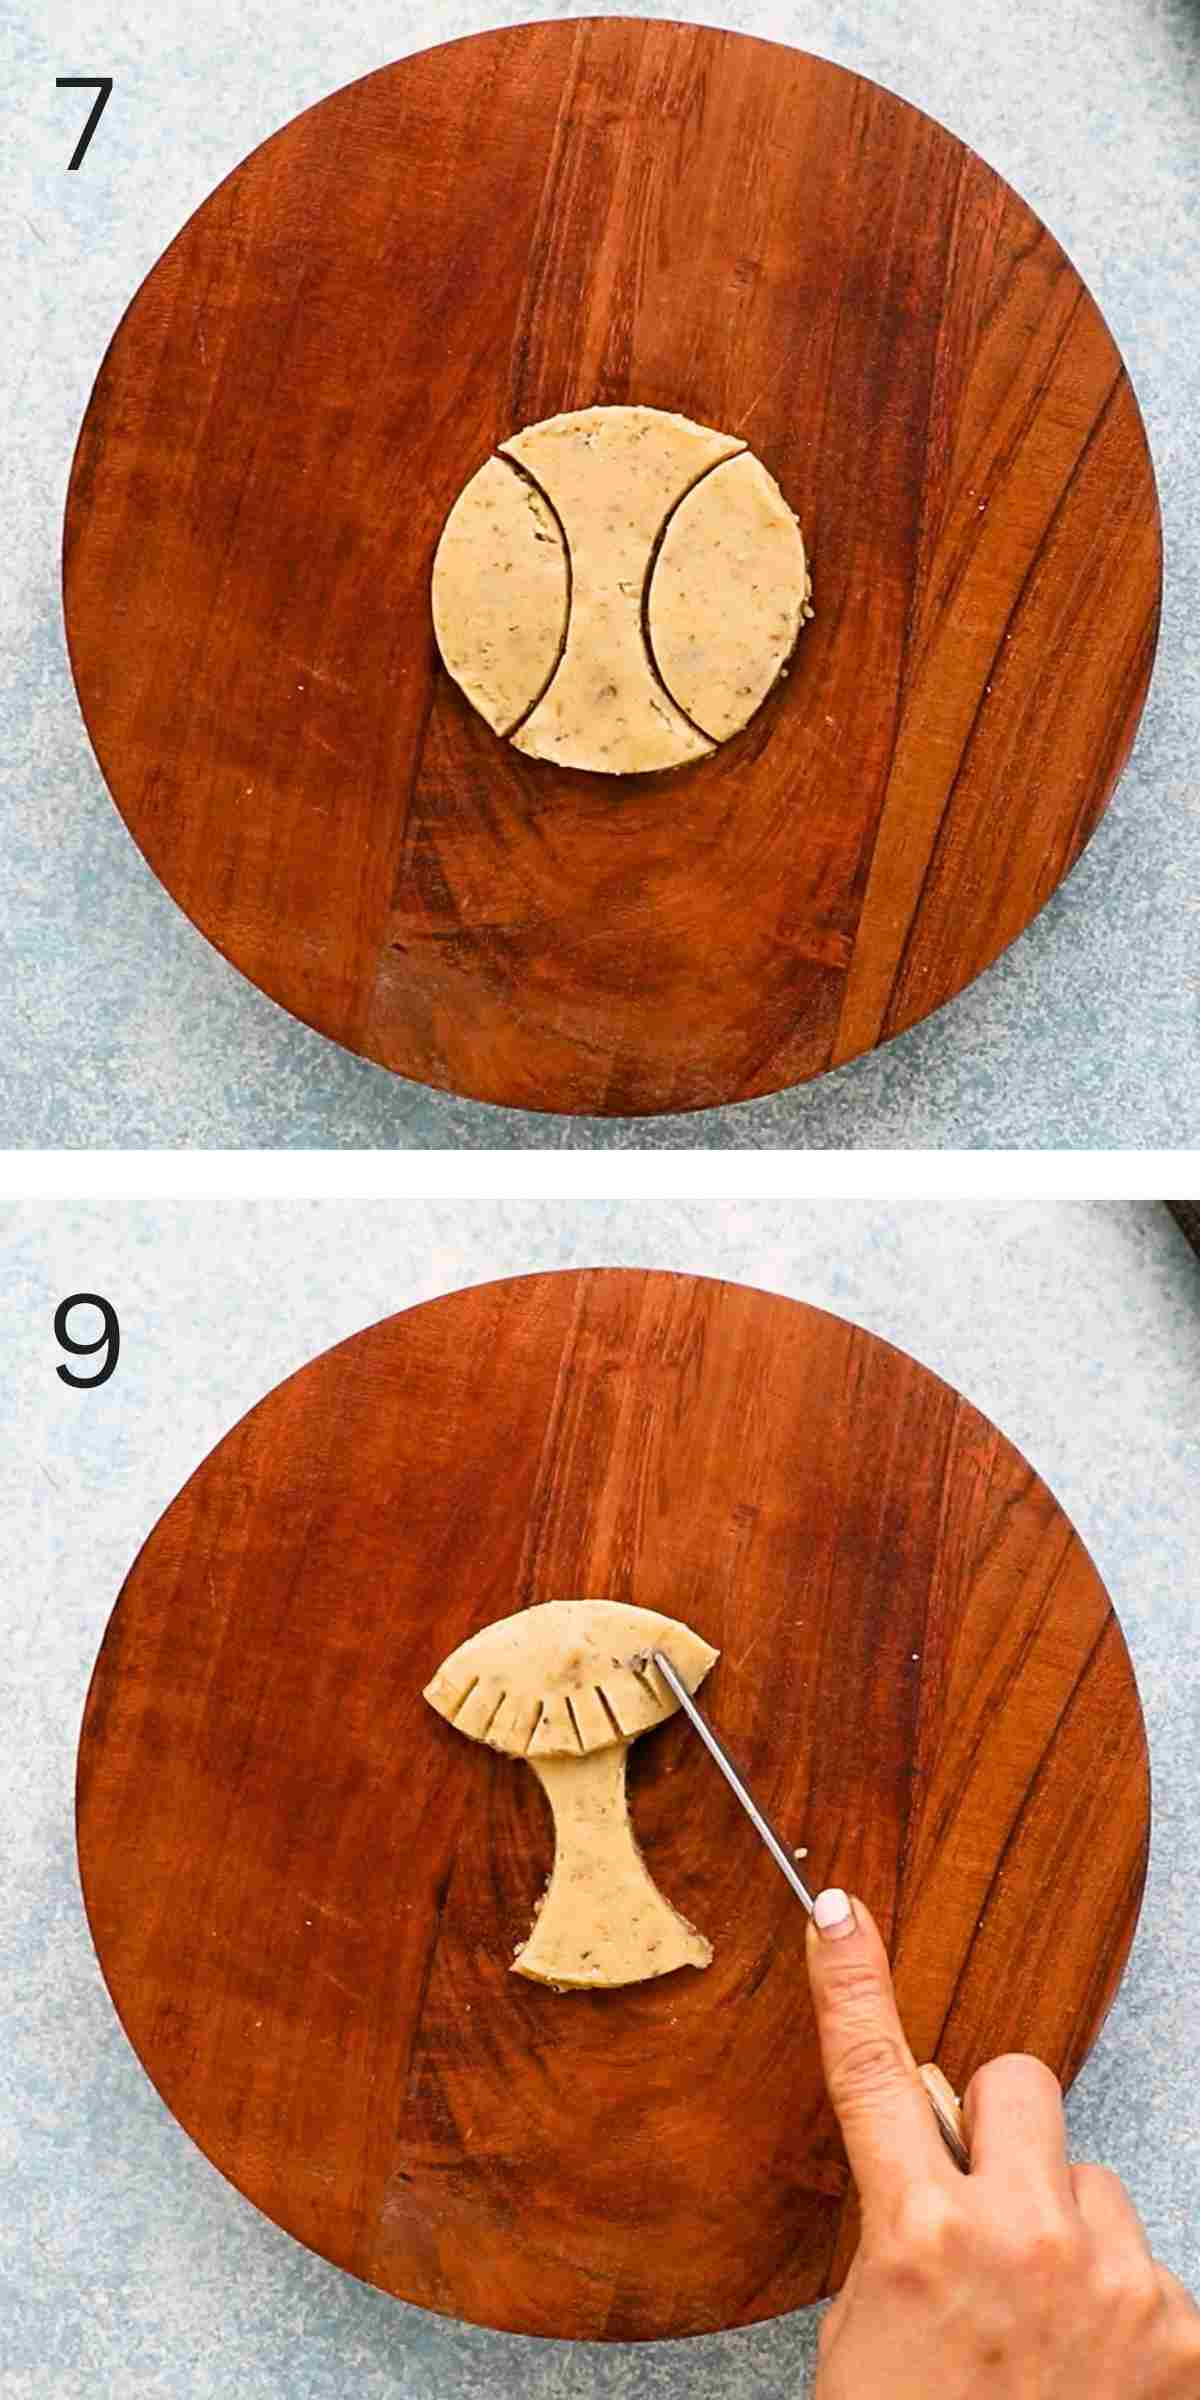
6 & 7. Place one round one a work surface and using the same cookie cutter, cut the 2 opposite sides, to make tree trunk.
8. Place one cut end over one end of the tree trunk, pressing slightly to adhere.
9. Using a butter knife, cut about ¼-inch slits on the bottom of the tree top to create a fringe.
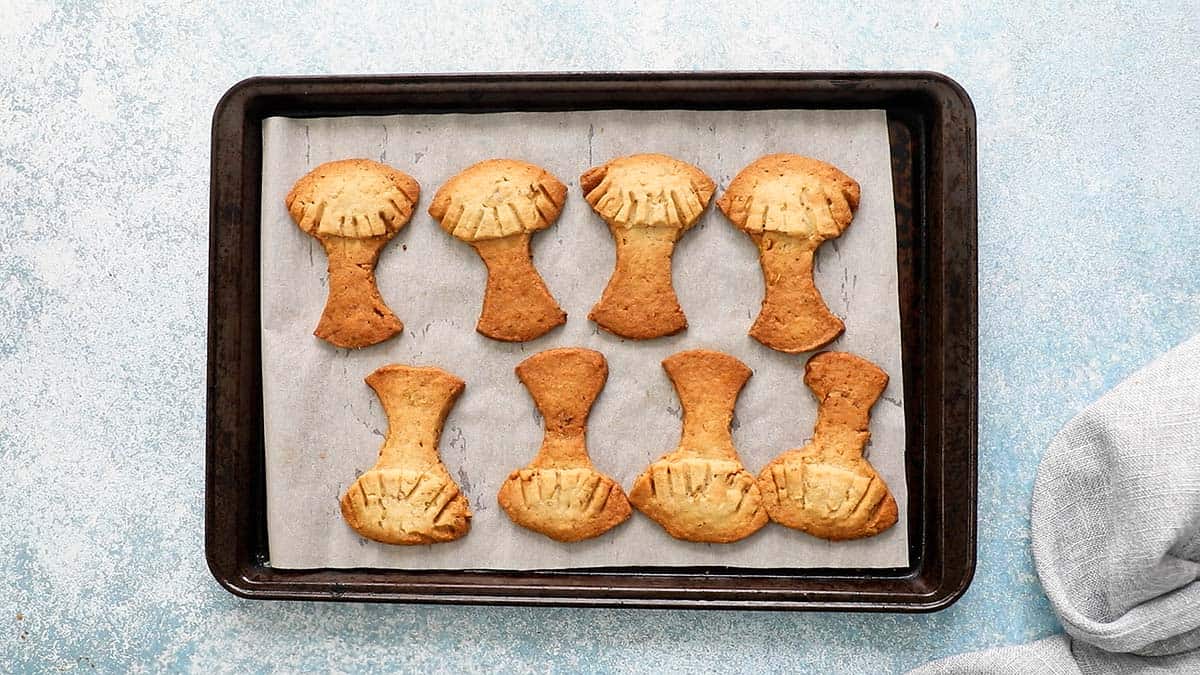
Chill cookies and bake at 325 degrees, until golden brown.
Decorate
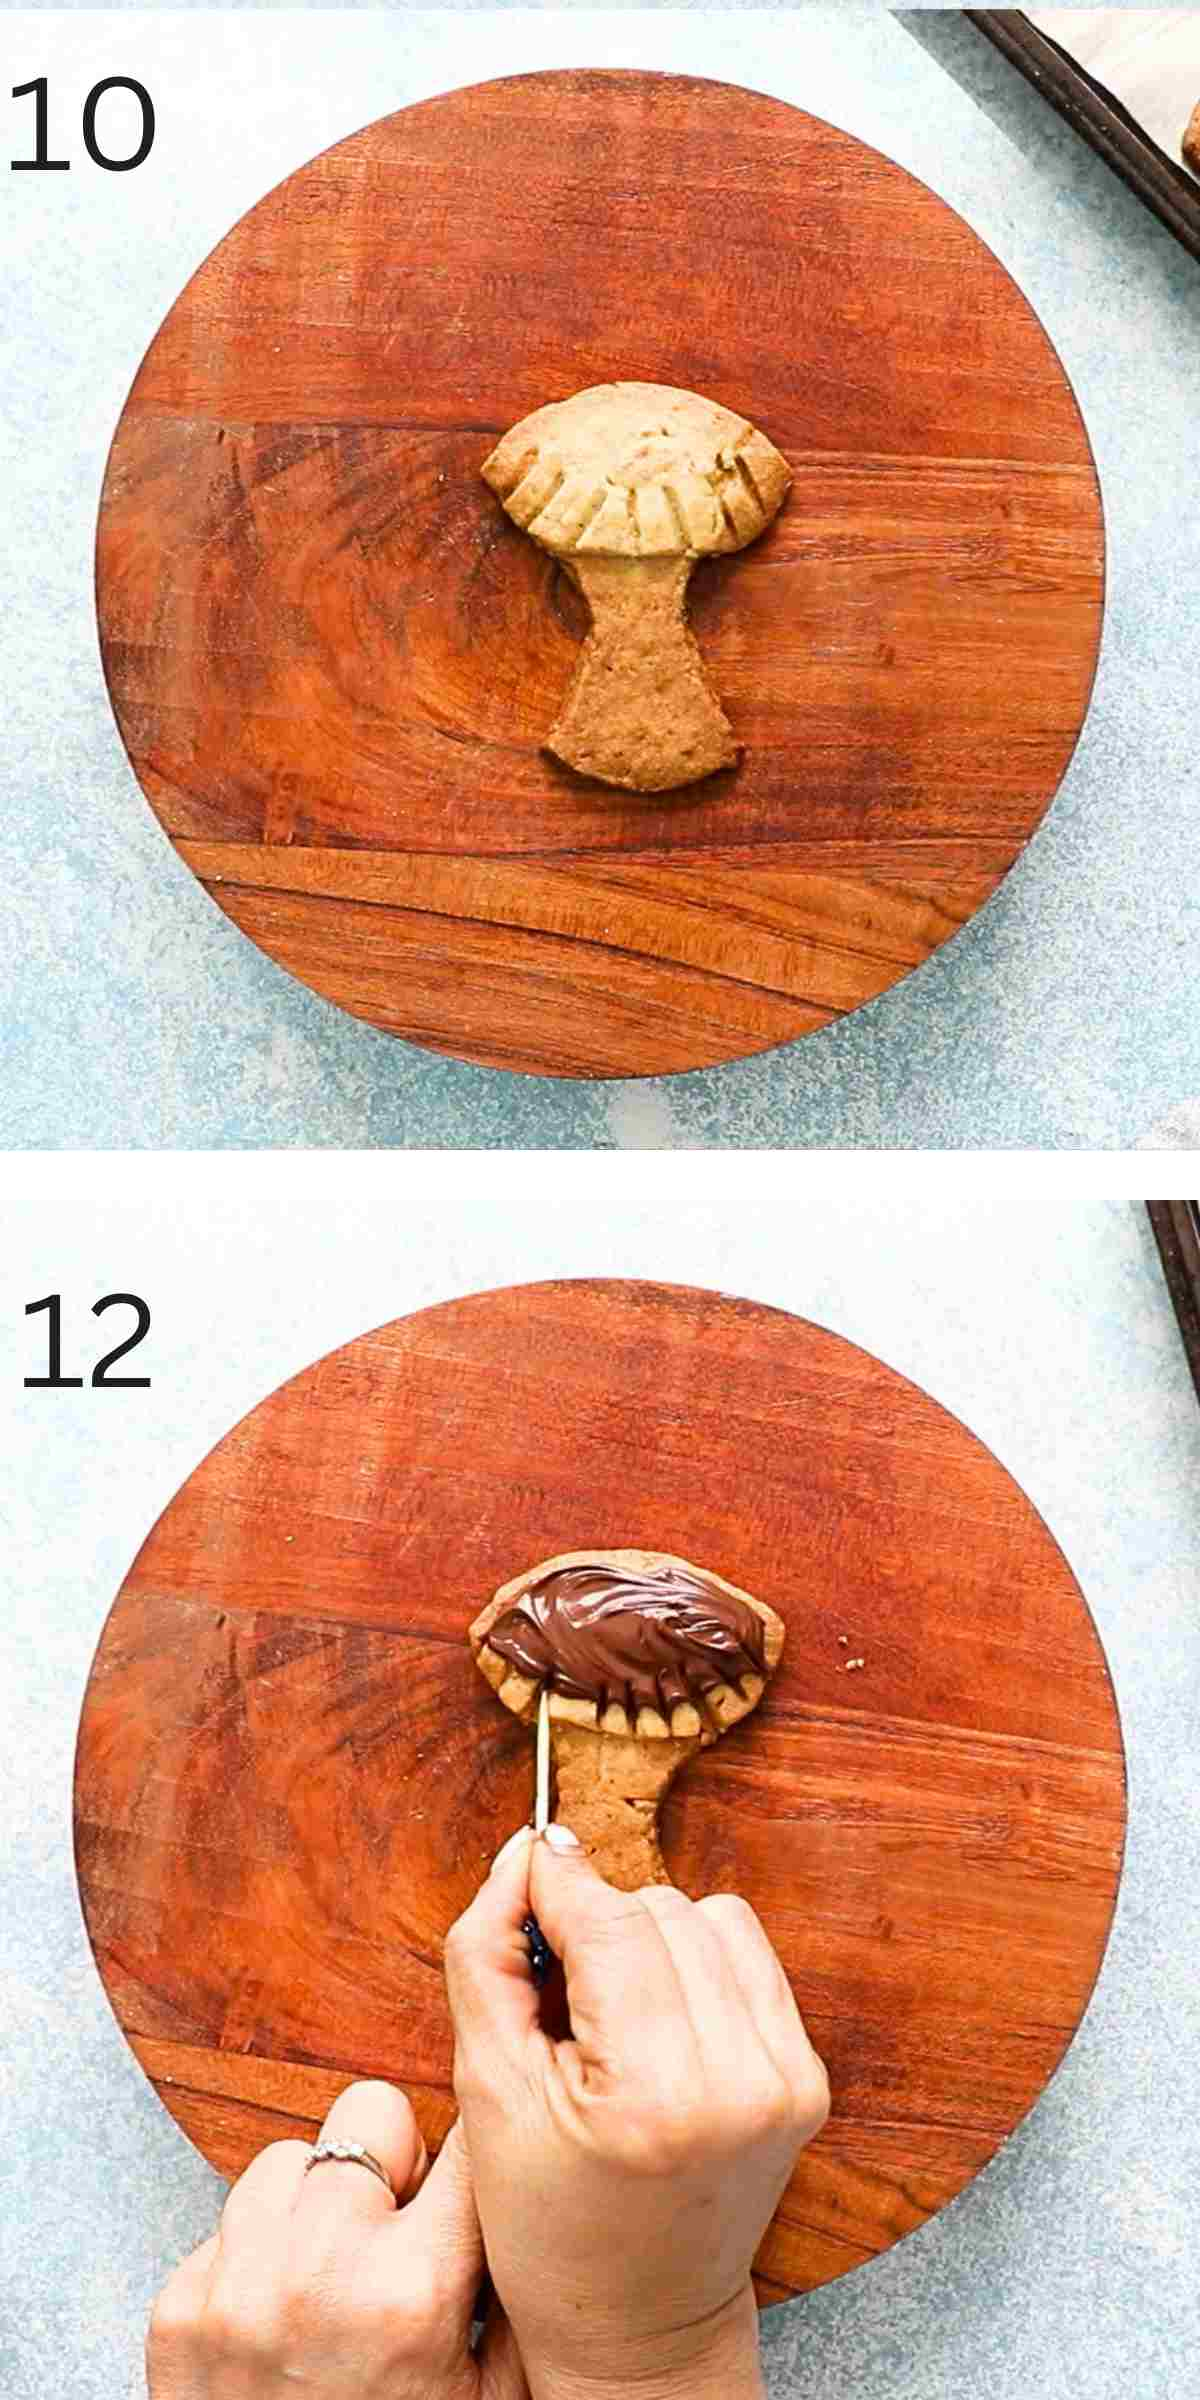
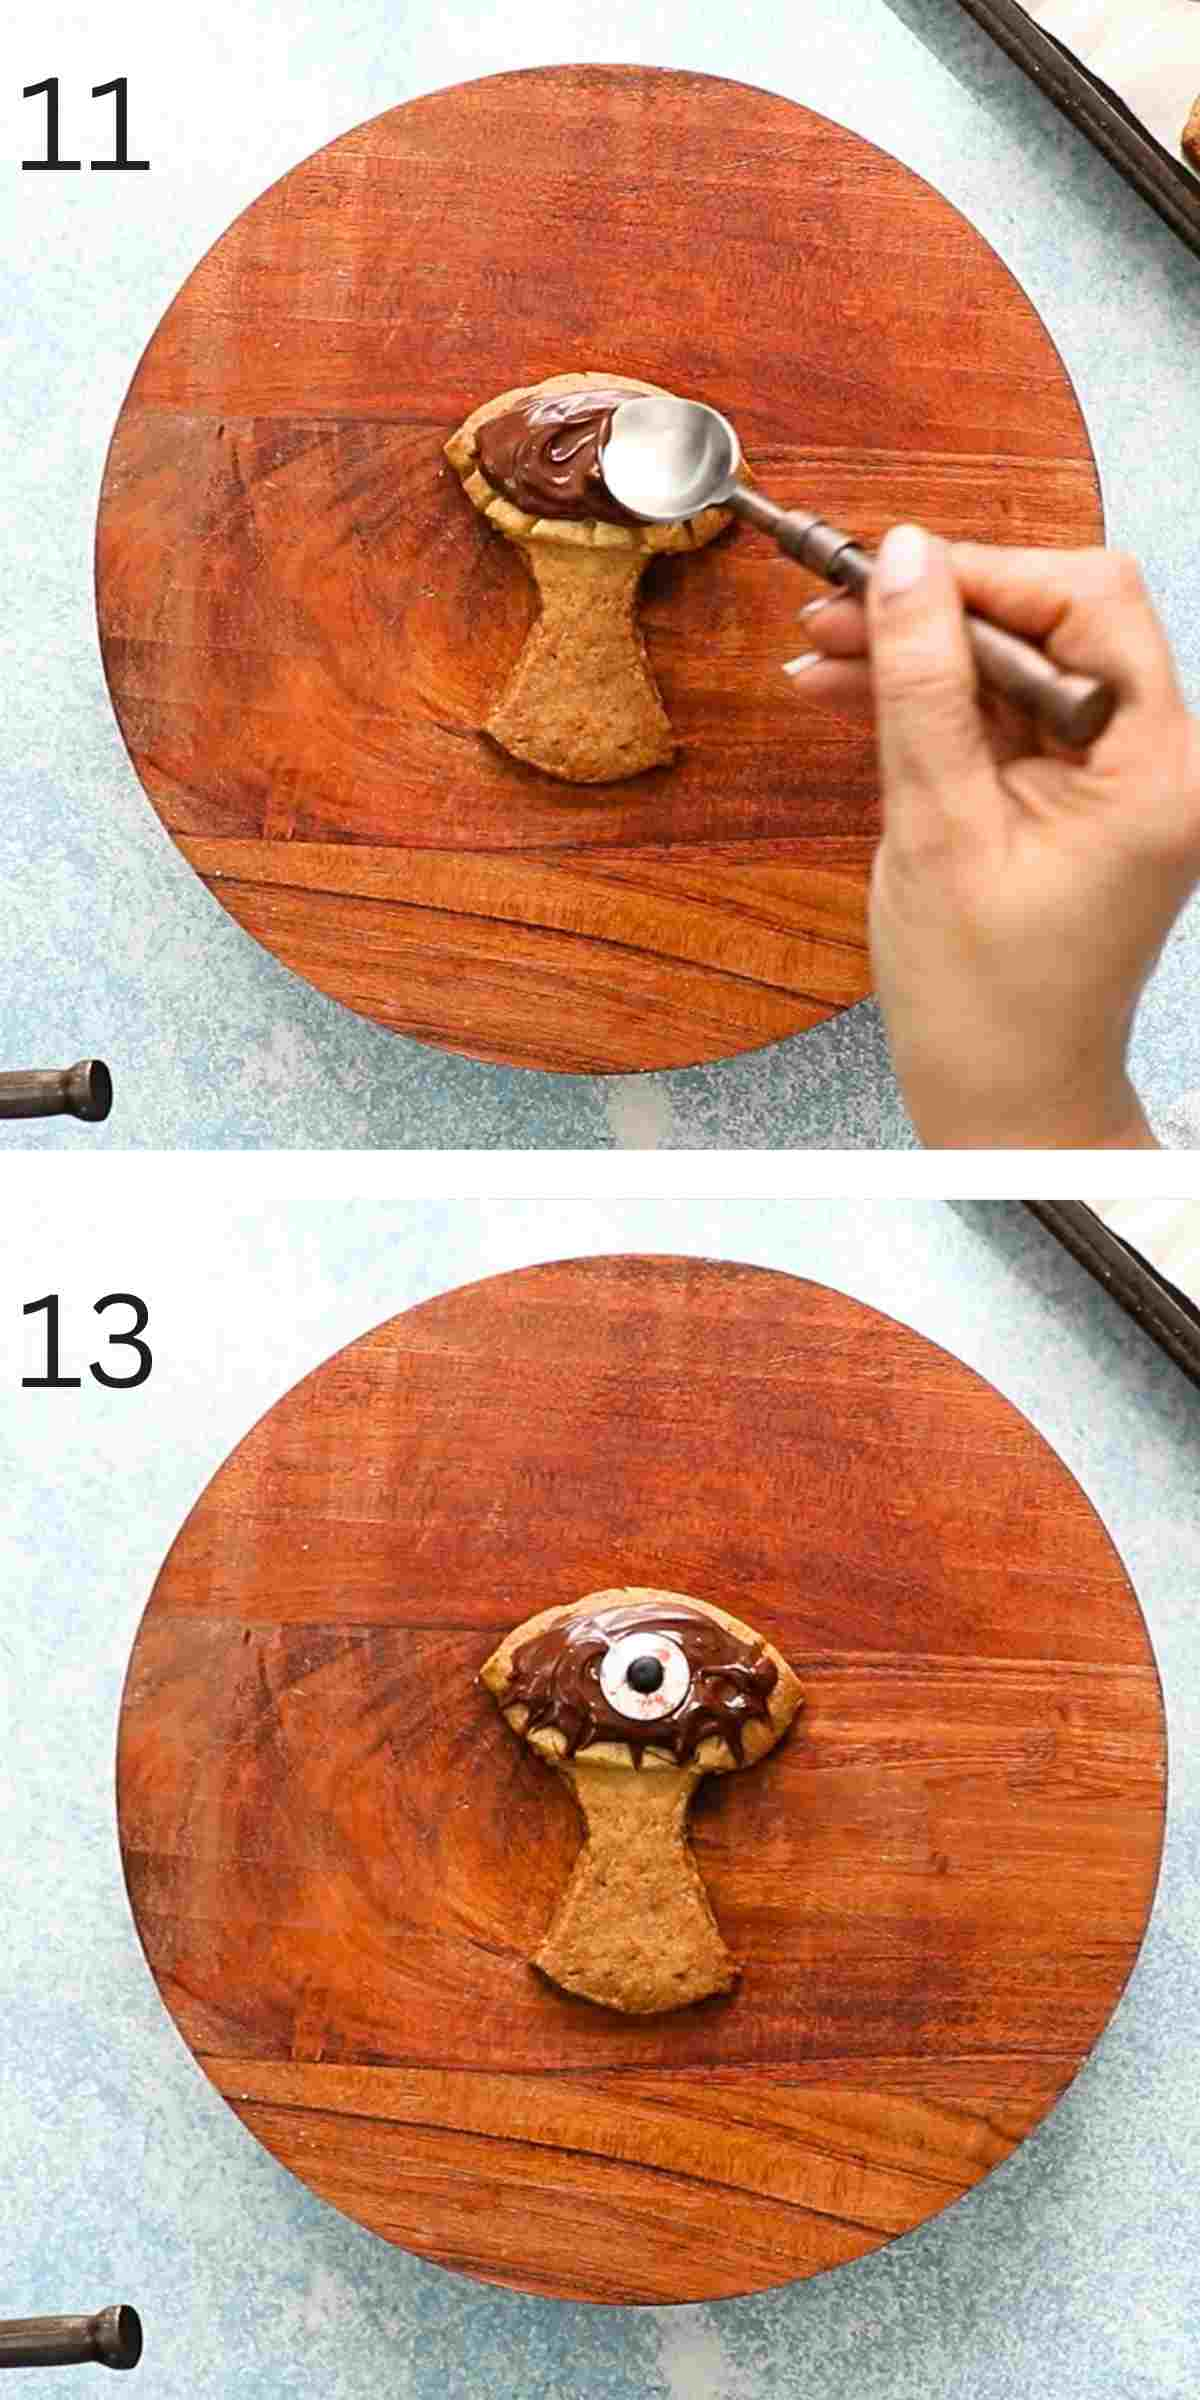
10 & 11. Using a small spoon, spread some melted chocolate on the tree tops.
12. Using a tooth pick make a fringe pattern on the base of the tree top.
13. Press one candy eyeball on the chocolate. Let stand until chocolate sets.

How to store?
Halloween trees can be stored in a sealed container at room temperature for up to 4 days.
If you'd like to store them for a longer period, then freeze the baked cookies, without any chocolate for up to 2 months. Thaw at room temperature and then decorate.
Helpful tips
- Chill dough – I recommend chilling both the rolled dough and shaped Halloween trees for several hours, which gives ample time for the dough to firm up before baking.
- Chop walnuts very fine - Ensure that no walnut pieces are larger than ¼-inch , avoiding coarse pieces and preventing making them into a fine powder.

More Halloween food ideas

Halloween Trees
Equipment
Ingredients
- ½ cup unsalted butter, room temperature (1 stick)
- ½ cup sugar
- 1 egg yolk
- 1 teaspoon vanilla extract
- 1 cup + 3 tablespoons all purpose flour
- 1 cup walnuts, minced
- ¼ teaspoon salt
- ½ cup semi sweet chocolate chips
- 15 candy eye balls
Instructions
Cookie dough
- Cream butter and sugar using an electric beater for about 1 minute or until smooth and creamy. Add yolk and vanilla, cream for another minute.
- Add minced walnuts, flour and salt. Continue mixing until it forms a dough. Tip: To mince walnuts, add walnuts into a food processor and process until they are finely minced.
- Shape dough into a flat disc and roll between two sheets of parchment paper, until slightly less than ¼ inch thick. Transfer dough, along with parchment papers, onto a baking sheet and place in the refrigerator for at least 4 hours (up to one day), until firm.
Shape cookie
- Remove dough from refrigerator, cut circles using a 3-inch round cookie cutter.
- Place one round one a work surface and using the same cookie cutter, cut the 2 opposite sides, to make tree trunk (refer photos and video). Place one cut end over one end of the tree trunk, pressing slightly to adhere.
- Using a butter knife, cut about ¼-inch slits on the bottom of the tree top to create a fringe.
- Repeat process to shape remaining cookies and place them in a parchment lined baking sheet. Place baking sheet back into the refrigerator and chill until firm, at least 2 hours.
Bake
- Preheat oven 325°F.
- Bake cookies for 20 to 25 minutes, or deep golden brown in color. Place baking sheet on a wire rack to cool completely.
Decorate
- Melt chocolate chips in a microwave, until melted and smooth, about 30 to 60 seconds.
- Using a small spoon, spread some melted chocolate on the tree tops.
- Using a tooth pick make a fringe pattern on the base of the tree top (refer photos and video).
- Press one candy eyeball on the chocolate. Let stand until the chocolate sets.
Notes
Nutrition
Nutritional information, based on third-party calculations, should be seen as estimates, not guarantees, as various factors like product types, brands, processing methods, and more can alter the nutritional content in recipes.
Did you make this recipe? I’d love your feedback! Please let me know by leaving a comment, a star rating or review below.
All contents and images are my original work, unless and otherwise mentioned. Please do not use my recipes or images without linking back to www.kitchenathoskins.com. If you wish to republish a recipe, please rewrite in your own words and don’t forget to include a link back to the original recipe.
Some of the links above are affiliate links, which pay me a small commission for my referral at no extra cost to you! I am a participant in the Amazon Services LLC Associates Program, an affiliate advertising program designed to provide a means for us to earn fees by linking to Amazon.com and affiliated sites. Thank you for supporting kitchenathoskins.com.




Kelsie | the itsy-bitsy kitchen
These are so clever, Maria! I have such a weakness for shortbread so these cuties need to happen soon in my kitchen!
Maria Doss
Thanks dear:)
Ashika @ Gardening Foodie
These are the cutest little spooky trees,I have seen.My little niece will absolutely adore these little treats. I love the recipe, really yummy!
Maria Doss
Thank you so much Ashika. I'm sure she'll love them:)
Kelly @ Kelly Lynns Sweets and Treats
So cute!!!! And these cookies sound so yummy too 🙂 xoxo
Kaylie | Healthy Hacks
What an adorable idea! I love the mix of walnuts and whole wheat flour, too 🙂
Maria Doss
Thank you so much:)
Vanitha
These look so cute and very creative! Love shortbread, that too with WWF! I have to make these, but without the candy eyeballs 🙁 Love your imagination!
Maria Doss
Thank you so much Vanitha. I love the rustic look of whole wheat flour, that looked more tree like.
Maria Doss
Thanks Vanitha. Eyeballs make it Halloweeny!!!
Maria Doss
Thank you very much Vanitha
Deepika|TheLoveOfCakes
Wow! So creative!! These spooky tree cookies are so much fun to make! And I have never tried walnut flour in shortbread cookie dough.. Sounds yummy!