
This Halloween Bark is fun, easy to make, and doesn't require any decorating skills. With only 20 minutes of prep time, there is no baking, and it is a great Halloween treat for kids to make. Recipe includes step-by-step photos!

If you’re looking for a last-minute Halloween recipe to bring to a party or for the little the trick or treaters knocking on the door, I’ve got you covered!
This homemade Halloween bark recipe is so easy to make with basic ingredients that you can find in all major grocery stores or online. My favorite part is that you don't need special decorating skills like the Halloween bone cookies or no-bake Halloween pumpkins.
What is chocolate bark? It is a type of candy made by melting and spreading chocolate onto a flat surface, usually a baking sheet, and then topping it with various ingredients such as nuts, dried fruits, candies or cookies.
The chocolate is left to harden, and then broken into smaller pieces, resembling pieces of tree bark. It's a versatile recipe that allows for endless possibilities with flavors and toppings, making it a popular choice for special occasions like holidays like the peppermint bark.
What is the best way to melt chocolate? A true connoisseur will argue that the optimal melting technique involves tempering. This method yields a beautifully glossy finish with a satisfyingly crisp crunch, and maintaining its structural integrity at room temperature.
However, tempering can be somewhat daunting for beginners and an easier method is to use a double boiler.
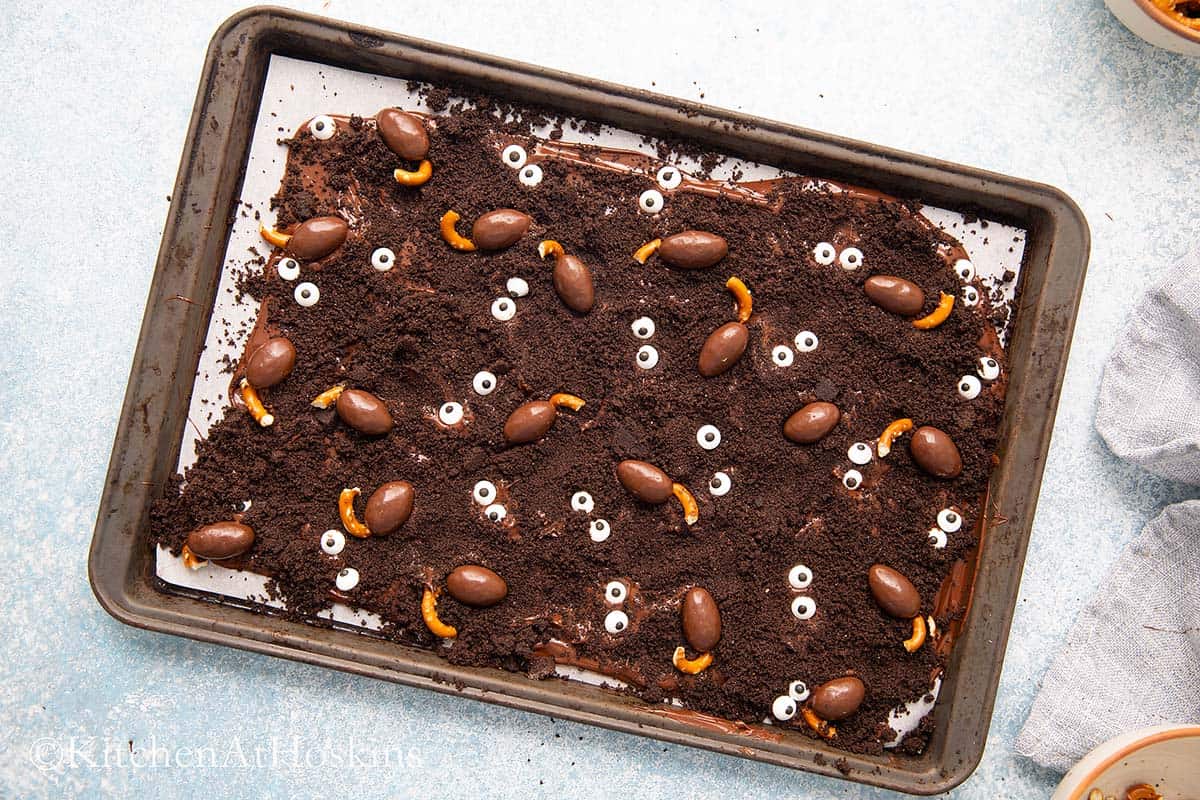
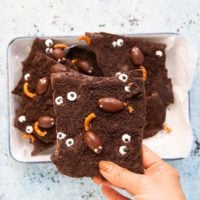
The Halloween bark features dark chocolate, topped with ground Oreo cookies to resemble dirt, candy eyeballs and tiny mice made with chocolate-covered almonds and broken pretzels for tails like in Halloween chocolate mice. It's super fun for kids to make and eat, and makes a spooky Halloween night project.
Jump to:
Why you'll love it?
- No bake treat
- Spooky, fun and unique
- Made with Oreos and pretzels
- Easy for kids to make
- Nut free
Ingredients
Scroll down to the recipe card below for full information on ingredients and amounts.
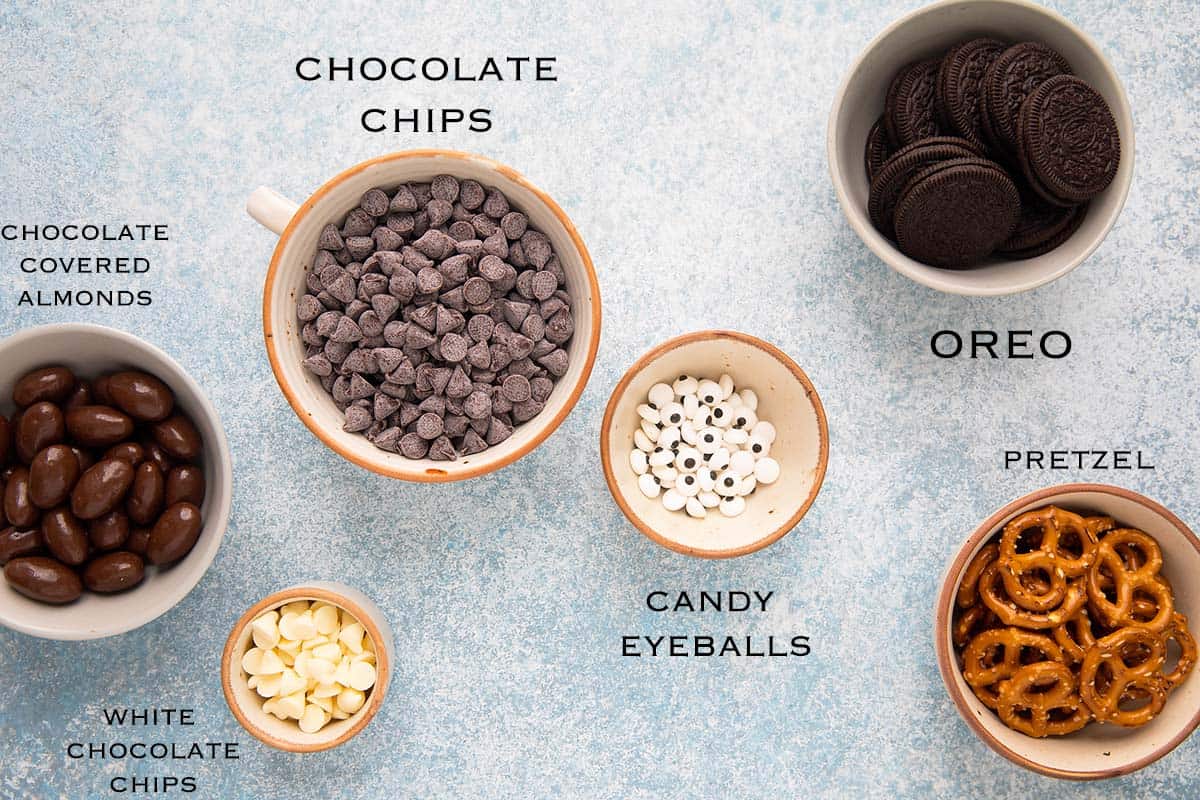
- Chocolate chips - I use semi-sweet chocolate chips for the base of the Halloween bark and then some melted white chocolate chips to make the eyes.
- Oreos - Use standard Oreo cookies or other flavored ones such as mint thins or dark chocolate.
- Chocolate-covered almonds - This resembles the body of a mouse.
- Candy eyeballs - Adds a spooky element.
- Pretzels - Break small pieces of mini pretzel twists to form tails.
Tip: I like to stay away from colored Oreo cookies such as red velvet, peanut butter, birthday cake, golden thins or carrot cake. This ensures that the color of the Halloween bark remains unchanged and true to its spooky theme.
How to make?
You can find full printable recipe below, but here is a quick overview of the procedure along with step-by-step photos.
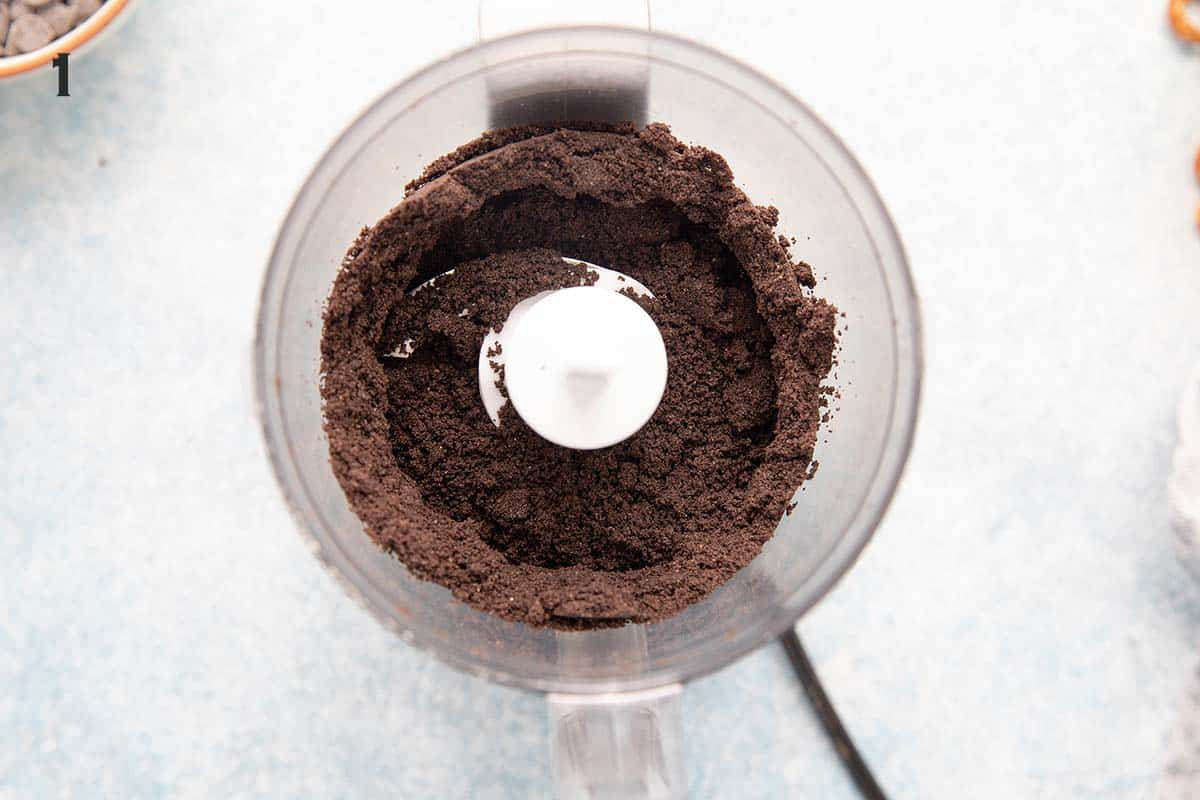
1.Add Oreo cookies in a food processor and process until it is crushed into a fine powder.
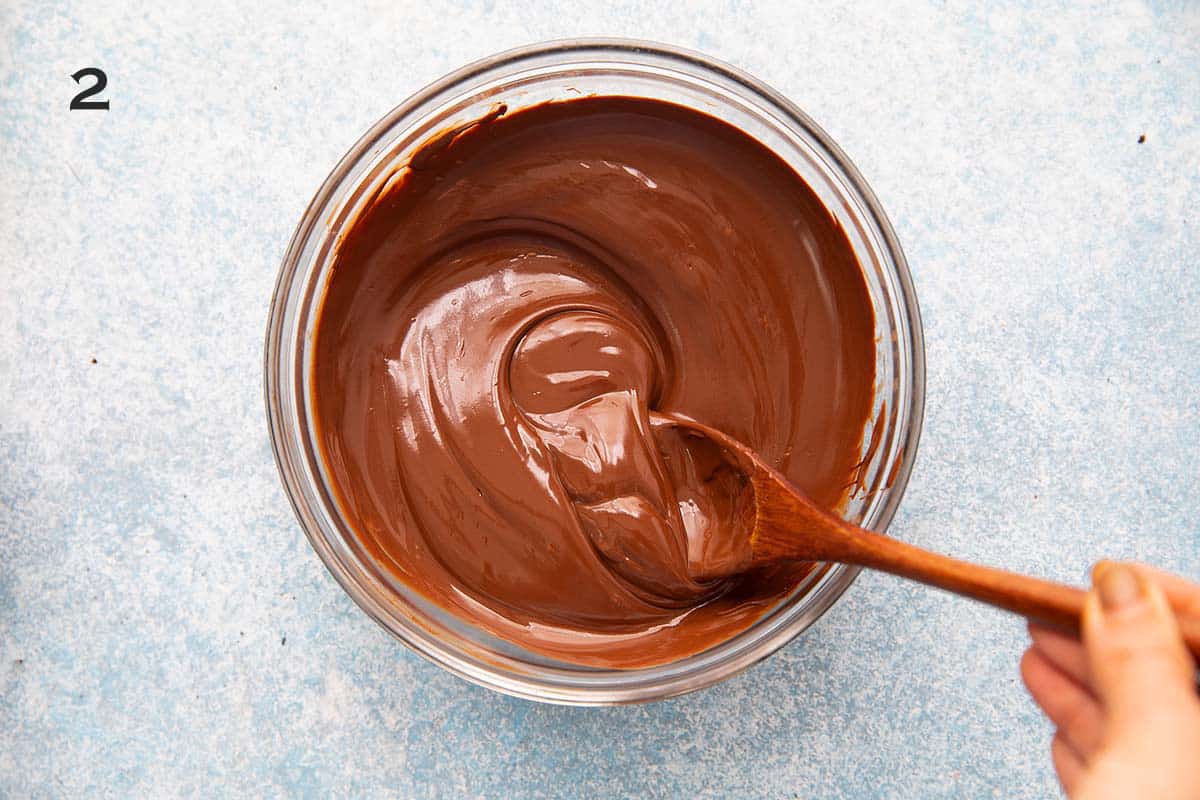
2. Add chocolate chips into a microwave-safe bowl. Microwave in 30-second increments, stirring after each one. Make sure you don't overdo it. The chocolate is done when it’s about 90% melted. Remove from microwave, keep stirring until completely melted.
Want To Save This Recipe?
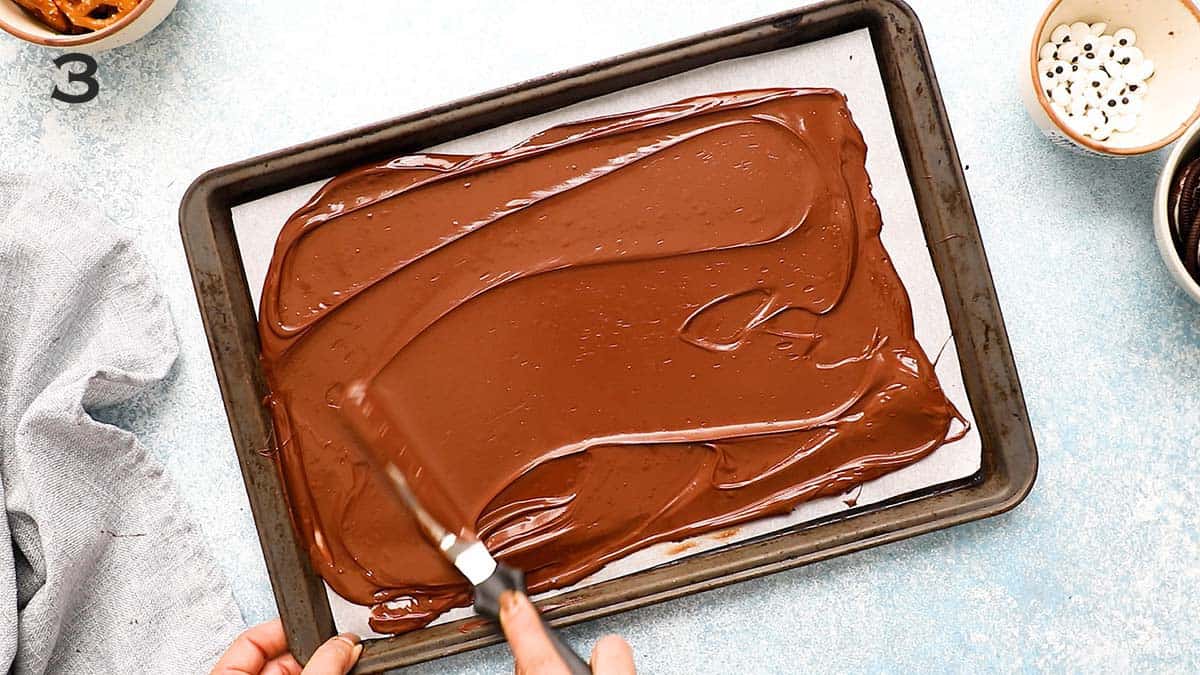
3. Spread melted chocolate evenly over a piece of parchment paper and spread to about ¼-inch thickness.
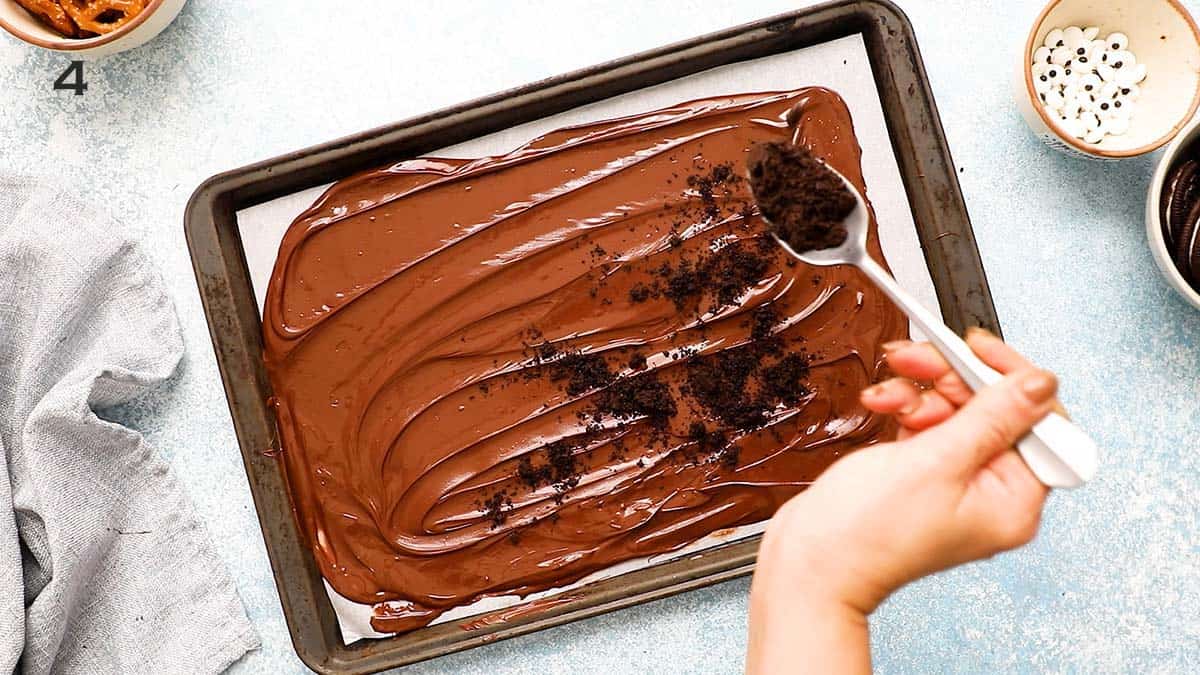
4. Scatter crushed oreos on the melted chocolate, pressing gently to adhere. Make sure that you don't cover it completely. We want empty spots to stick the candy eyeballs and chocolate almonds.
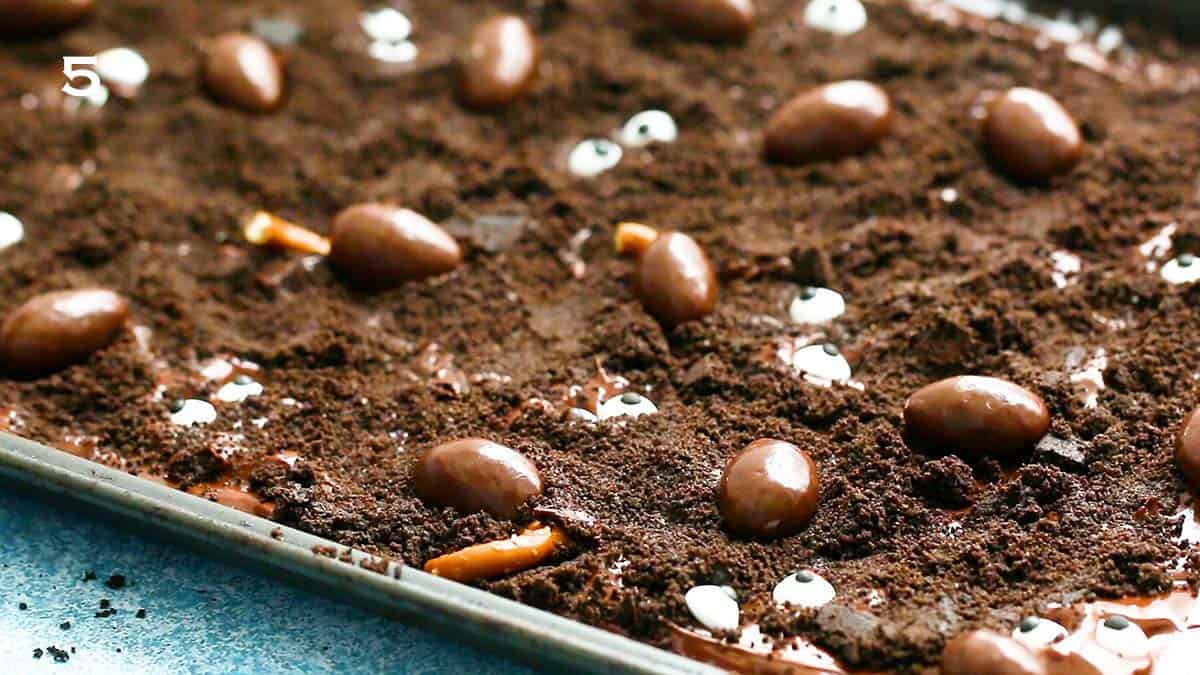
5. Time to decorate. Place candy eyeballs and chocolate-covered almonds on the melted chocolate, pressing into the chocolate to stick. Stick broken pretzel pieces for tails, on the wider end of the almond. Pipe eyes on the pointed end of the chocolate covered almonds.
Place baking pan in refrigerator to harden. Once the chocolate is completely hardened, use your hands to break Halloween bark into large pieces. Serve immediately, or cover and store at refrigerator for up to 1 week.
How to store?
Halloween bark stays most stable chilled, so I suggest storing in the refrigerator, in an airtight container for up to 3 weeks. Enjoy cold!
Helpful tips
- Adjust the recipe - Use this Halloween bark recipe as a guide. Use as many eyes and mice that you need.
- Store bark in the refrigerator.
- Cut Halloween bark into larger pieces for a more visual appeal.
More fun Halloween treat for kids
Halloween Bark
Ingredients
- 10 oreos
- 12 ounces semi-sweet or dark chocolate chips
- 12 to 15 Chocolate covered almonds
- 5 to 6 mini pretzels
- 30 to 40 candy eyeballs
- 2 tablespoons white chocolate chips
Instructions
- Line a baking sheet with parchment paper.
- Crush oreos into a fine powder using a mini food processor or any dry grinder.
- Add chocolate chips into a microwave-safe bowl. Microwave in 30-second increments, stirring after each one. Make sure you don't overdo it. The chocolate is done when it’s about 90% melted. Remove from microwave, keep stirring until completely melted. Tip: Alternately, you can melt it in a heat-proof bowl set over a saucepan of gently simmering water.
- Spread melted chocolate evenly on the parchment paper to about ¼-inch thickness.
- Scatter crushed oreos on the melted chocolate, pressing gently to adhere Tip: Make sure that you don't cover it completely. We want empty spots to stick the candy eyeballs and chocolate almonds.
- Place candy eyeballs and chocolate covered almonds on the melted chocolate , pressing into the chocolate so that it sticks well.
- Stick broken pretzel pieces for tails (refer photos), on the wider end of the almond.
- Place white chocolate in a small microwave safe bowl and microwave for 25 to 50 seconds, stirring every 20 seconds, until completely melted.
- Spoon melted white chocolate into a quart-size zip lock bag, seal and snip the corner (to make a tiny hole). Pipe eyes on the pointed ends of the chocolate almonds.
- Place the baking pan in the refrigerator to harden. Once the chocolate is completely hardened, use your hands to break it into large pieces. Serve immediately, or cover and store in the refrigerator for up to 1 week.Pro tip: I like the break into larger pieces for a more visual appeal.
Notes
Nutrition
Nutritional information, based on third-party calculations, should be seen as estimates, not guarantees, as various factors like product types, brands, processing methods, and more can alter the nutritional content in recipes.
Did you make this recipe? I’d love your feedback! Please let me know by leaving a comment or review below or snap a photo and share on Instagram.
Some of the links above are affiliate links, which pay me a small commission for my referral at no extra cost to you! I am a participant in the Amazon Services LLC Associates Program, an affiliate advertising program designed to provide a means for us to earn fees by linking to Amazon.com and affiliated sites. Thank you for supporting kitchenathoskins.com