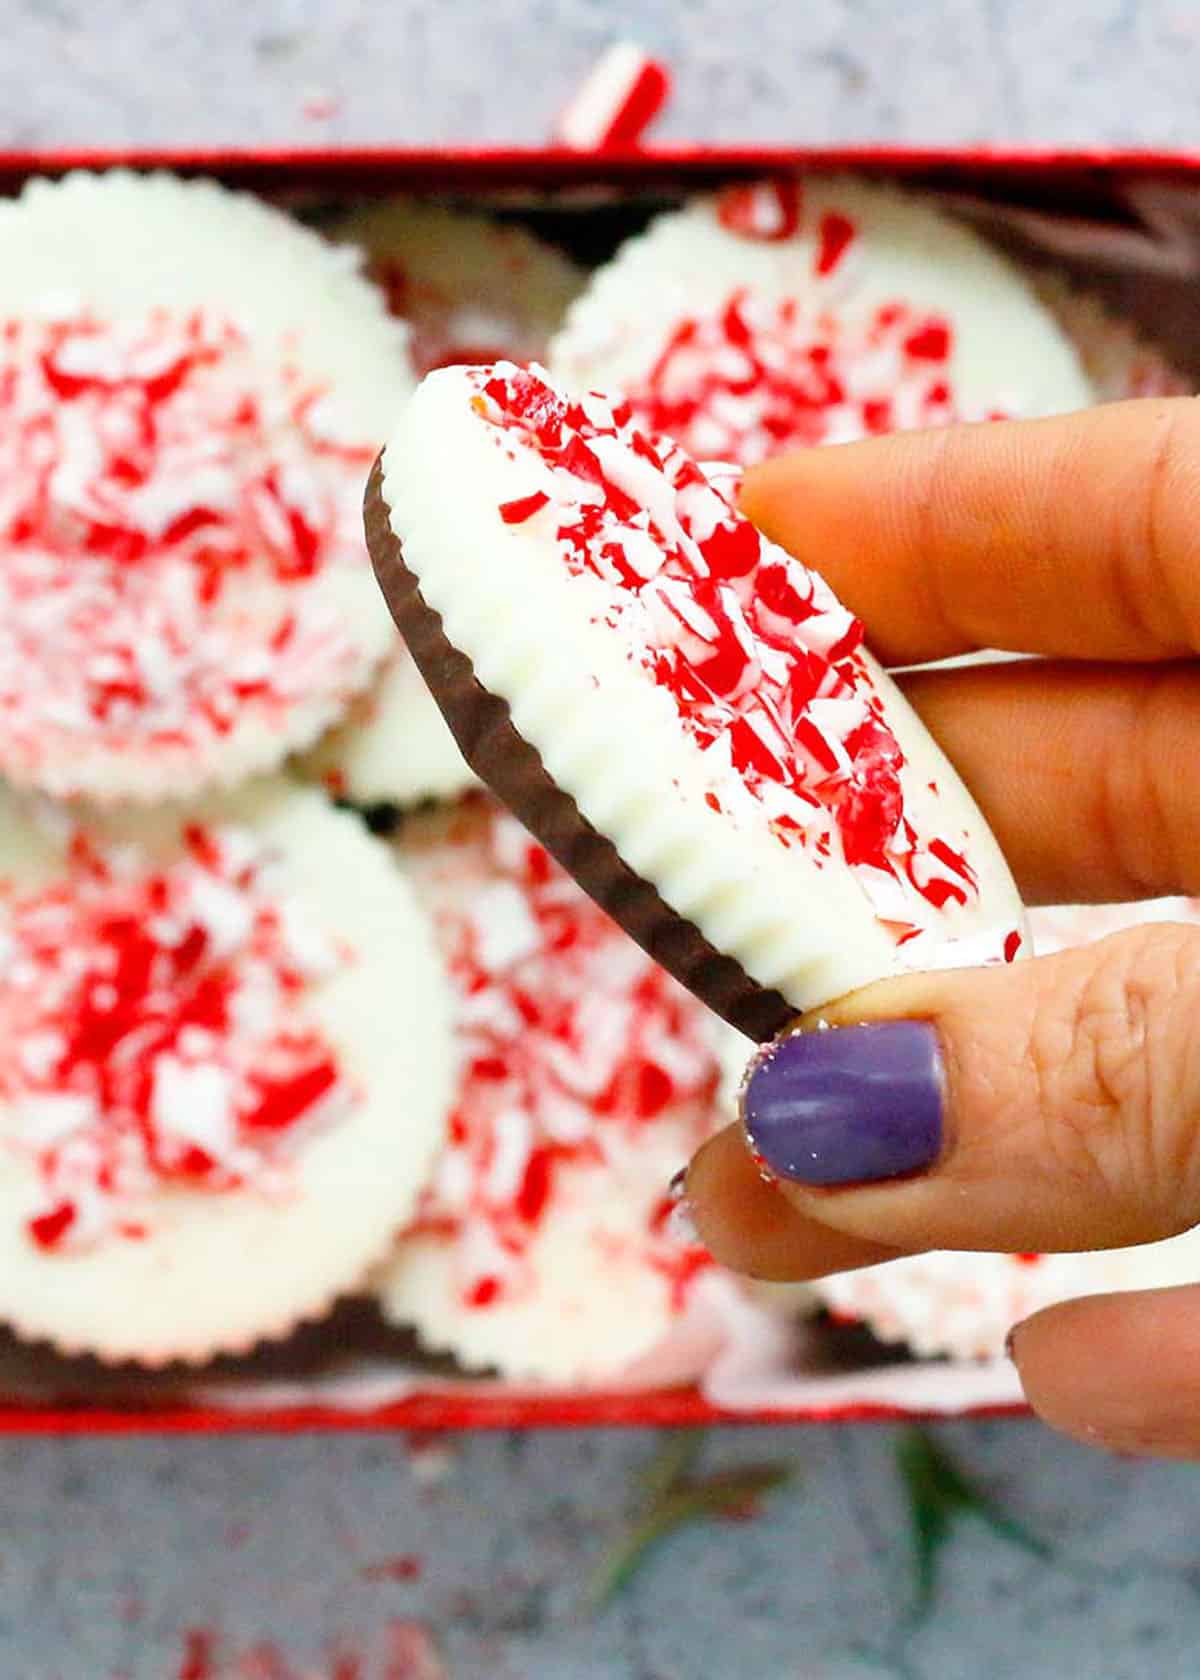
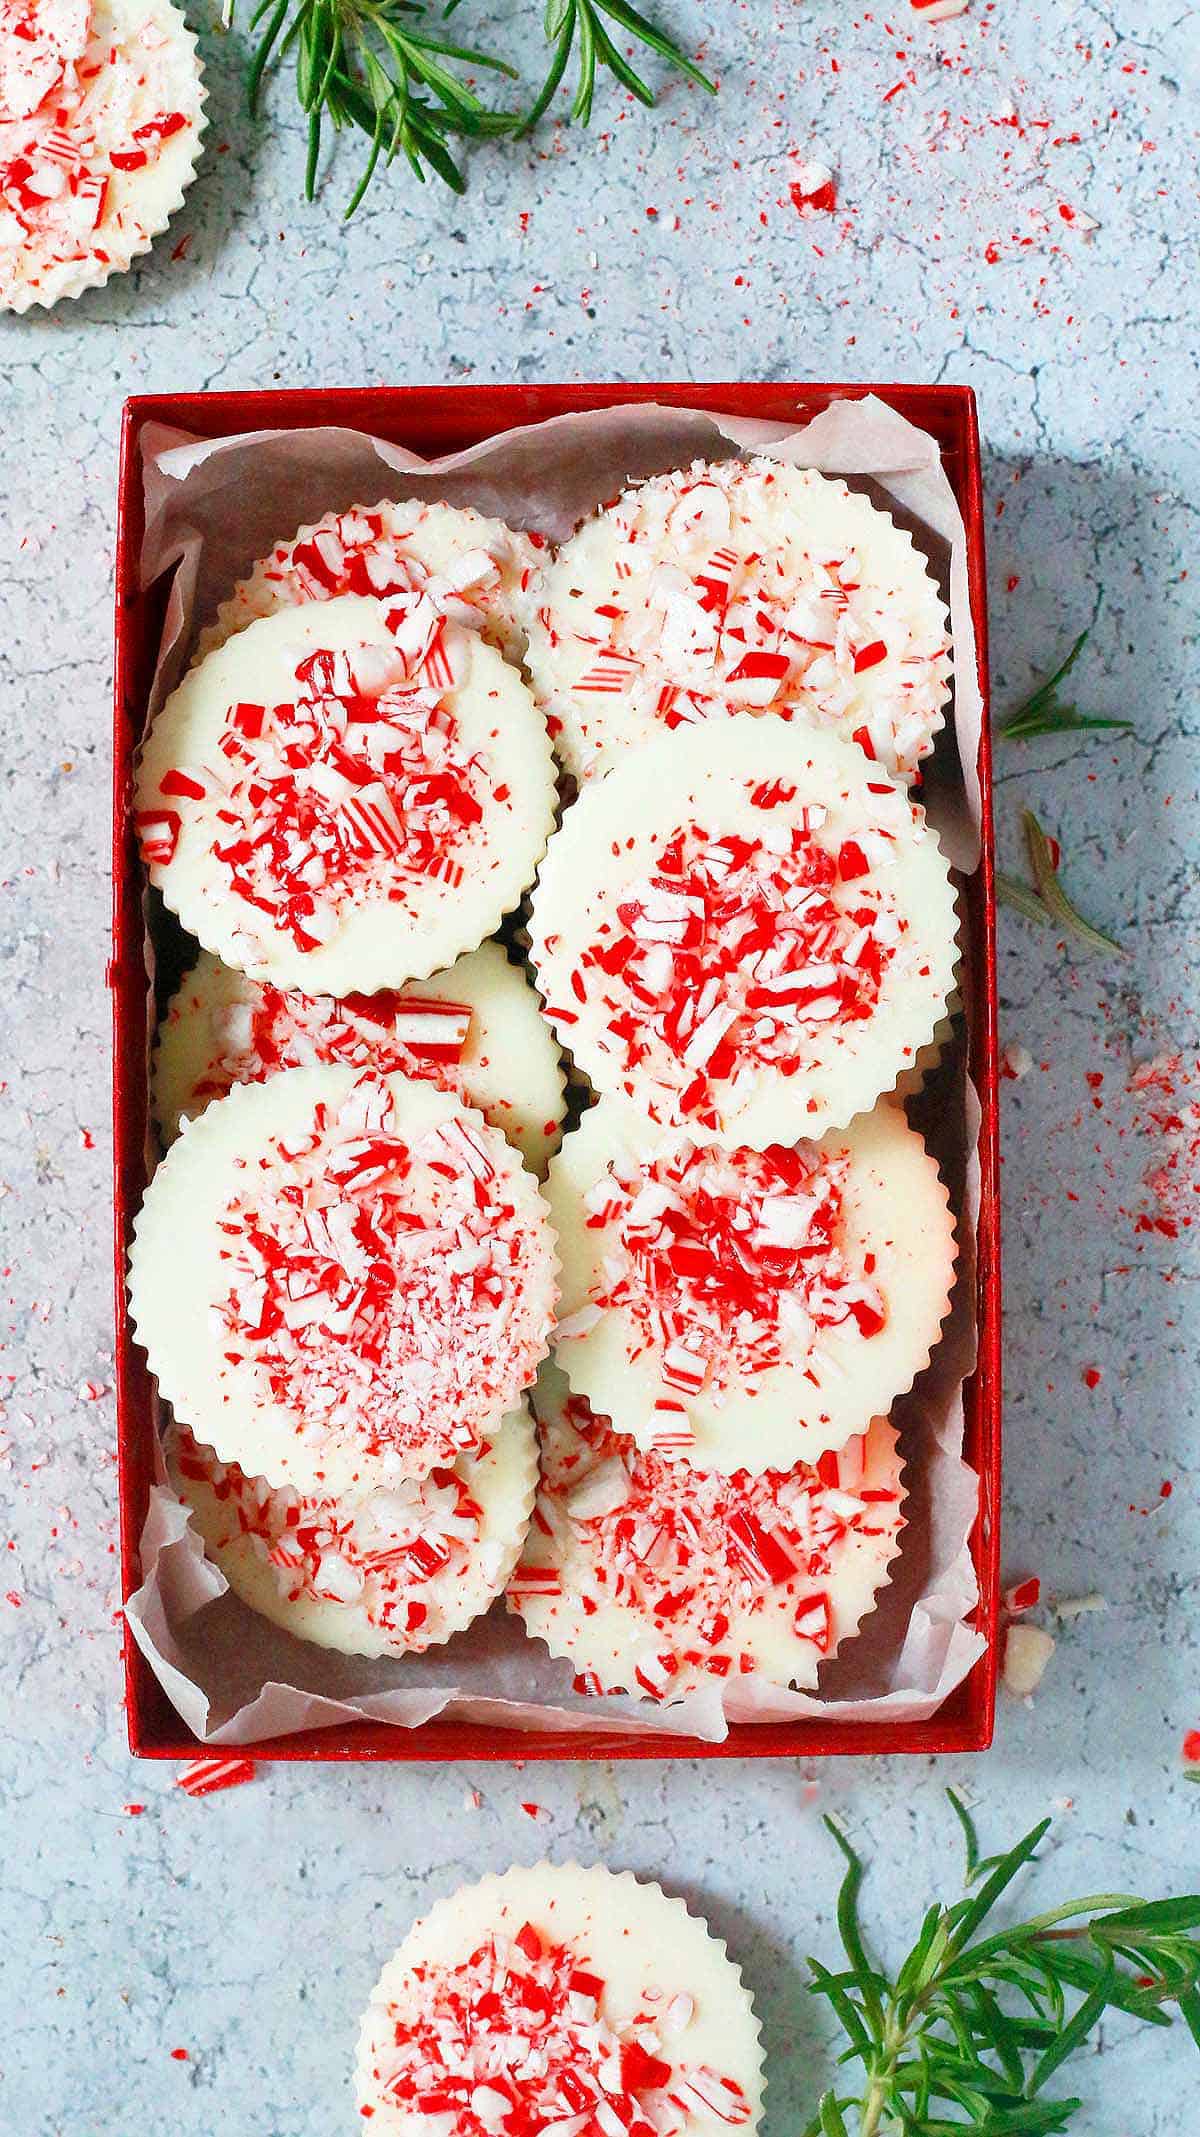
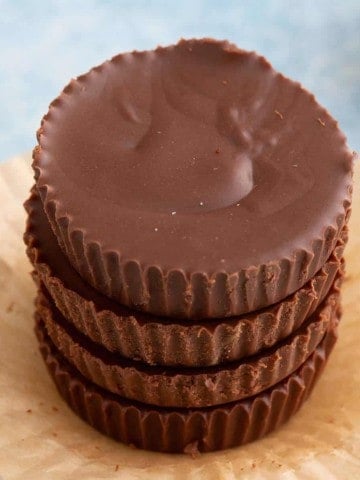
Chocolate Peppermint Bark is made into individual round shapes instead of the traditional large bark. It not only eliminates the need for breaking peppermint bark into chunks but also makes perfect individual portions that is ideal for packaging and gifting!
If you’re looking for easy Christmas treats to make for a hostess gift or for a cookie exchange, I’ve got you covered!
This homemade chocolate peppermint bark recipe is so easy to make with basic ingredients that you can find in all major grocery stores or online, like the healthy peanut butter balls, Chocolate Peanut Butter Fudge.
What is peppermint bark? It is a type of candy made primarily from chocolate, typically dark or white chocolate, and flavored with peppermint extract. It's commonly popular during the winter holiday season.
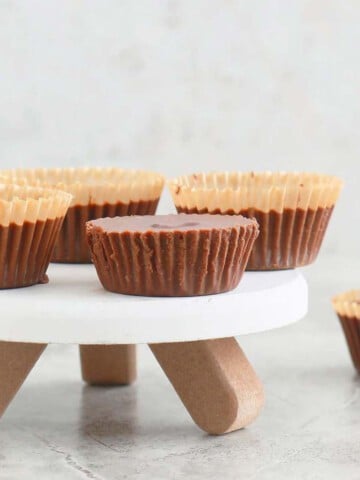
The recipe generally involves layering melted dark or semi sweet chocolate with a layer of peppermint flavored white chocolate. This treat dates back to 1960s when it was sold in a Florida shop. However, Williams Sonoma made it popular in 1998 and then companies like Ghiradelli and Mrs. Fields also began selling them.
As in the chocolate dipped chocolate cookies, crushed peppermint candies or candy canes are sprinkled on top of the layers before they harden, giving it a festive appearance.
It is generally made into one large bark, like the Halloween bark and then broken into pieces after it has hardened. But this chocolate peppermint bark is made into individual portions in muffin tins, and makes it perfect for gift giving during the Holidays. I used the same technique to make this white chocolate bark.
Jump to:
Why you'll love it?
- Festive
- 4 simple ingredients
- Made using real chocolate.
- Perfect texture that begins to melt as soon as you take a bite, offering a delightful chewy crunch from the candy canes.
Ingredients
Scroll down to the recipe card below for full information on ingredients and amounts.
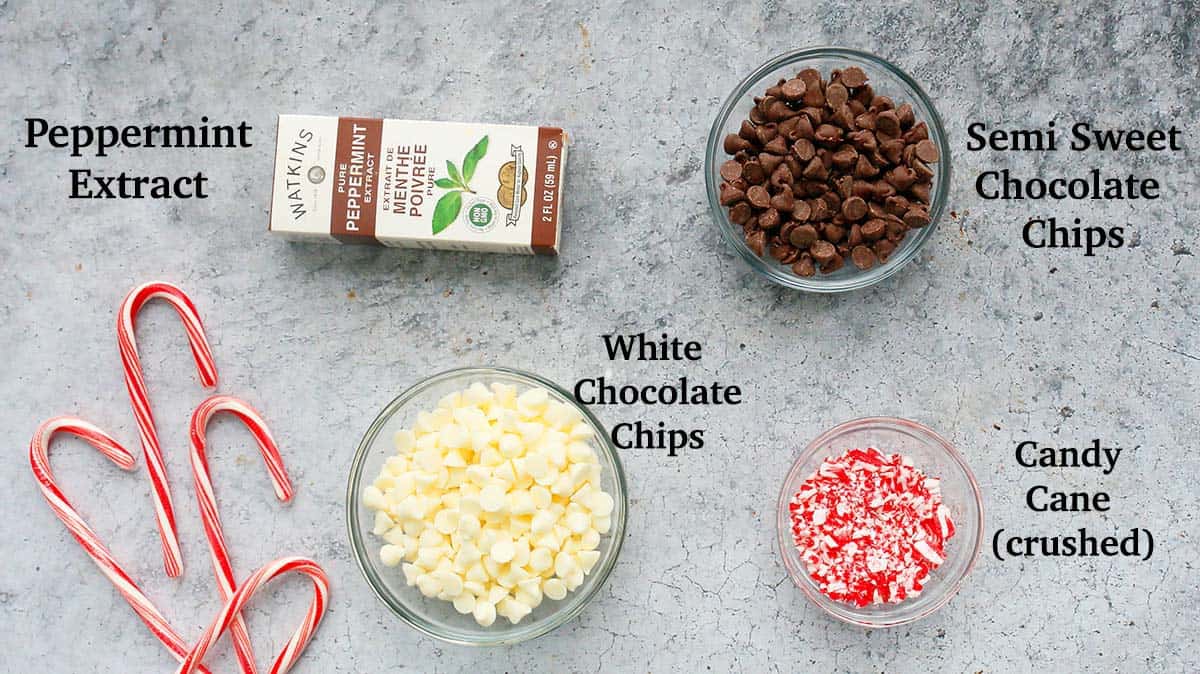
- Chocolate Chips - I use semi-sweet chocolate chips for the base and then white chocolate chips to make the top layer. Since there are very few ingredients, it’s important to use quality chocolate, like I recommend Ghirardelli, Guittard, or Baker’s brand. More on this below.
- Flavoring - Peppermint extract.
- Candy canes - You need 3 to 4 standard-size candy canes, depending on how much candy cane topping you like on your chocolate peppermint bark.
Best chocolate to use
Chocolate comes in various forms such as baking bars and chips, both of which can be used to create delicious chocolate peppermint bark. For an ultra-smooth and luxurious chocolate peppermint bark, opt for baking bars. If chocolate chips are what you have on hand, they'll work perfectly well.
High-quality baking bars, known for their elevated cocoa butter content, melt smoothly, imparting a glossy finish and a rich flavor to the bark.
Conversely, chocolate chips typically contain stabilizers to retain their shape during high-temperature baking. They have a lower cocoa butter content compared to baking bars, affecting their melting characteristics.
Variations
- Use milk chocolate chips instead of semi sweet.
- Add chopped M&Ms along with candy canes.
- Use all white chocolate instead of dark, to make a snowy bark.
- Omit both peppermint extract and candy canes altogether, and instead, drizzle salted caramel sauce over the white chocolate. Afterwards, use a wooden skewer to create a swirling pattern, like in sheet pan pancakes recipe.
- Skip the peppermint extract and top with crushed graham crackers to make a s’mores bark!
- Add another layer of melted dark chocolate on top of white chocolate and then top with crushed candy canes, to make a triple layer.
How to make?
You can find full printable recipe below, but here is a quick overview of the procedure along with step-by-step photos.
Want To Save This Recipe?
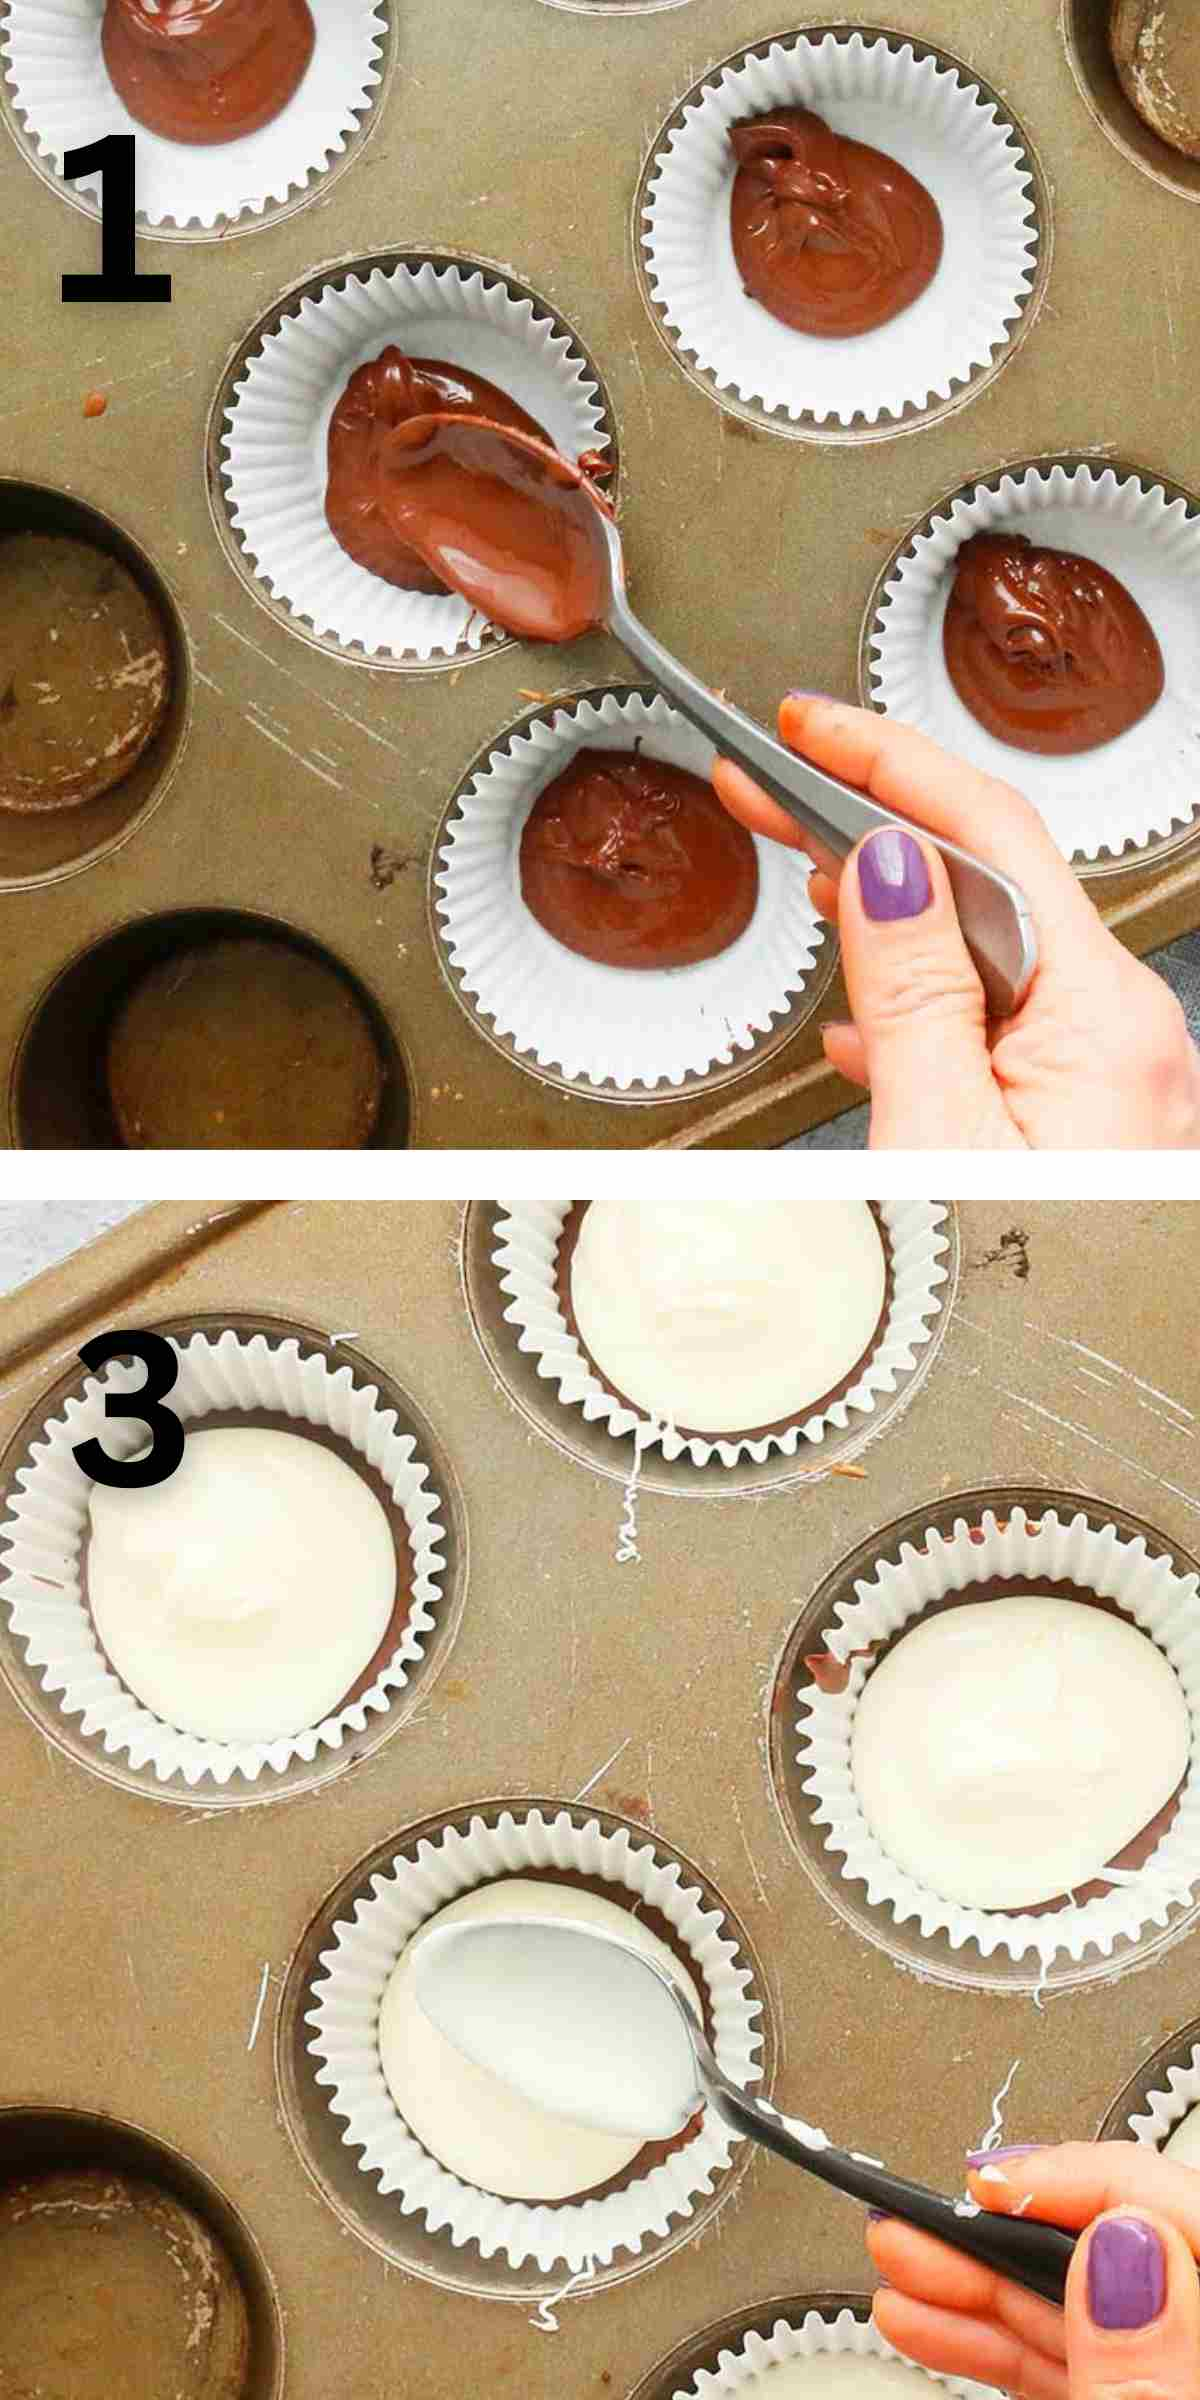
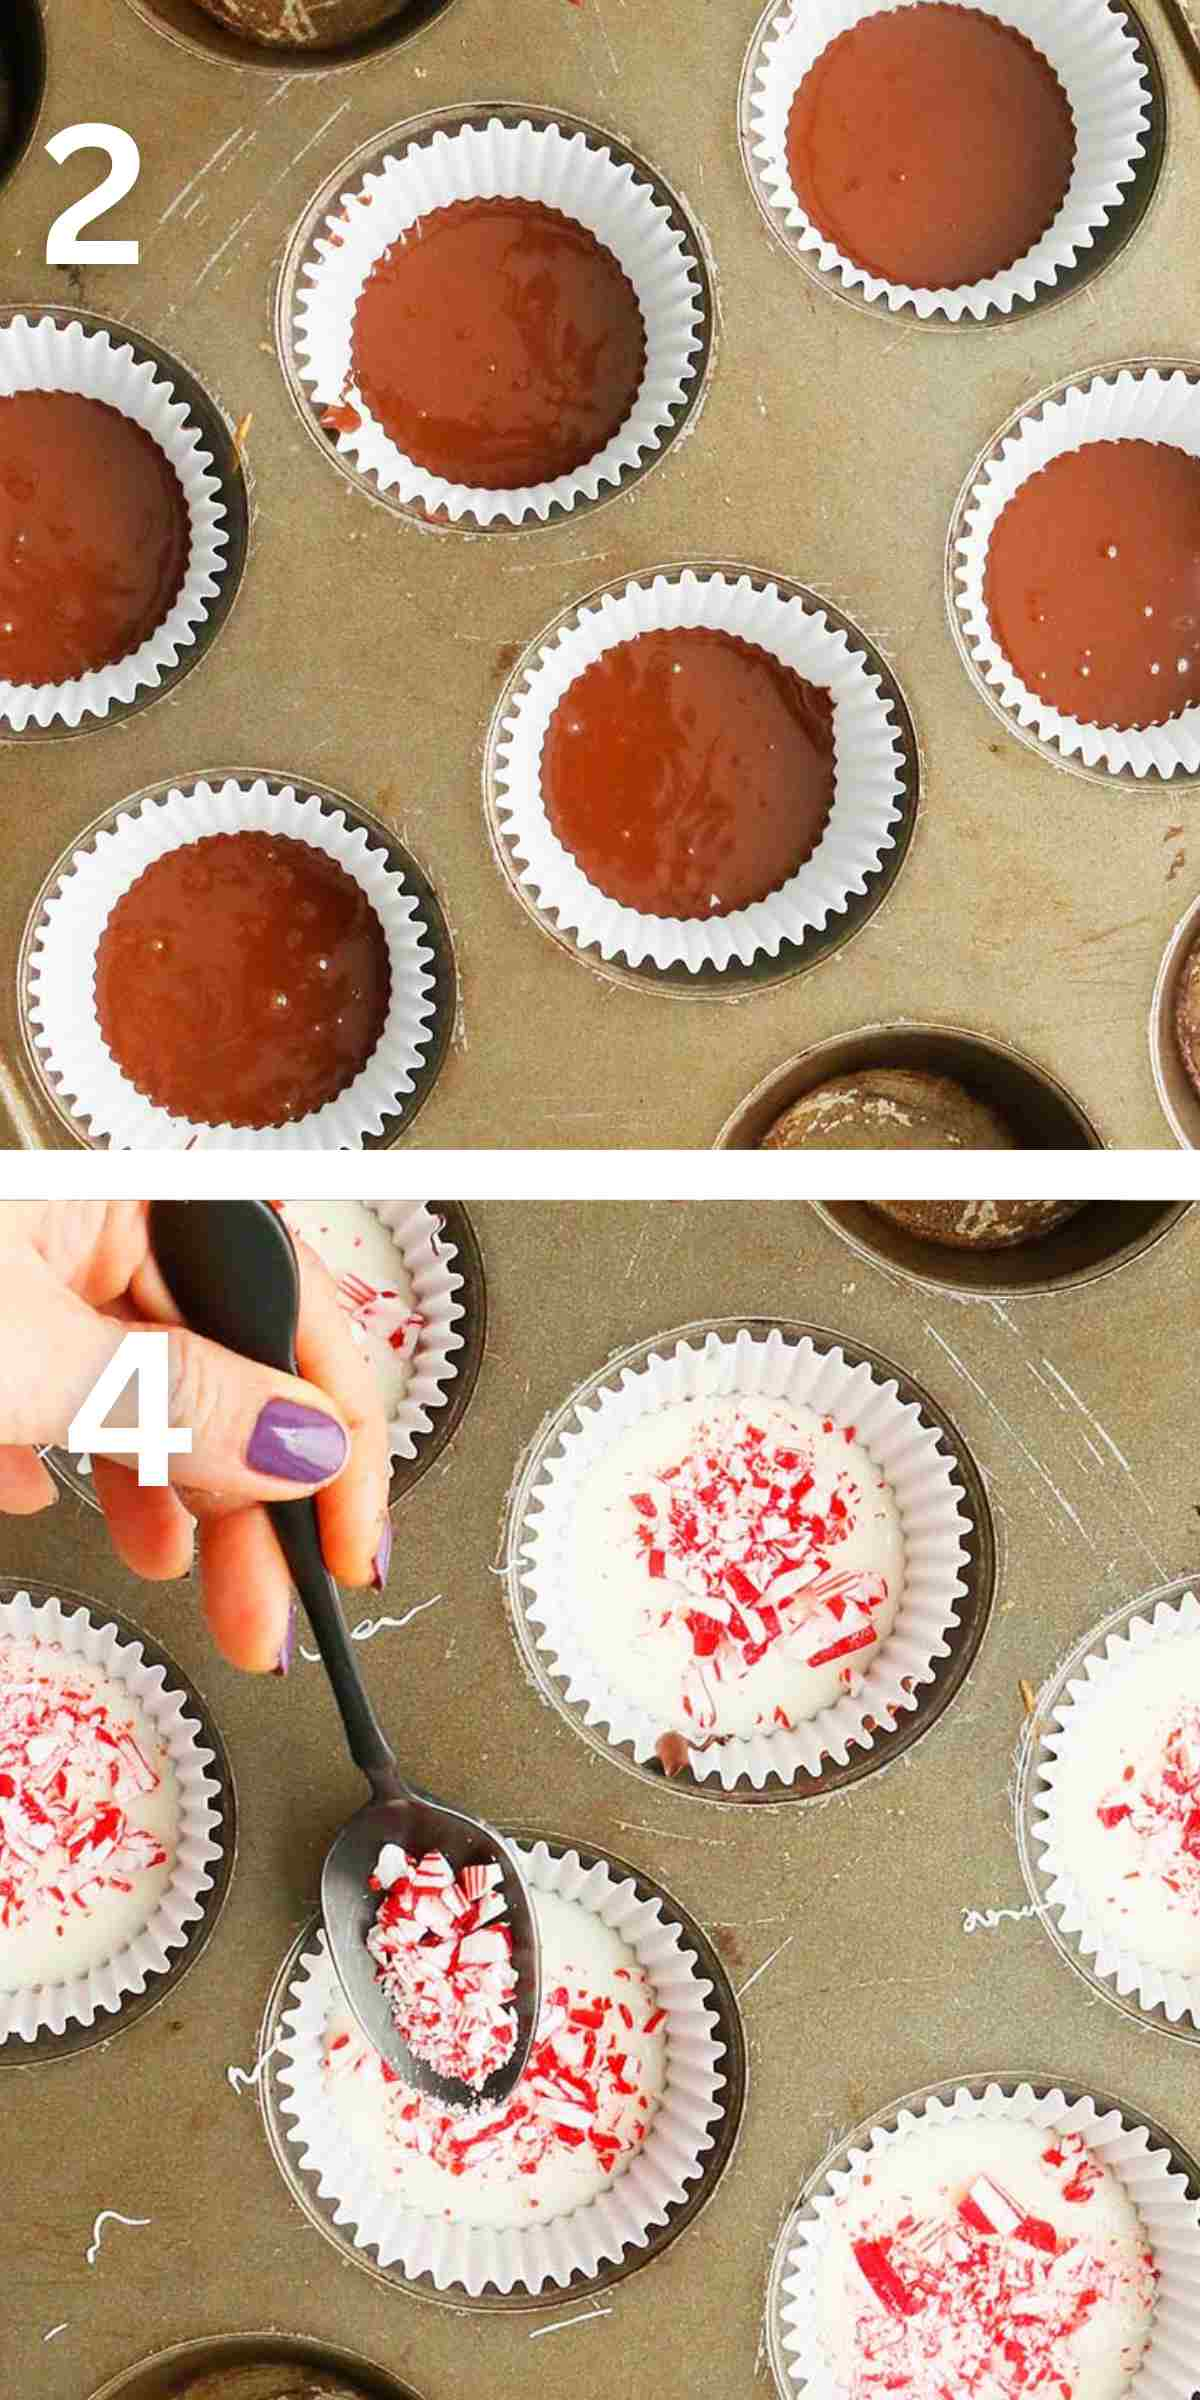
1 & 2. Add semi sweet chocolate chips into a microwave safe bowl and microwave until completely melted and smooth. Evenly divide melted chocolate into the paper lined muffin pan. Give the pan a few taps on the counter to help chocolate settle evenly. Refrigerate for 5 to 10 minutes.
Tip: Place the pan in the refrigerator for not longer than 10 minutes. You don’t want it to set for too long and completely harden, or else the layers will separate. You want it still a bit soft so the layers adhere together.
3. Melt white chocolate chips in the microwave and stir in peppermint extract. Evenly divide melted white chocolate on top of the dark chocolate and give the pan a few taps on the counter to help chocolate settle evenly.
4. Place unwrapped candy canes in a zip lock bag and crush using rolling pin or a meat mallet, until coaresly chopped. Sprinkle crushed candy canes on top of the white chocolate. Refrigerate pan until set.
If you have some leftover crushed candy canes, use them instead of sprinkles on your gingerbread cookie cups or make a cup of hot peppermint hot chocolate.
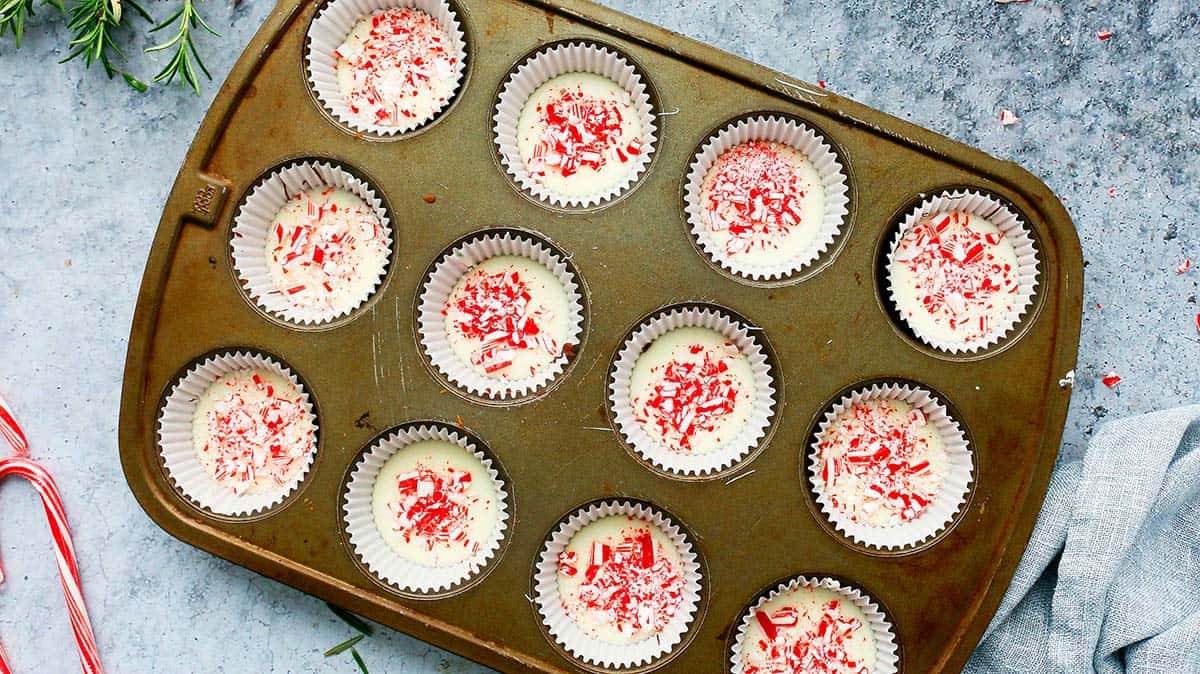
Best pan to use
You can use a standard muffin pan for regular-sized chocolate peppermint bark or opt for a mini muffin pan to create smaller versions. Alternatively, for a traditional large bark, use an 8-inch square baking pan lined with parchment paper. Regardless of the pan size, ensure you line it with parchment paper or paper liners to facilitate easy removal of the bark after it sets.
How to store?
Chocolate peppermint bark stays most stable chilled, so I suggest storing in the refrigerator, in an airtight container, in the paper liners, for up to 3 weeks. Enjoy cold!
Can you freeze? I don't recommend freezing chocolate peppermint bark because, upon thawing, the candy pieces tend to become sticky.
Package for gift giving - Remove the paper liners and arrange 3 to 6 cups in clear cellophane bags. Tie them with a beautiful ribbon and share these treats with your loved ones.
Helpful tips
- Use crushed candy canes or crushed peppermint candies.
- How to crush? I find that the easiest way to crush candy canes is to place it in zip lock bag, then use a rolling pin or a meat mallet to crush.
- Use as much candy canes as you like.
- No microwave? Melt using a double boiler on the stove.
- You can use peppermint oil instead of peppermint extract, but the peppermint oil is very potent and only needs a drop or two.

More single serving cups


Chocolate Peppermint Bark
Ingredients
- 6 ounces semi sweet chocolate chips
- 8 ounces white chocolate chips
- ¼ teaspoon peppermint extract
- 3 to 4 candy canes crushed
Instructions
- Line a standard muffin pan with paper liners and set aside.
- Add semi sweet chocolate chips into a medium microwave safe bowl and microwave for 50 to 60 seconds, stirring every 20 seconds, until mostly melted. Remove bowl from microwave and continue stirring until fully melted.
- Evenly divide melted chocolate into the prepared muffin pan, give the pan a few taps on the counter to help chocolate settle evenly. Refrigerate for 5 to 10 minutes.Tip: Place the pan in the refrigerator for not longer than 10 minutes. You don’t want it to set for too long and completely harden, or else the layers will separate. You want it still a bit soft so the layers adhere together.
- Add white chocolate chips into a another medium microwave safe bowl and microwave for 50 to 70 seconds, stirring every 20 seconds, until melted and smooth. Stir in peppermint extract.
- Evenly divide melted white chocolate on top of the dark chocolate, give the pan a few taps on the counter to help white chocolate settle evenly. Top with crushed candy canes. Place pan in the refrigerator to harden.
- To crush candy canes, place unwrapped candy canes in a zip lock bag and crush using rolling pin or a meat mallet, until crushed.
Notes
Nutrition
Nutritional information, based on third-party calculations, should be seen as estimates, not guarantees, as various factors like product types, brands, processing methods, and more can alter the nutritional content in recipes.
Did you make this recipe? I’d love your feedback! Please let me know by leaving a comment or review below or snap a photo and share on Instagram.
Some of the links above are affiliate links, which pay me a small commission for my referral at no extra cost to you! I am a participant in the Amazon Services LLC Associates Program, an affiliate advertising program designed to provide a means for us to earn fees by linking to Amazon.com and affiliated sites. Thank you for supporting kitchenathoskins.com
All contents and images are my original work, unless and otherwise mentioned. Please do not use my recipes or images without linking back to www.kitchenathoskins.com. If you wish to republish a recipe, please rewrite in your own words and don’t forget to include a link back to the original recipe.